
A nice wood range hood can run you a couple grand, easily, let alone a custom design!
I personally didn’t want to fork out that kind of cash if we had the skills to build an amazing feature piece ourselves for a fraction of the cost.
Plus, I would have it far sooner as a DIY project than saving and budgeting for the expense!

We already owned all the tools needed (I mean, we are renovating a 3 story house… tools are a must!)
Basics like measuring tapes, clamps, drills, drivers, etc. along with a brad nailer, miter saw, and table saw (which happened to be a birthday gift from my wish-list one year).
The supplies included a sheet of high-quality plywood, a length of crown moulding, some nice finishing boards, a couple corbels, and a few choice pieces of trim accents.
Oh! And of course some good ol’ 2×4’s for reinforcement!
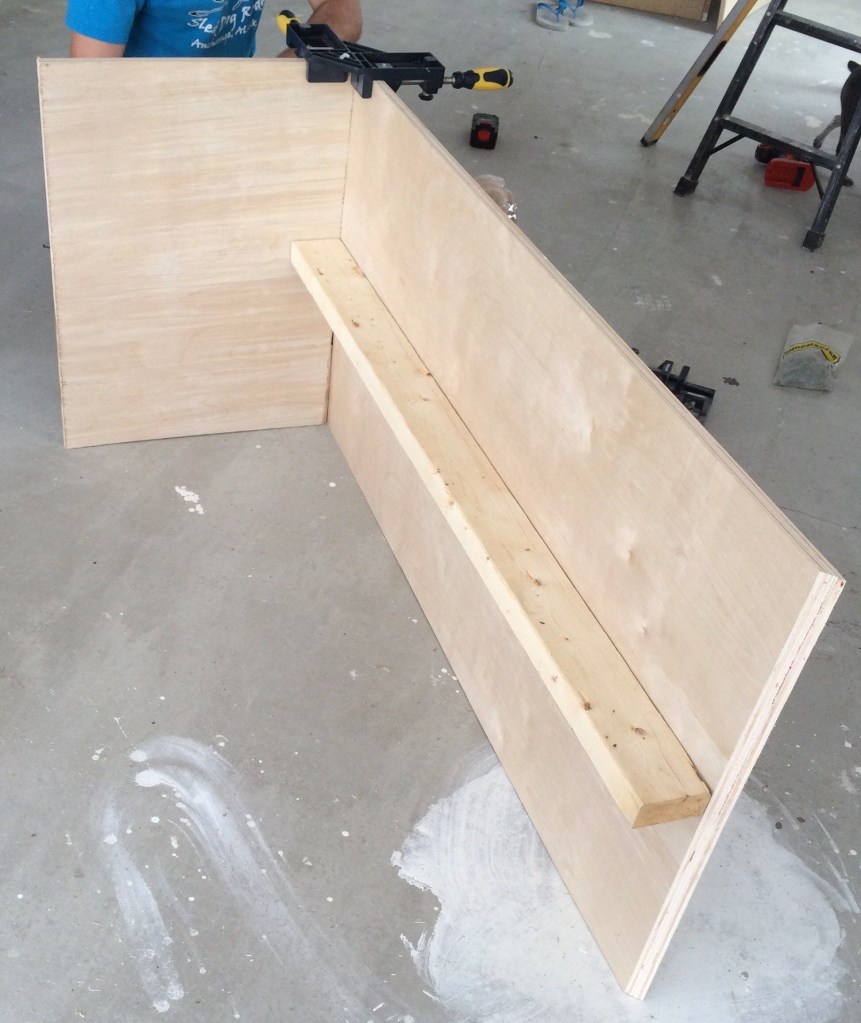
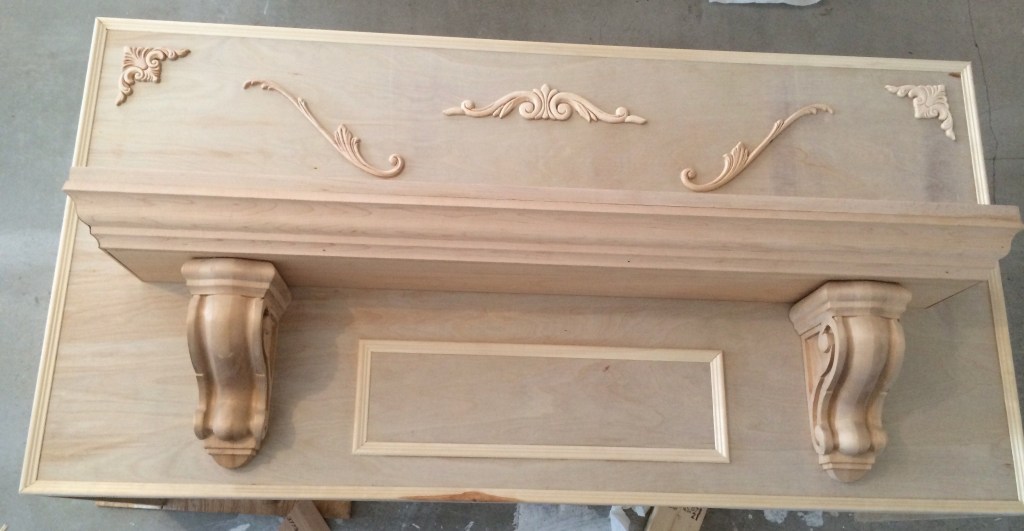
Once we had decided on the dimensions, building the box was as simple as cutting the plywood & supports and securing them together using a combination of screws and brad nails, based on whether you would see that part of the range hood when it was installed.
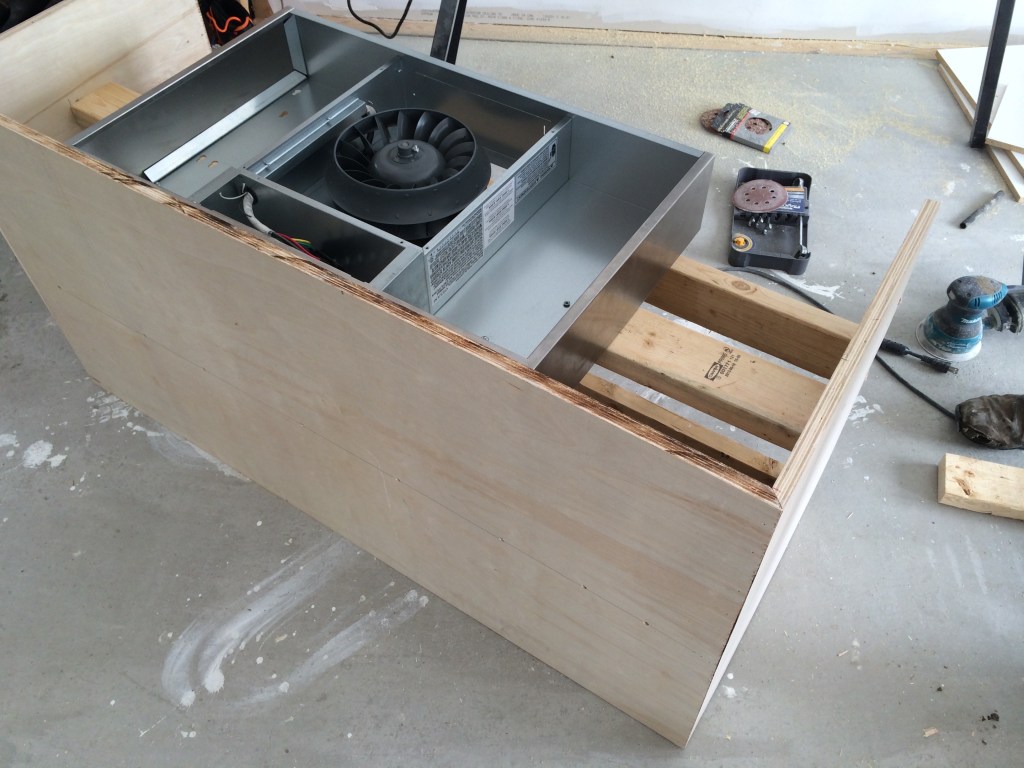
We added a fan with lights at the end, so we decided to frame in the supports before we installed the wood range hood to make it easier.
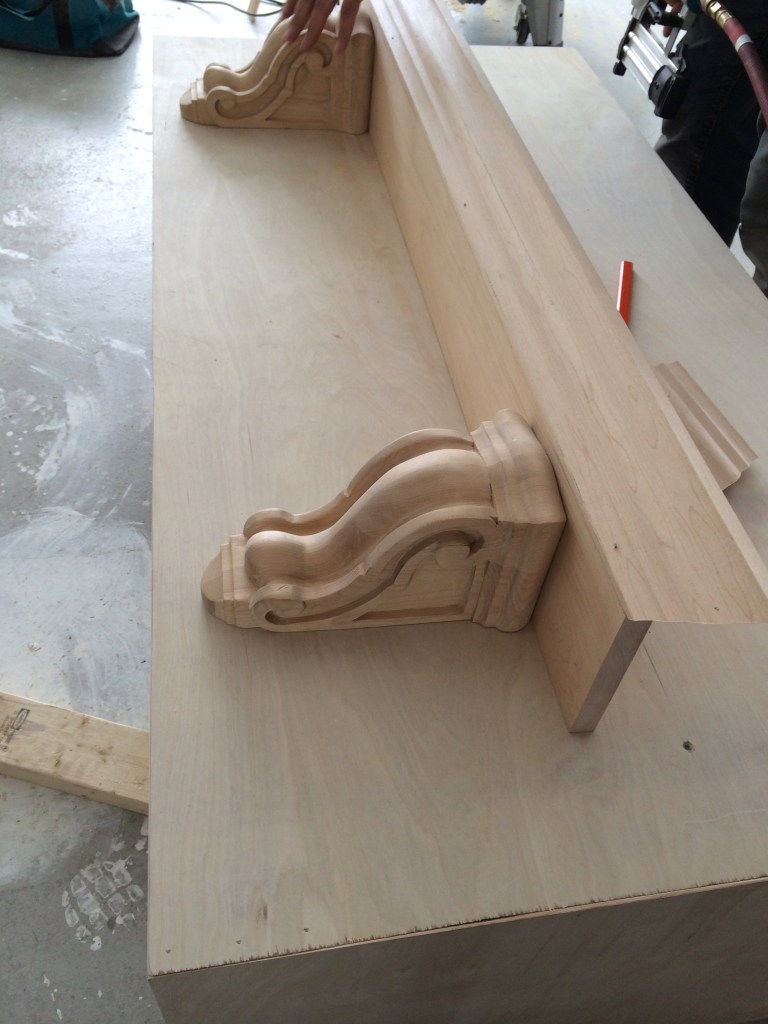
Then we lined up the accent pieces where we wanted to be, making sure everything was even and squared off.
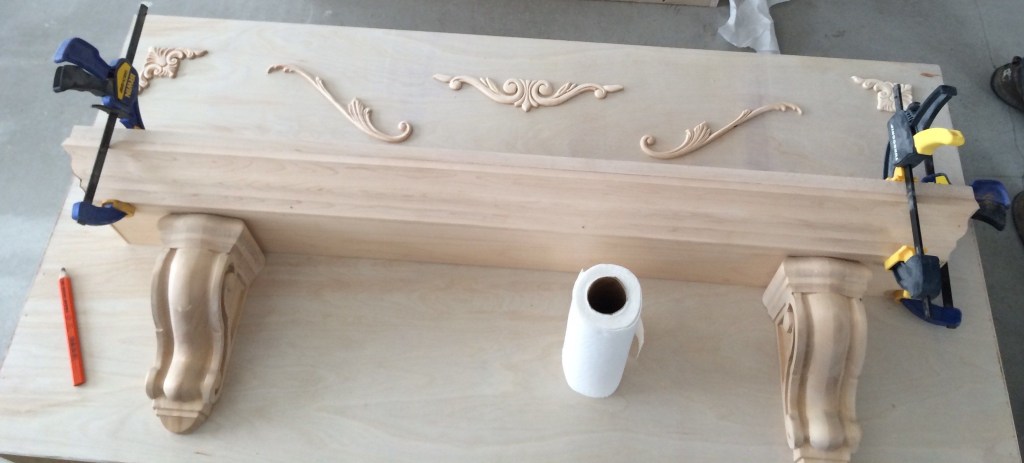
Using clamps to hold the crown moulding to the top and bottom parts of the shelf helped make sure nothing moved when we began nailing it together. (the whole smarter, not harder concept…)
Next, we primed the wood.

WOW! Does it ever make a difference in the quality of the finished stain job!
DO NOT SKIP THIS STEP!
It helps the stain to soak into the wood evenly without streaks and really enhances the color.

We added 2 different color stains; one with more brown tones and the other with red tones, allowing to dry well between coats.
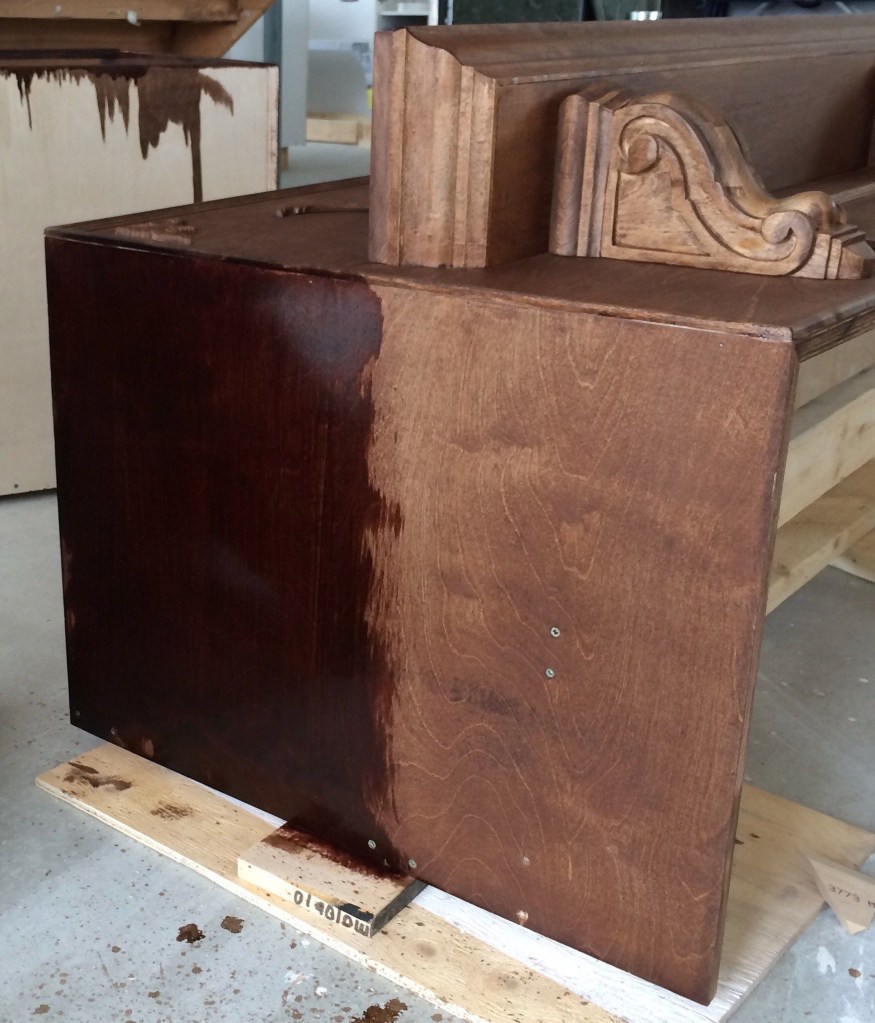
PRO TIP: Wear nitrile gloves when staining. The stain soaks into your skin just as easily as it does with wood and takes ages to wash out!
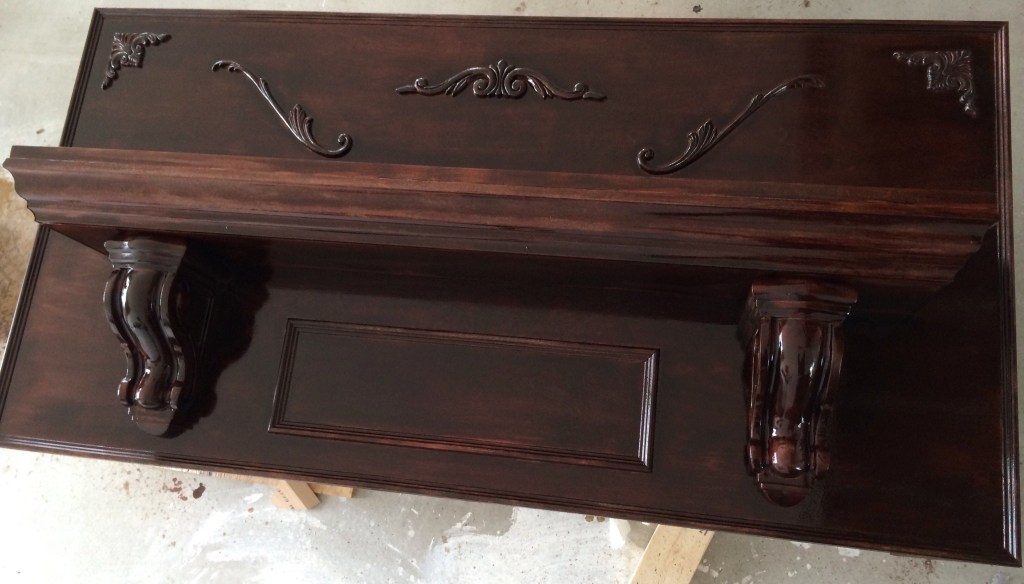
My kitchen cabinets are all white, so having a dark stain for the range hood gave it an extra accent to draw the eye to the center of the kitchen.
I add seasonal decorations to the shelf above the range hood to add a bit of color to the kitchen.
Eventually, I would like to find an antique metal piece to add to the trim box in the center of the range hood, but it has to be something with history that I love – and I have yet to find something calling my name.

Make sure to follow my blog for the post on creating this beautiful backsplash with the fireback and pot filler!

Nice DIY, looks great!
LikeLike