

The hope of spring feels stronger when it is finally time to start seedlings indoors!
I don’t know about the rest of you, but I am always to impatient this time of year, wanting to get some seeds started – and now that March has arrived, the time has come!
Tomatoes and peppers should be planted in March so they have enough growing time to produce once our short growing season starts in the North.
Depending on the variety you plan to grow, the tomato plants will need anywhere from 60-100 days until you can harvest mature fruit.
And yes; I just called tomatoes fruit!
I know it can be a huge debate and I tend to call tomatoes fruit sometimes and vegetables other times, depending on the reference.
Why grow tomatoes?
Tomatoes are a versatile veggie (see what I did there?) that are used in everything from ketchup to spaghetti sauce to salads to pizza… The list goes on and on!
Whether you like raw tomatoes or not, I would be willing to bet that you like at least a few of the other recipes they get added into.
Also, there is just something so satisfying about the beautiful colors you can grow; classic cherry red, bright yellow, and even some that are a dark purple!
Another great reason is the fact that tomatoes are easy to grow once you have all the know-how (which is why you are reading this blog).
But the biggest reason of all?!!
The incredible flavour is NOTHING like you have ever tasted from a grocery store tomato!
It will make you feel like you have lived your entire life in black & white and finally see (taste) color for the first time.
It will make you feel like you have lived your entire life in black & white and finally see (taste) color for the first time.
There really is just something about homegrown that kicks the taste up to a million times better! Especially if it is a hot tomato straight off the vine…
So let’s get to it!
Germination
Tomato seeds need light, fluffy potting soil for ideal germination – DO NOT USE GARDEN SOIL!
The reason for this is that potting soil is easy for the new plant to poke up through without fighting through heavy-packed garden soil (plus potting soil tends to hold the moisture better).
Speaking of moisture, you should moisten the soil so it is damp, but not wet.
If you over-water the soil, your seeds will rot and you will find yourself spending $5 a pot for tiny plants at a garden centre.
HEAT: this is a big factor that I overlooked as a beginner gardener. Your seeds need enough heat to germinate and household temperatures aren’t always warm enough.
Tomato seeds can germinate at 60 F, however they prefer 80 F as an ideal temperature.
I use a heating pad with my covered seed starter kit to make sure they have the idea temperature and humidity – and let me tell ya! It makes a world of difference!
Not only do I have a better germination rate (a.k.a. how many seeds sprout), but my seeds also germinate much more quickly than they would at a cooler temperature.
You need to keep the soil moist (once again, make sure it’s not wet) while the seeds sprout.
Once the seeds poke through the soil and are close to touching the lid of the seed starter kit, remove the lid.
Lighting
Now that your tomato plants are up, they need proper light!
Early March where we live typically does not give the ideal amount of light, even with our huge South-facing picture windows.
I invested in a grow light that gives my plants the extra energy they need to get established during the “leaner” months of daylight.
Grow lights should be 4-6 inches from the top of the tomato plants to get the maximum benefit.
I won’t go into detail on the specifics of choosing a grow light on this post, so be sure to follow me here, on FaceBook and/or subscribe to my YouTube channel for when I go over those details
Hardening off
Once the weather warms up to temperatures that are consistently above freezing, it is time to begin hardening your plants off.
If you are new to starting plants from seed, you are probably wondering what I’m talking about.
Hardening off means that you gradually get your plants used to the temperatures outside, any wind they may be exposed to, and direct sunlight.
Most windows will block a certain amount of UV rays from the sun (some will block almost all of it), which means that your plants aren’t used to it – and can get sunburn, just like people!
Who knew?!
If you have really strong winds (like we do on our acreage here in Saskatchewan) you will have to be very careful with taller plants to ensure they don’t just get blown over or get broken tops. Your best bet is to keep them as sheltered as possible outside during the hardening stage.
When you are hardening off your plants, place them outside for about an hour the first day and then bring them back inside. Repeat this step for the next few days before extending the time to a couple hours for the next several days.
The goal is to slowly get them used to the environment they will be living in.
When I plant my tomatoes in a greenhouse, I typically skip this step. There can still be some minimal sunburn, but nothing major.
Planting tomatoes
Once your tomatoes have been hardened off, you are ready to plant!
First things first, we need to talk soil.
Tomatoes prefer soil that is slightly acidic (6-6.8 pH range), well drained, and high in organic material.
They love humidity and plenty of water, but (like most plants) don’t want to be drowned.
I use about a 50/50 mix of peat moss and soil in my beds; the peat moss is light, fluffy, and drains well.
When I plant my tomatoes, I add a banana peel (or even a whole banana if we won’t be eating it), a scoop of used coffee grounds, egg shells, compost, and a tablespoon of epsom salt in each hole.
Composting is another topic I will be discussing on my blog, so be sure to follow me so you don’t miss the “black gold” of gardening!
Why should I add any of this?
The bananas add potassium that the tomatoes will tap into and it helps prevent blossom end rot, which is a deformity caused by deficient nutrition.
The coffee grounds add nitrogen and the eggs offer calcium, which also help prevent blossom end rot.
Compost is pure energy for the tomato plants to feed off of and the epsom salt offers calcium and helps promote blooming.
When you actually get down to digging your hole, take into account how tall your tomato plant is.
Every hair on the stem of your tomato plant is a root just waiting to grow, so you want to maximize that root base as much as possible.
Every hair on the stem of your tomato plant is a root just waiting to grow, so you want to maximize that root base as much as possible.
By planting your tomato with as much of the stem in the soil as possible with the topmost leaves above the ground, you will have healthier, more vigorous plants.
Be sure to remove any leaves that are on the part of the stem that will be buried.
If you have an especially tall tomato plant, you can actually plant it sideways so the stem runs horizontally in the soil and then bends upward for the part you want above ground (I do this ALL the time!)
Varieties of tomatoes
Before we get deeper into the daily care of your tomato plants, let’s talk about my favourite varieties!
You can choose from determinate or indeterminate varieties of tomatoes; determinate means they will only grow to a certain size bush and indeterminate will never stop growing taller, if given the growing season.
All the varieties I list below are indeterminate.
Each year I end up with plants so tall they touch the roof of my greenhouse.
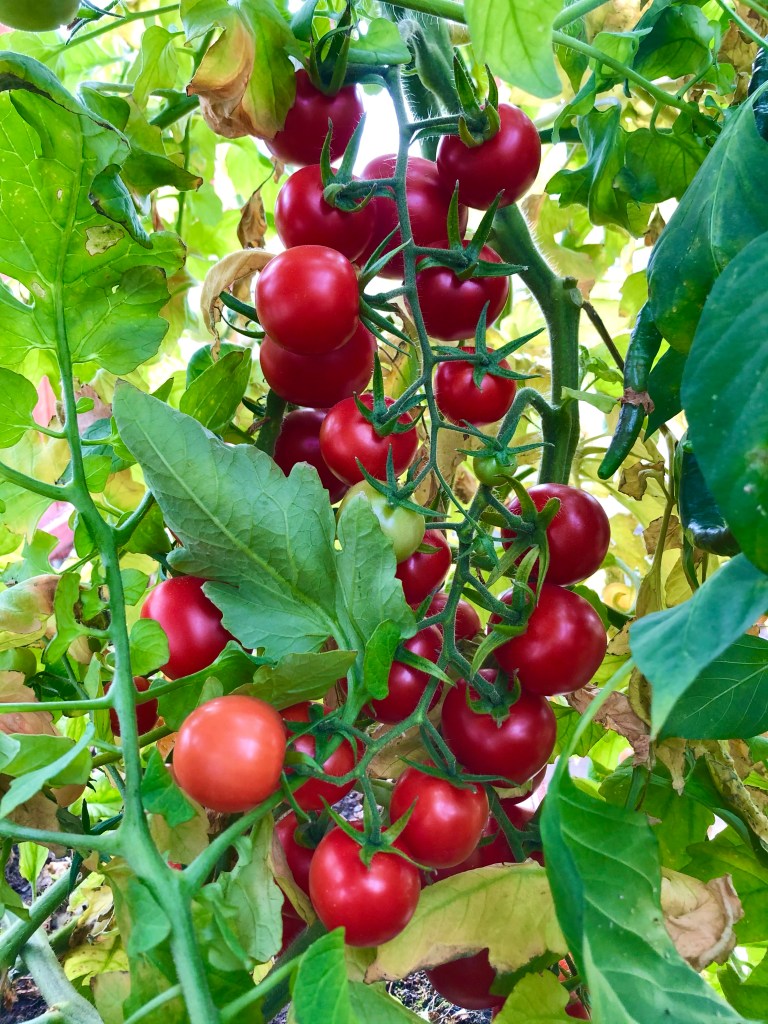
Cherry Tomatoes
Aside from just being so pretty to look at, cherry tomatoes are such a tasty snack to munch on while I am watering the garden.
They are prolific producers and have such a juicy, full-bodied flavour that my husband and I enjoy all summer long – and winter, too!
Winter Too?! Let me explain: I am such a sucker for plants, I just had to bring a few cherry tomato plants into the house last fall… And they have been giving us DELISH tomatoes in the middle of winter!
There are many different varieties to choose from, which can range from 45 – 80 days to maturity.
I recommend doing research on varieties that do well in your particular zone and growing environment.

Beefsteak Tomatoes
These gigantic tomatoes are amazing for so many reasons!
They are traditionally what you would have on a burger, but they also have a lower water content than many other tomatoes – which makes them great for sun-dried tomatoes, pasta sauces, pizza, ketchup, etc.
Their flavour is milder than the cherry tomatoes when eaten raw, but when cooked down in recipes it is a nice, rich taste.
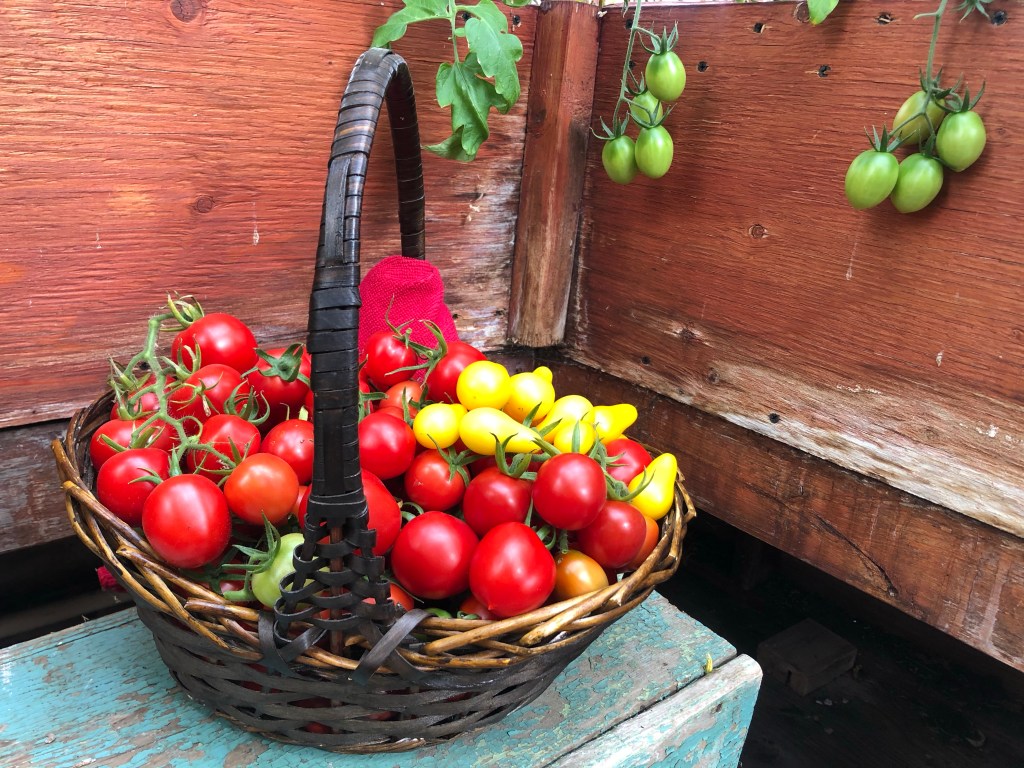
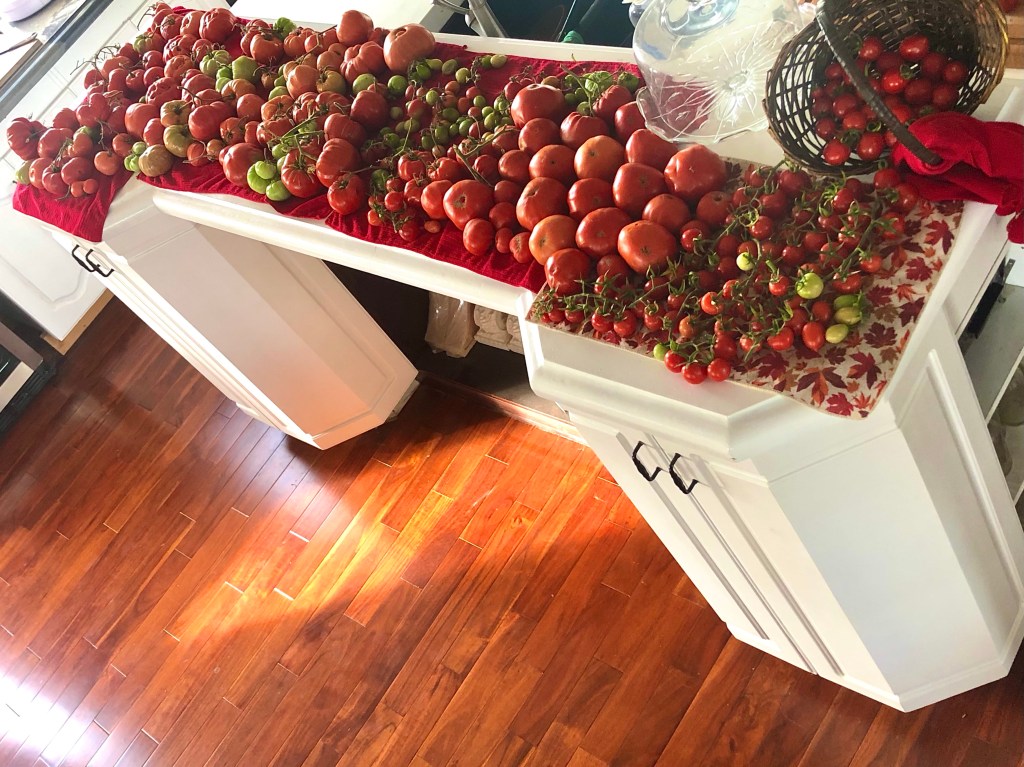
Plus, who wouldn’t feel a swell of pride while picking a huge basket of these from a plant that is bending from the weight of all those beautiful tomatoes?!
Beefsteak tomatoes average about 85 days to maturity, depending on variety.
Warning: they have more of a risk of blossom end rot than other tomatoes, so watch out for that.
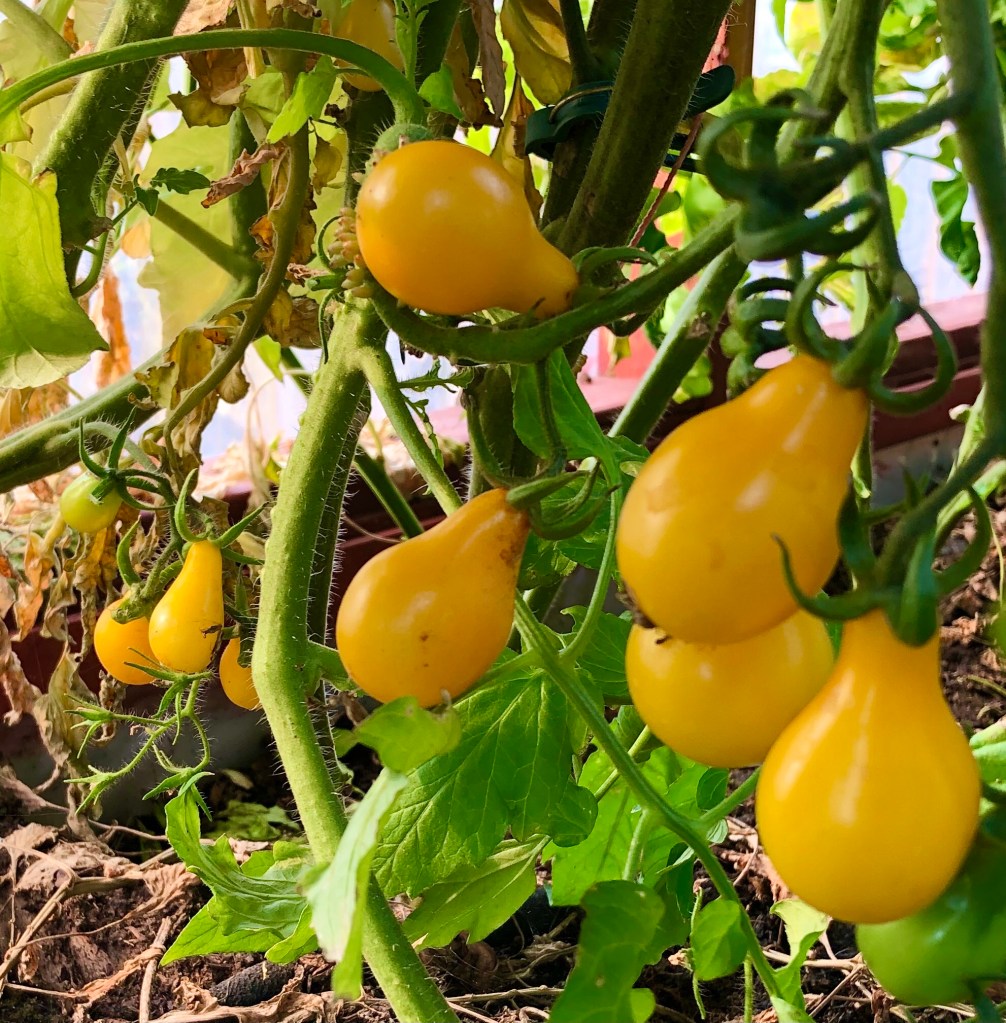
Aaah… Pear Tomatoes…
These are one of my absolute favourites because of their unique shape and color!
They are so pretty and their flavour is the sweetest of any tomato I have ever eaten.
Pear tomatoes are smaller than cherry tomatoes and have a similar growing season.
They can be difficult to find at times, so save your seeds if you want to be sure you can grow them year after year!
Daily Care
I give my tomatoes a good soak daily, but try to be sure they are not “drowning.”
Typically, I will trim the bottom leaves off the plant up until the place the lowest set of tomatoes are growing.
Why? Plants put their energy into everything attached to them. If they have leaves, they send energy there.
I hated this concept until I tried it the first time. I thought, “Leaves produce energy for the plants, so I am going to keep them!”
While it is true that leaves produce energy for the plant, they also require energy. By cutting the lowest leaves off, the plant forced more of its energy into the top part – including the formation of tomatoes!
Fertilizing
I have found that I have much more success when I am diligent on weekly or bi-weekly fertilizing.
I like using a combination of compost, liquid fertilizer, and pellet fertilizer from one week to the next.
If you choose to go organic, you can still use a compost tea weekly rather than the traditional store-bought fertilizer.
Pruning suckers
This is another counter-intuitive thing to do…
Suckers will produce tomatoes. Eventually.
We do not have a long enough growing season here to allow the tomatoes to spend all their energy producing suckers, so they have to go!
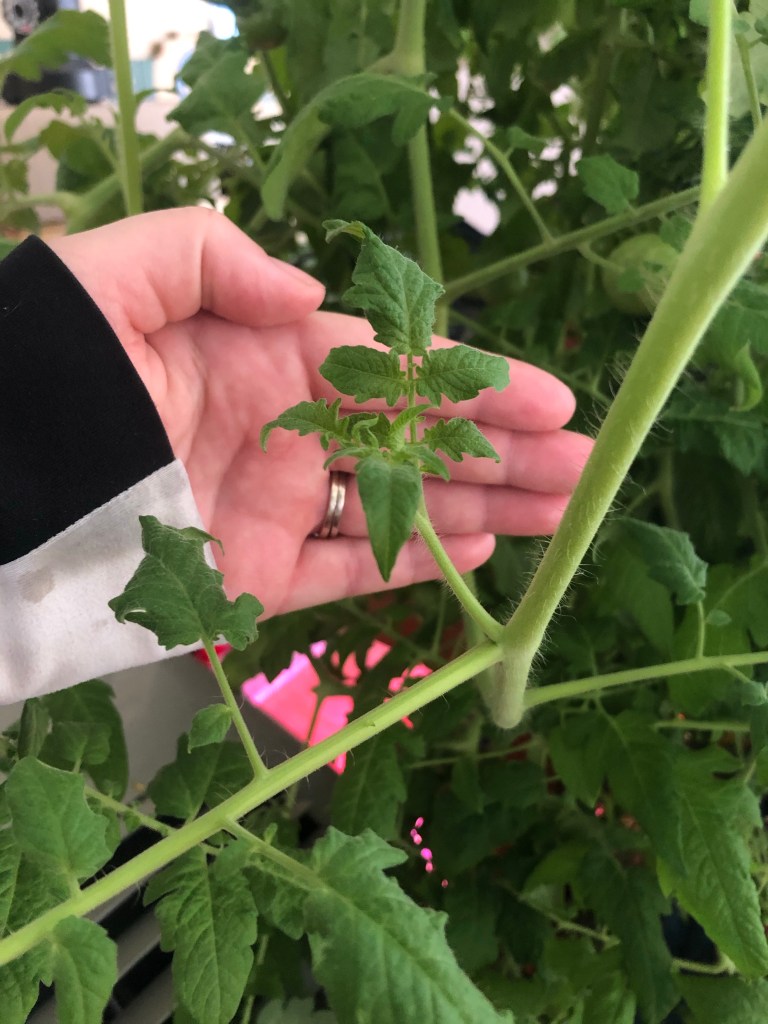
If you haven’t grown tomatoes before, suckers are the part that starts growing at the junction between a leaf and the stock of the tomato plant.
(Note: do not confuse suckers with blossoms; the blossoms will typically start growing on the stock where there isn’t a leaf growing)
I use small garden shears to cut the suckers off to make sure the plant isn’t damaged. You can also carefully twist the sucker until it breaks free from the plant.
Read to the end for my secret to create more tomato plants using suckers!!!
Pollination
Tomatoes are self-pollinated, which means that they do not need a “male” and a “female” flower to create fruit.
They do, however, need wind or vibrations to get the pollen to fall into the stigma of the flower.
They do, however, need wind or vibrations to get the pollen to fall into the stigma of the flower.
If you plan to grow your tomatoes in a greenhouse or indoors, you will need to give a gentle shake or taps to your plants every few days to make sure they have been pollinated.
Within a few days, if the yellow part of the flower falls off, but the stem remains, you likely have a successfully pollinated tomato. If the green part attached the flower or the entire stem falls off as well, you will not get a tomato from that blossom.
Support
Indeterminate tomatoes need support so they do not fall over or break under the weight of the tomatoes they produce.
Some gardeners will use tomato cages, however I have found that my tomatoes typically grow much taller than the cages.
Instead, I tie a sturdy string from the ceiling of the greenhouse and use clips to secure the plant to the string, adding more clips as the plant grows.
I have also seen bamboo poles used; for this method you will need to have a deep enough bed for the bamboo pole to offer sturdy support.

Ripening geen tomatoes
Frost is on the way; can you pick green tomatoes and ripen them?
Well, the answer is YES – and NO!
It really depends on how well developed they are.
If they are mature enough, they will ripen to a beautiful red with amazing flavour on their own.
If they are not mature enough, they will turn brown and rot.
So how do you know the difference?
Maturing tomatoes on the vine will turn from their juvenile color of dark green to a lighter green and will be roughly the size they should be when fully ripened.
If they have a twinge of pink or red (or yellow in the case of pear tomatoes), you can certainly pick them and allow them to ripen in the house.
The larger the tomato, the more forgiving they are when picked early; beefsteaks can still be very green and will be okay, however cherry tomatoes and pear tomatoes have to be a lot closer to maturity in order to finish ripening in the house.
One myth that has been prevalent for many years is that ripening tomatoes need sunlight.
Not true!
I have ripened many green tomatoes without any sunlight just fine.
What about frozen tomatoes?
If your tomatoes froze, I really hope you have a compost pile set up already… because they need to get chucked!
Okay, okay… I know some people may still try to use them, but let’s be honest here… they turn to mush.
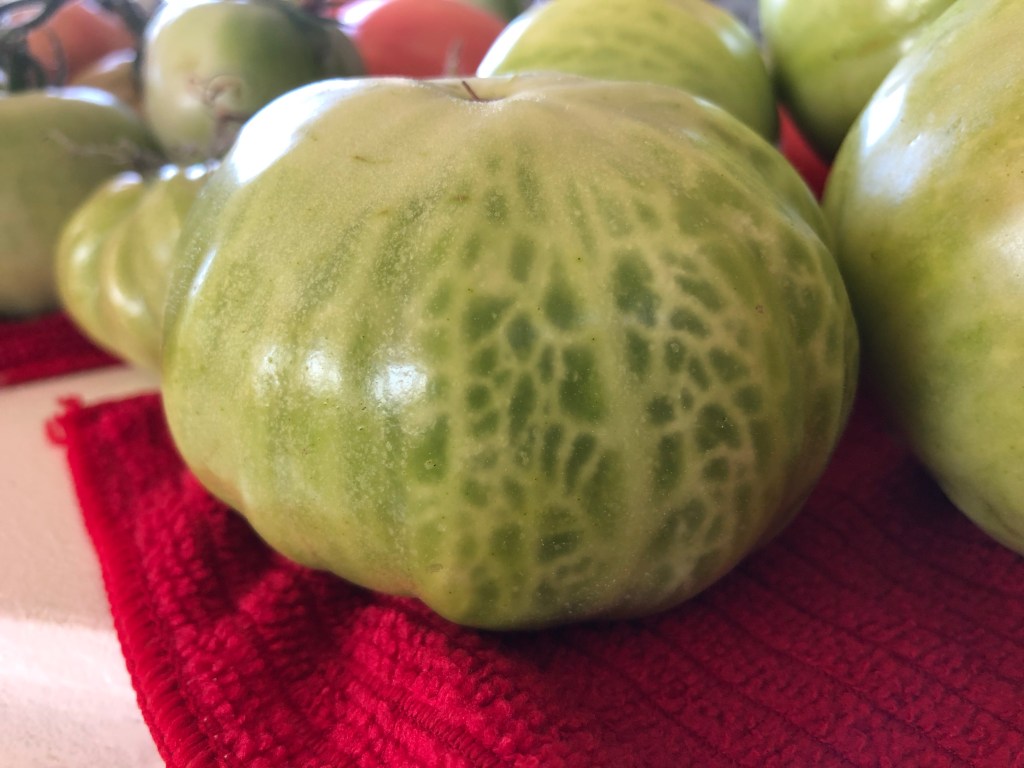
So how about if you covered your tomatoes before the first frost and want to know if they are still good?
The photo above is an example of the veined pattern that shows up on tomatoes that have been touched by frost.
If they froze solid, they will turn to mush as soon as they thaw, however if they have just been touched by frost they can still be firm.
The tomatoes touched by frost will not ripen into a nice red; if you want to salvage them, you need to use them ASAP – otherwise they will go bad.
Pinterest has some interesting recipes and I may post some here later as well.
Companion planting
Bugs can be a huge struggle in gardening, which is part of the reason companion planting is a thing.
Other reasons to companion plant include flavour, shade, and even added nutrients!
Planting marigolds with tomatoes helps reduce the pests that like to feed on your tomato plants. The flowers may smell stinky, but they are kind of pretty!
I LOVE (let me reiterate – I LOVE) basil with tomatoes!!!
They grow well together and I love pairing them in the same foods.
Some people swear by the fact that they enhance each other’s flavours when grown together…
My unconventional companion is green beans.
Why green beans?
Beans are a “nitrogen fixer,” which means that they pull nitrogen into the soil and the tomatoes can then “eat” the nitrogen.
Runner beans also act as a natural support for the tomatoes if done correctly.
The downside is the fact that the green beans have large leaves that can block out sunlight, so I keep mine well trimmed.
Want to learn to grow green beans? CLICK HERE!

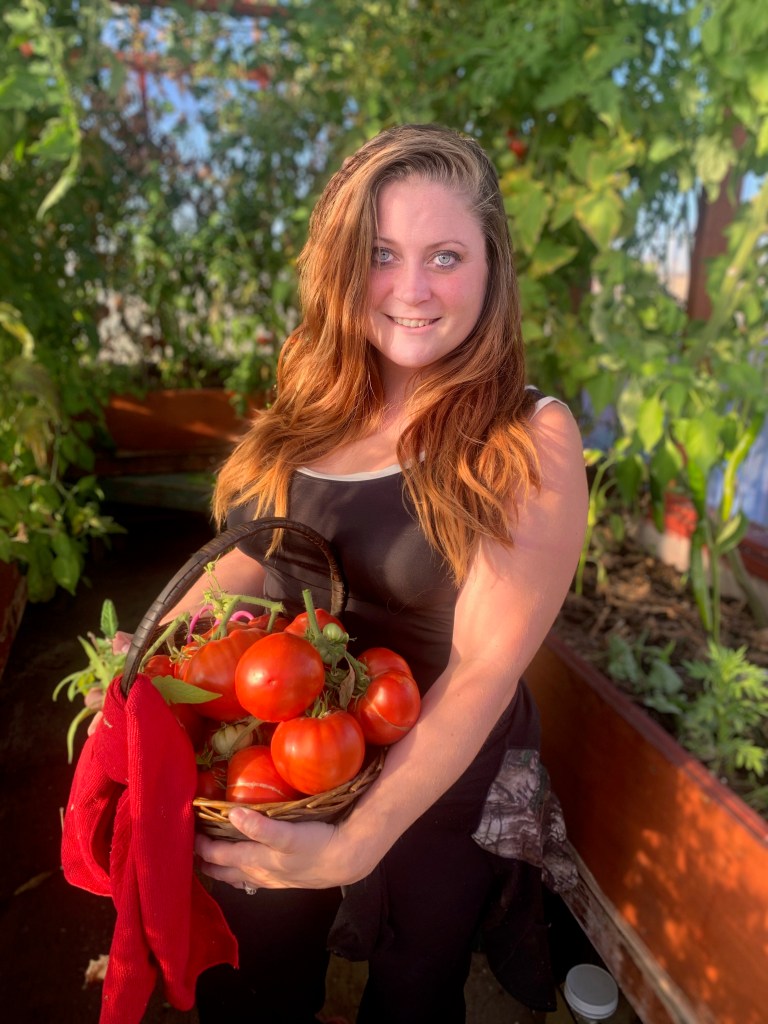
Harvesting tomatoes
Congratulations!!!
You have successfully planted, cared for, and grown your own tomatoes!
Here is the fun part.
Your tomatoes are ready to harvest when they are a nice, deep color – whether red, yellow or purple will depend on the variety you are growing.
Their skin should still be glossy and they should be firm.
If you do not plan to eat your tomatoes immediately, either cut them off or break them at the knob above the tomato on the stem; they store better this way.
If you plan to use them right away, you can gently twist the tomato off the stem.
Propagating suckers
Remember earlier when I said to read to the end for my secret on using suckers to make more tomatoes?
Well, here it is!
Suckers are the easiest way to expand your tomato crop – after you have pruned them!
Just like when you plant a tomato as deep as possible to use the hairs on the stem to expand the root system, the suckers can root on their own using those hairs.
You can either place the sucker in water for a week or two to get roots established or you can plant them directly into drenched soil.
They require enough heat and sunlight to do well if you plan to put the suckers directly into soil.
Whichever method you choose, they typically will wilt over and look as though they may have died for a couple days.
That is normal.
Sometimes they may die, but I would have pruned them off in any case… so all the suckers that grow are just more free tomato plants!
Most times, however, the suckers will perk back up in a day or two and start developing roots.
It is important at this stage to keep them borderline “drowned.”
After the first 2-3 weeks, they should be ready to be transplanted.
At one point, I had pruned a sucker off a tomato in my greenhouse and simply chucked it at the base of the plant to decompose… And it ROOTED IN! While it was just laying on top of the soil!
Tomatoes are tough, resilient plants that just don’t give up.
Preserving & Recipes
If you are interested in learning more – including preserving your tomatoes and different recipes, be sure to follow me!
I will also be posting about saving seeds to save you $$$ in the future, problem solving, and more!
Did I miss your question? Drop a comment below!

very informative thx i will follow
LikeLike
I’m glad you found this helpful!
LikeLike