
Did you know that rain water is much better for plants than tap water?
It contains nitrogen, which actually feeds the plants!
That is why things seem to grow like crazy right after a good rain (of course the thorough watering helps, too).
Plus, rain water doesn’t contain chlorine and the tepid temperature is far easier on your plants than frigid water from the house.
And then there is the water bill. Yuck. Who needs more bills in their lives?!
Living in the country with well water, we don’t have to worry about a water bill – however a lot of people do have to take that expense into consideration.
And I can’t tell you how many times I have seen notices in the city for “odd/even” watering schedules, which cuts down on how much water folks can use to keep everything green.
With all these factors in favour of a bit more self-sufficiency, rain barrels have become increasingly popular.
(Yes, I am aware that there is controversy in some States trying to regulate people collecting rain water – but thankfully that is not the case up here where I live)
Did you say this DIY rain barrel was almost FREE?
Yep. You read that right.
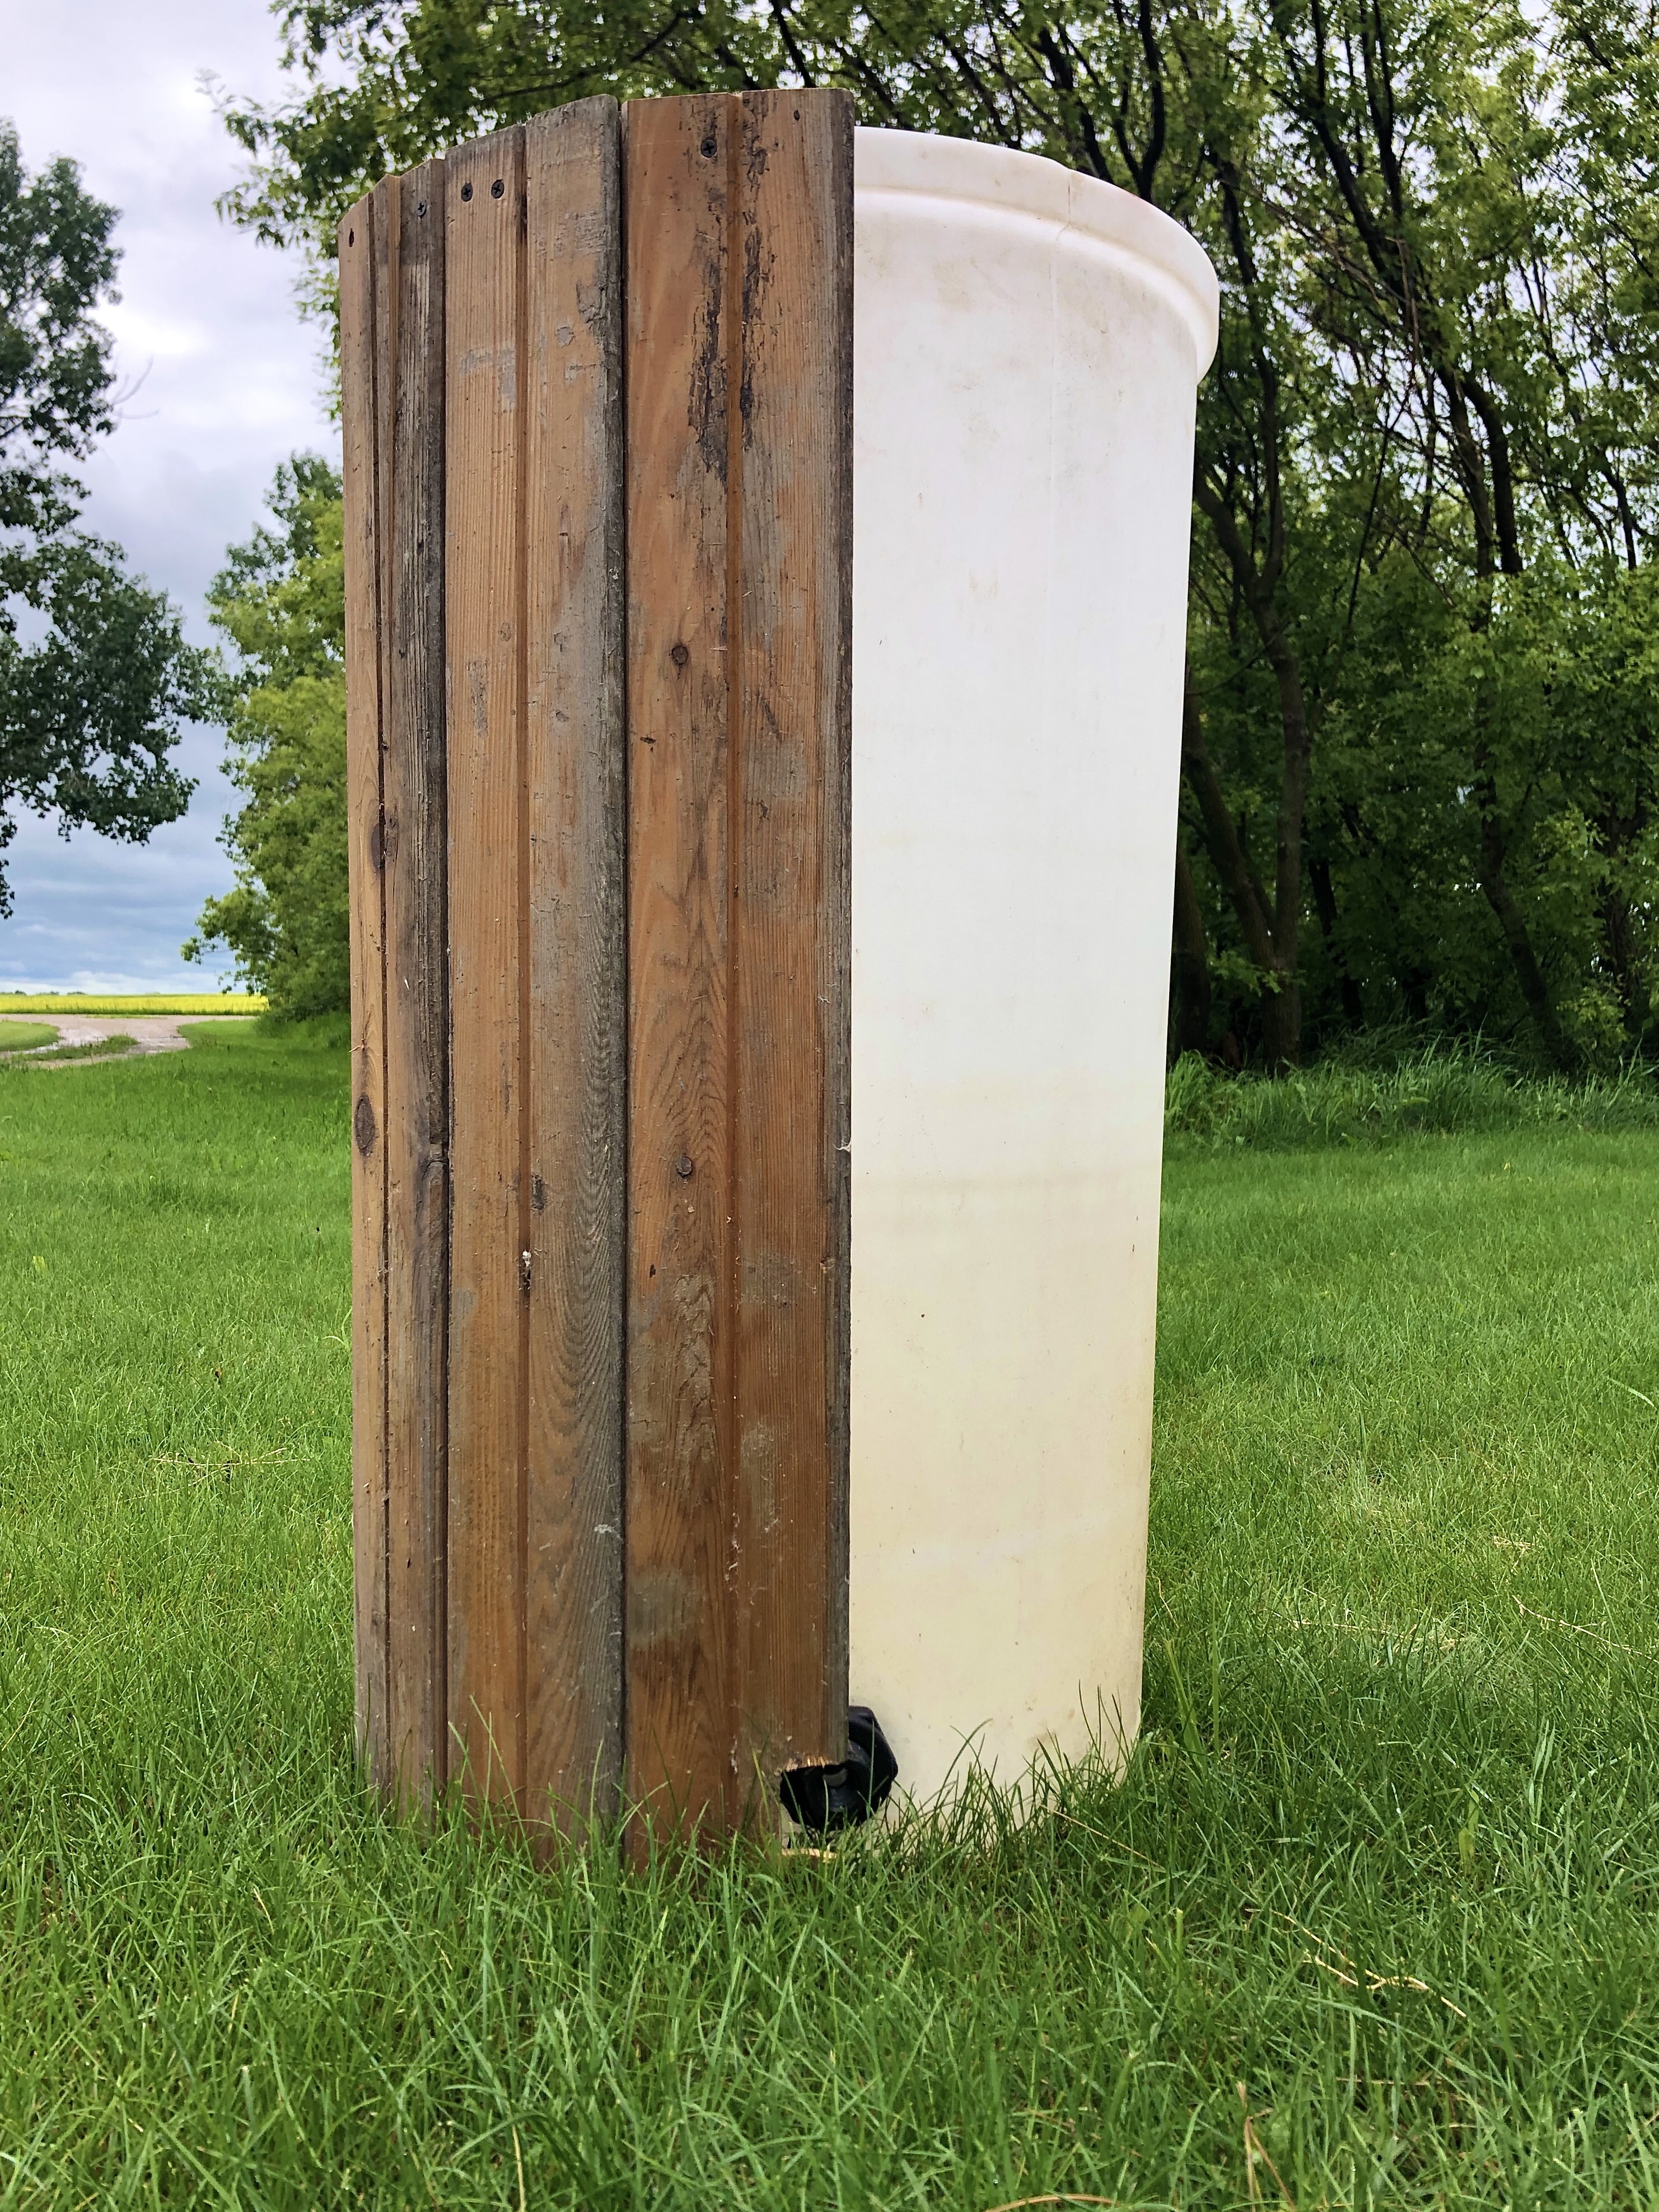
We repurposed an old water softener barrel, weathered wood planking, leftover stain, and only had to buy some hardware for the tap!
The repurposed materials were things we already had on the acreage, however they wouldn’t be difficult to get for free (or cheap) for someone who doesn’t have these items sitting around their yard.
Obviously this project required tools, which were not free, but with all the renovations we have been doing on our huge house we have accumulated many tools that will last us a lifetime.
(Check out our laundry room renovations here!)
Where to start
Once you have collected a barrel, some wood planking, and hardware for the tap – and perhaps some rope as a decorative accent, you can get started!
Some people use an adhesive like PL Premium to “glue” the boards to the barrel, while others will use that rope as more than a decorative accent and have it tie everything together – literally.
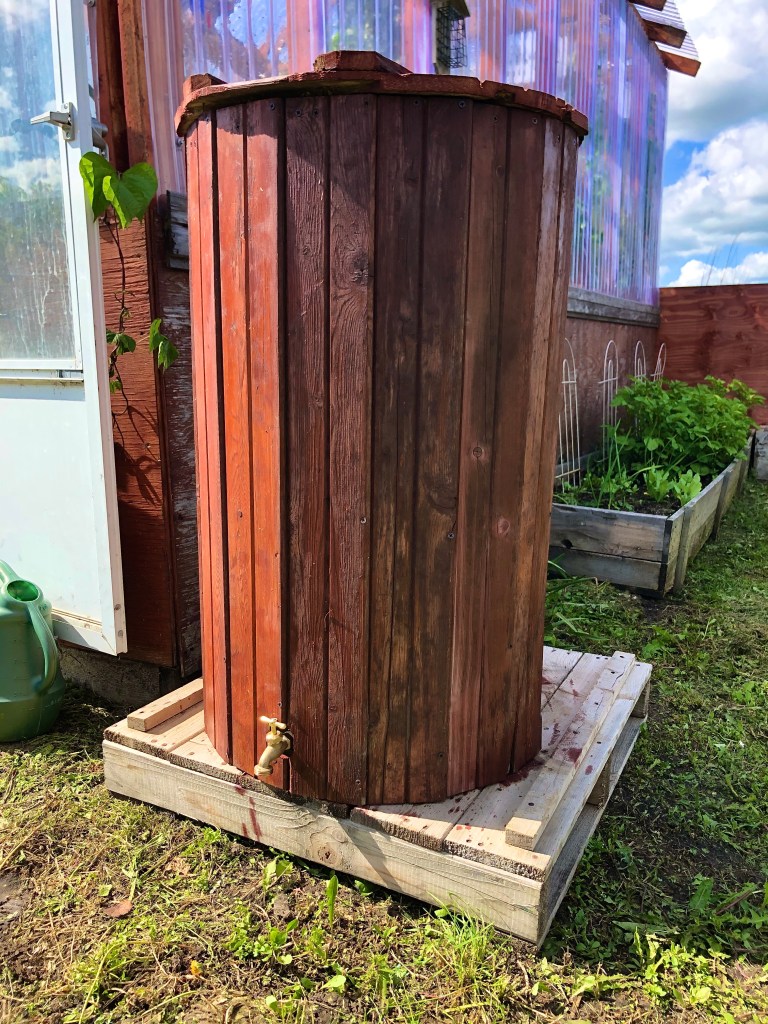
For our rain barrel, we used drywall screws (once again, supplies we already had on hand from other projects) to secure the tongue-in-groove planking together at the top and bottom (making sure not to puncture the barrel).
We drilled a hole near the bottom of the barrel for the tap.
Installing the tap, the hardware had to have a good seal on the inside of the barrel so it didn’t end up losing water with a leak.
And wood stain finished the look nicely; we used stain left over from the greenhouse, which makes the rain barrel look like a perfect accent piece in the garden.
The hole in the top of the rain barrel should only be large enough for the waterspout and protected with a fine screen to keep debris from getting into the rain barrel and clogging the tap.
Once the rain barrel is in place and get your first good rain, you’re set!
No more relying on a mandated watering schedule and extra cost on your water bill!
And of course, enjoy the added benefit of water perfect for feeding your plants!
Do you already have a rain barrel or want to get one? Drop a comment below!

One thought on “DIY Rain Barrel *Almost* for Free!”