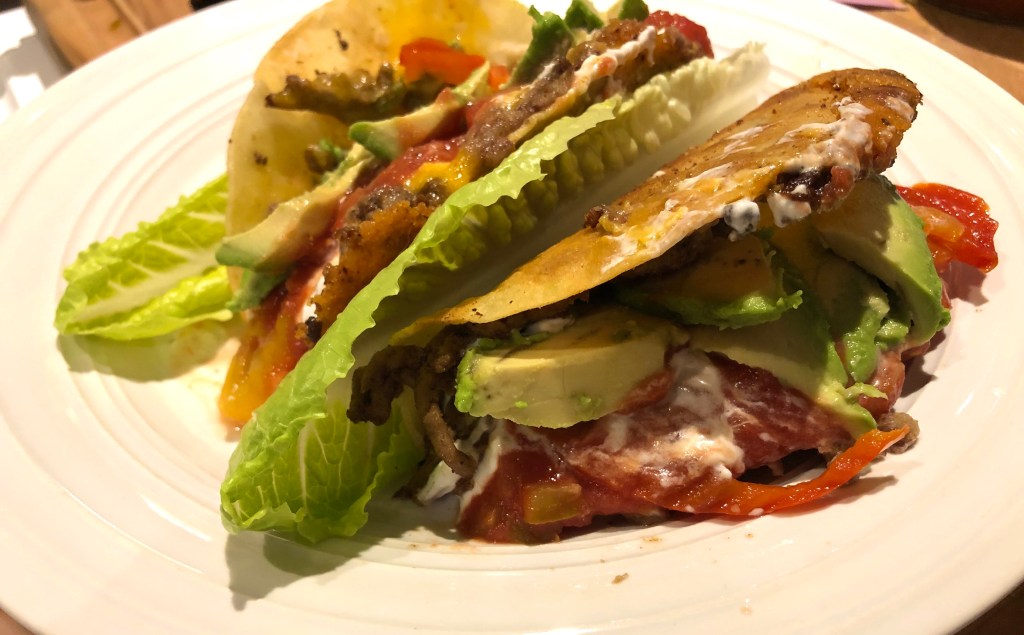
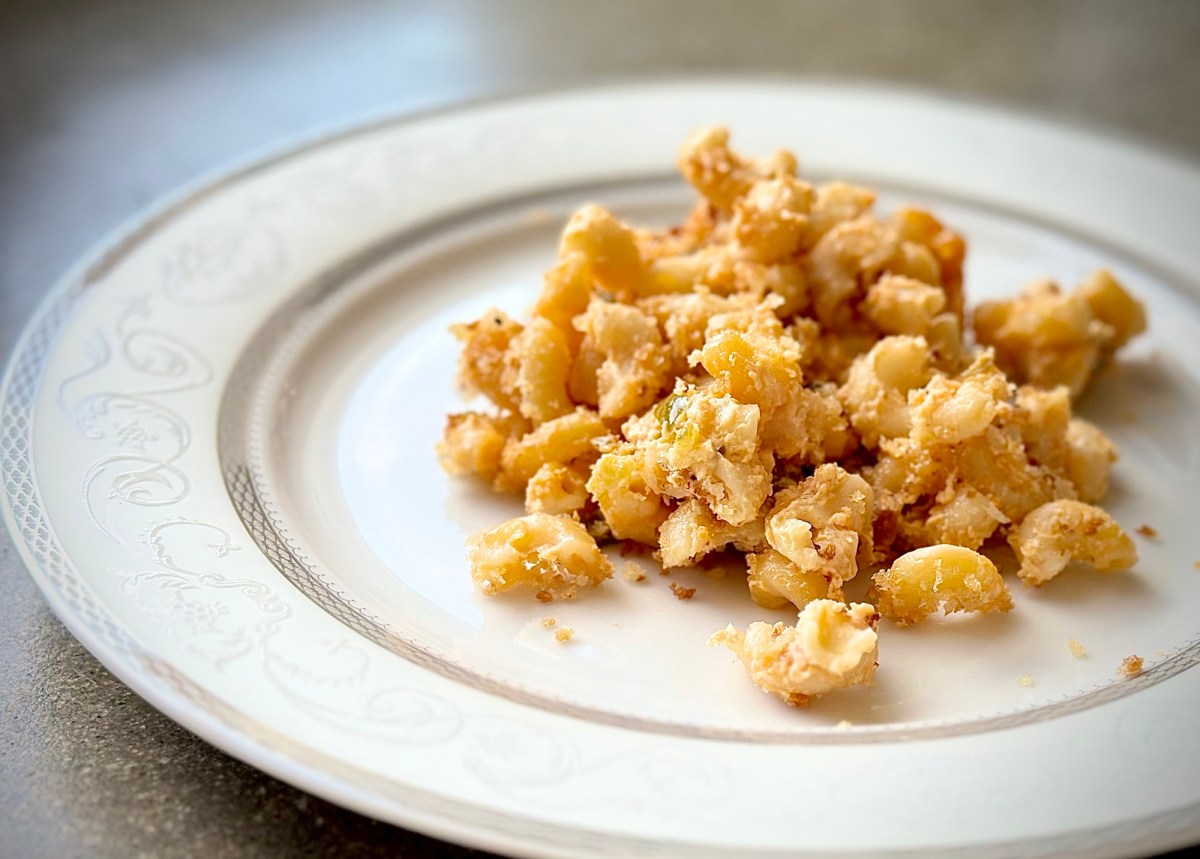
Jalapeño Popper Mac & Cheese
Who doesn’t love a good ol’ homemade mac & cheese? It’s gooey and cheesy and delicious. It just hits the spot.
If you have been following my blog for any period of time, however, I’m sure you have realized that I am partial to a little bit of spice – jalapeños in particular!
I have jalapeño cheddar knots, jalapeño popper stuffed chicken, spicy salsa, and chunky salsa – all featuring jalapeños.
Jalapeño popper mac & cheese has a nice bit of kick to it, but isn’t too spicy. And you can always adjust it, according to your tolerance of heat!
It is so fast and easy to make and is a great crowd pleaser when we have last-minute company.
This past Christmas, we hosted an impromptu family event and I needed something that was quick and easy to make that would feed everybody who was coming out to our acreage.
Even people who are not fans of spicy food, loved this dish and it was completely polished off, even though I made a huge, heaping pan of this jalapeño popper mac & cheese.
What little leftovers we did have got sent home with said people who are not typically spicy food eaters!
So hopefully, now that I have sold you on trying this recipe, let’s get into the details of the step-by-step instructions. 😉
First, you need a large pot of water. Bring it to a full boil and add salt and your macaroni, then reduce the heat to a simmer and allow it to cook for about 7 to 9 minutes depending on how firm you like your pasta to be. I typically like nine minutes cook time for the ideal texture I prefer.
While your pasta is cooking, go ahead and prep your jalapeños. I use pickled jalapeños because they do seem to be a little more mild than fresh jalapeños sometimes can be (I can handle the heat, but I don’t want to burn my guests so they never come back!)
Oh! I should also mention right now you should turn your oven on to 400° convection or 425° conventional oven heat. If you start the oven preheating now it will be good to go by the time your pasta is ready to be popped in.
If you do use pickled jalapeños, you can add some of the juice to the pasta water while the pasta cooks. I feel like it adds a little extra flavor (but this is not a necessary step, though)
Give your jalapeños, a rough chop. They do not need to be tiny because the chunks give extra colour and texture to the dish.
Next measure out your wet ingredients.
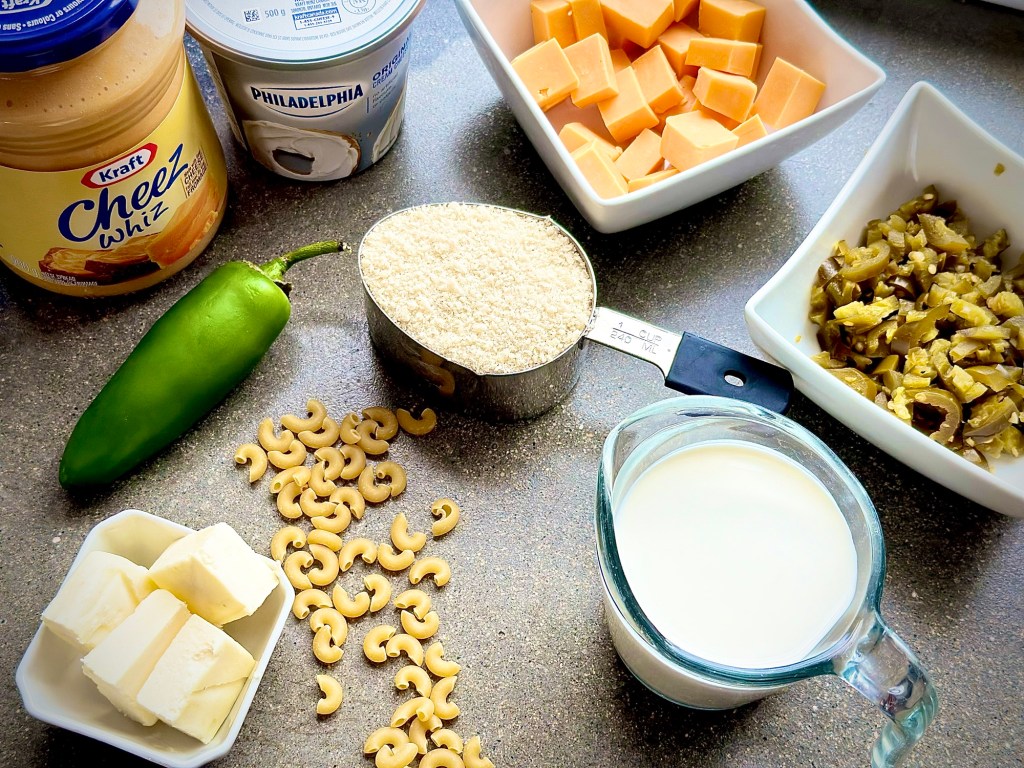
You will need one cup of heavy whipping cream, one cup of cream cheese, and 2 cups of cheese whiz (depending on how cheesy and gooey you would like it to be… You can go with just one cup of cheese whiz if you are trying to cut down on the amount of cheese, but what’s the point of making mac & cheese if you’re not using alllll the cheese??!)
You will also need one cup of cheddar cheese. It is up to you whether you would like to shred it – or what I do is just cut it into cubes.
I find the cubes are faster and easier for prep time, but it does take a bit longer for things to melt down into a nice even consistency.
So by now, your macaroni noodles should be fully cooked. Drain them in a colander in your sink.
I rinse my noodles with cold water to ensure they don’t continue cooking beyond the texture that I tested and decided was what I wanted.

Don’t worry, the sauce will be hot, which will warm the mac & cheese up and you are going to put it in the oven for a short period of time as well, so cold noodles are totally fine.
Use the pot you had cooked the noodles in and add your heavy cream, cream cheese, cheese whiz, and cheddar cheese, as well as your chopped jalapeños.
Next comes my secret ingredient – Worcestershire sauce!
Worcestershire sauce is one of my favourite flavour boosting ingredients. I’ll put just a splash of it in many recipes and it adds the extra wow factor.
Optional ingredients:
I try not to overcomplicate my recipes by having a myriad of ingredients that some people don’t have in their kitchen however, if you do have some of these ingredients and feel like changing the recipe up, you could add some thing like bacon bits, or mild Italian sausage (fully cooked), or chives.
BUT! Back to that pot you have on the stove. On a low temperature slowly melt all the cheesy ingredients together, stirring occasionally.

Mix well once everything is melted. You can add your macaroni noodles back into the pot.
Now we mix again!
Once all your ingredients are fully integrated, you can scoop the mixture into a large baking pan. For this recipe, I use a 9 x 13 extra deep baking dish.
Growing up, we didn’t bake our macaroni and cheese. It was simply a stove top version (which was still incredibly delicious)!
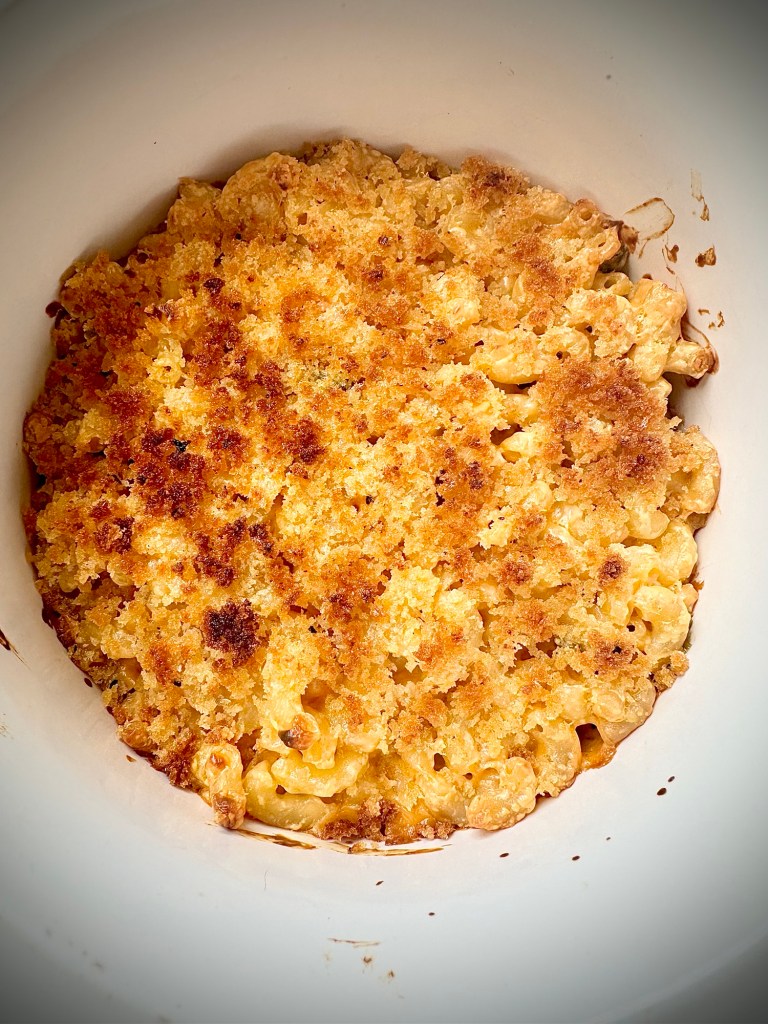
But for this recipe, however, I do bake it -which means I have decided to add breadcrumbs to the top.
If you choose to add breadcrumbs to the top of your jalapeño popper mac & cheese, you can melt your butter in the microwave and stir your breadcrumbs directly into the melted butter.
The other method is to melt the butter in a frying pan on low heat, then once it’s melted, you add the breadcrumbs and allow them to get a little bit golden-brown before you add them to your pan of jalapeño popper mac & cheese (be sure not to overcook it!)

Whichever method you choose for your breadcrumbs (once they are fully integrated with the butter), spread them evenly across the top of your jalapeño popper mac and cheese.

I should also caution you not to make the same mistake that I did when I first started adding breadcrumbs to the top of mac & cheese.
I thought, “more is better!”
It is not.
It makes a mess.
I feel like in this situation, the expression “a little goes a long way” is appropriate.
So now that you have your jalapeño popper mac & cheese dish in the pan and you have the breadcrumbs spread on top, it’s time to put it in your beautifully preheated oven.

Because the sauce is already warm, the main goal is to get your jalapeño popper mac & cheese just to the point of bubbling and to have the breadcrumbs golden brown.
This should only take 15 to 20 minutes.
Make sure your oven rack is in the middle of the oven. If it is too high, your breadcrumbs will crisp too quickly and perhaps even burn. If your oven rack is too low, it may take far longer than you expect to get the nice golden brown finish.
If you find that your jalapeño popper mac & cheese is bubbling, but the breadcrumbs are not yet golden brown, you can turn your oven to broil.
I caution you, though, if you do use the broil setting, don’t walk away. You need to stand there – and you watch that oven until you get the perfect golden brown you were looking for!
Many times have I seen people use the broil setting, only to be disappointed by a charcoal dinner as a result… because they were not standing there watching the entire time.
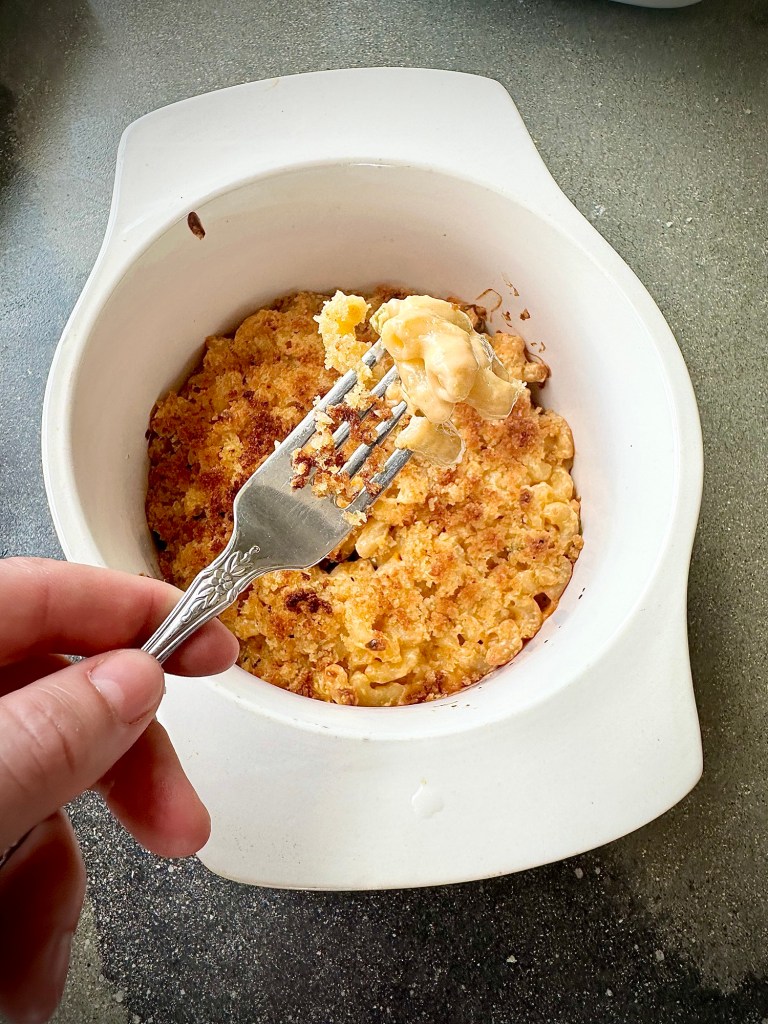
Once you have achieved the perfect golden brown and bubbly dish, make sure you let it rest after removing it from the oven for a few minutes.
We don’t want to burn your guests mouth after all!

And that’s all I have for you so I hope you enjoy this recipe. Please drop a comment and photo below when you make it!
Ingredients:
4 cups dry macaroni noodles
3/4 cups jalapeños, diced
1 cup cream
2 cups cheese whiz
1 cup cream cheese
1 cup cheddar cheese
Topping:
1/2 butter
1 cup breadcrumbs
Recipe:
- Bring a large pot of water to boil, then add dry macaroni noodles
- Reduce heat to simmer for 7 to 9 minutes, depending on desired texture
- Meanwhile, preheat your oven to 400° convection or 425° conventional heat
- Drain the noodles and rinse with cold water
- In the same pot add jalapeños, heavy cream, cheese whiz, cream cheese, cheddar cheese, and allow to melt together on a low heat stirring frequently.
- Once the sauce is hot and well mixed, add the cooked macaroni noodles and stir together
- Place the jalapeño popper macaroni mix and a 9 x 13 pan (no oil needed)
- Melt butter in a frying pan on low heat. Then add breadcrumbs and mix together.
- Evenly spread the breadcrumb mixture over the jalapeño popper macaroni & cheese in your pan
- Next, place your baking pan in the preheated oven and bake for 15 to 20 minutes or until the breadcrumbs are golden brown and the mac & cheese is bubbling.
- Remove from oven and allow your meal to rest for five minutes or until cool enough to eat
- Enjoy!