Roasted Halibut Steaks with Lemon-Dill Cream Cheese

You don’t have to break the bank going to a fancy restaurant to get a gourmet halibut dinner – and this recipe is so quick and easy you’ll be in love!

My mom made a similar recipe when I was a kid, but (as always), I enjoy adding my own twist and trying new things… So this is an “Ellie Original” recipe!

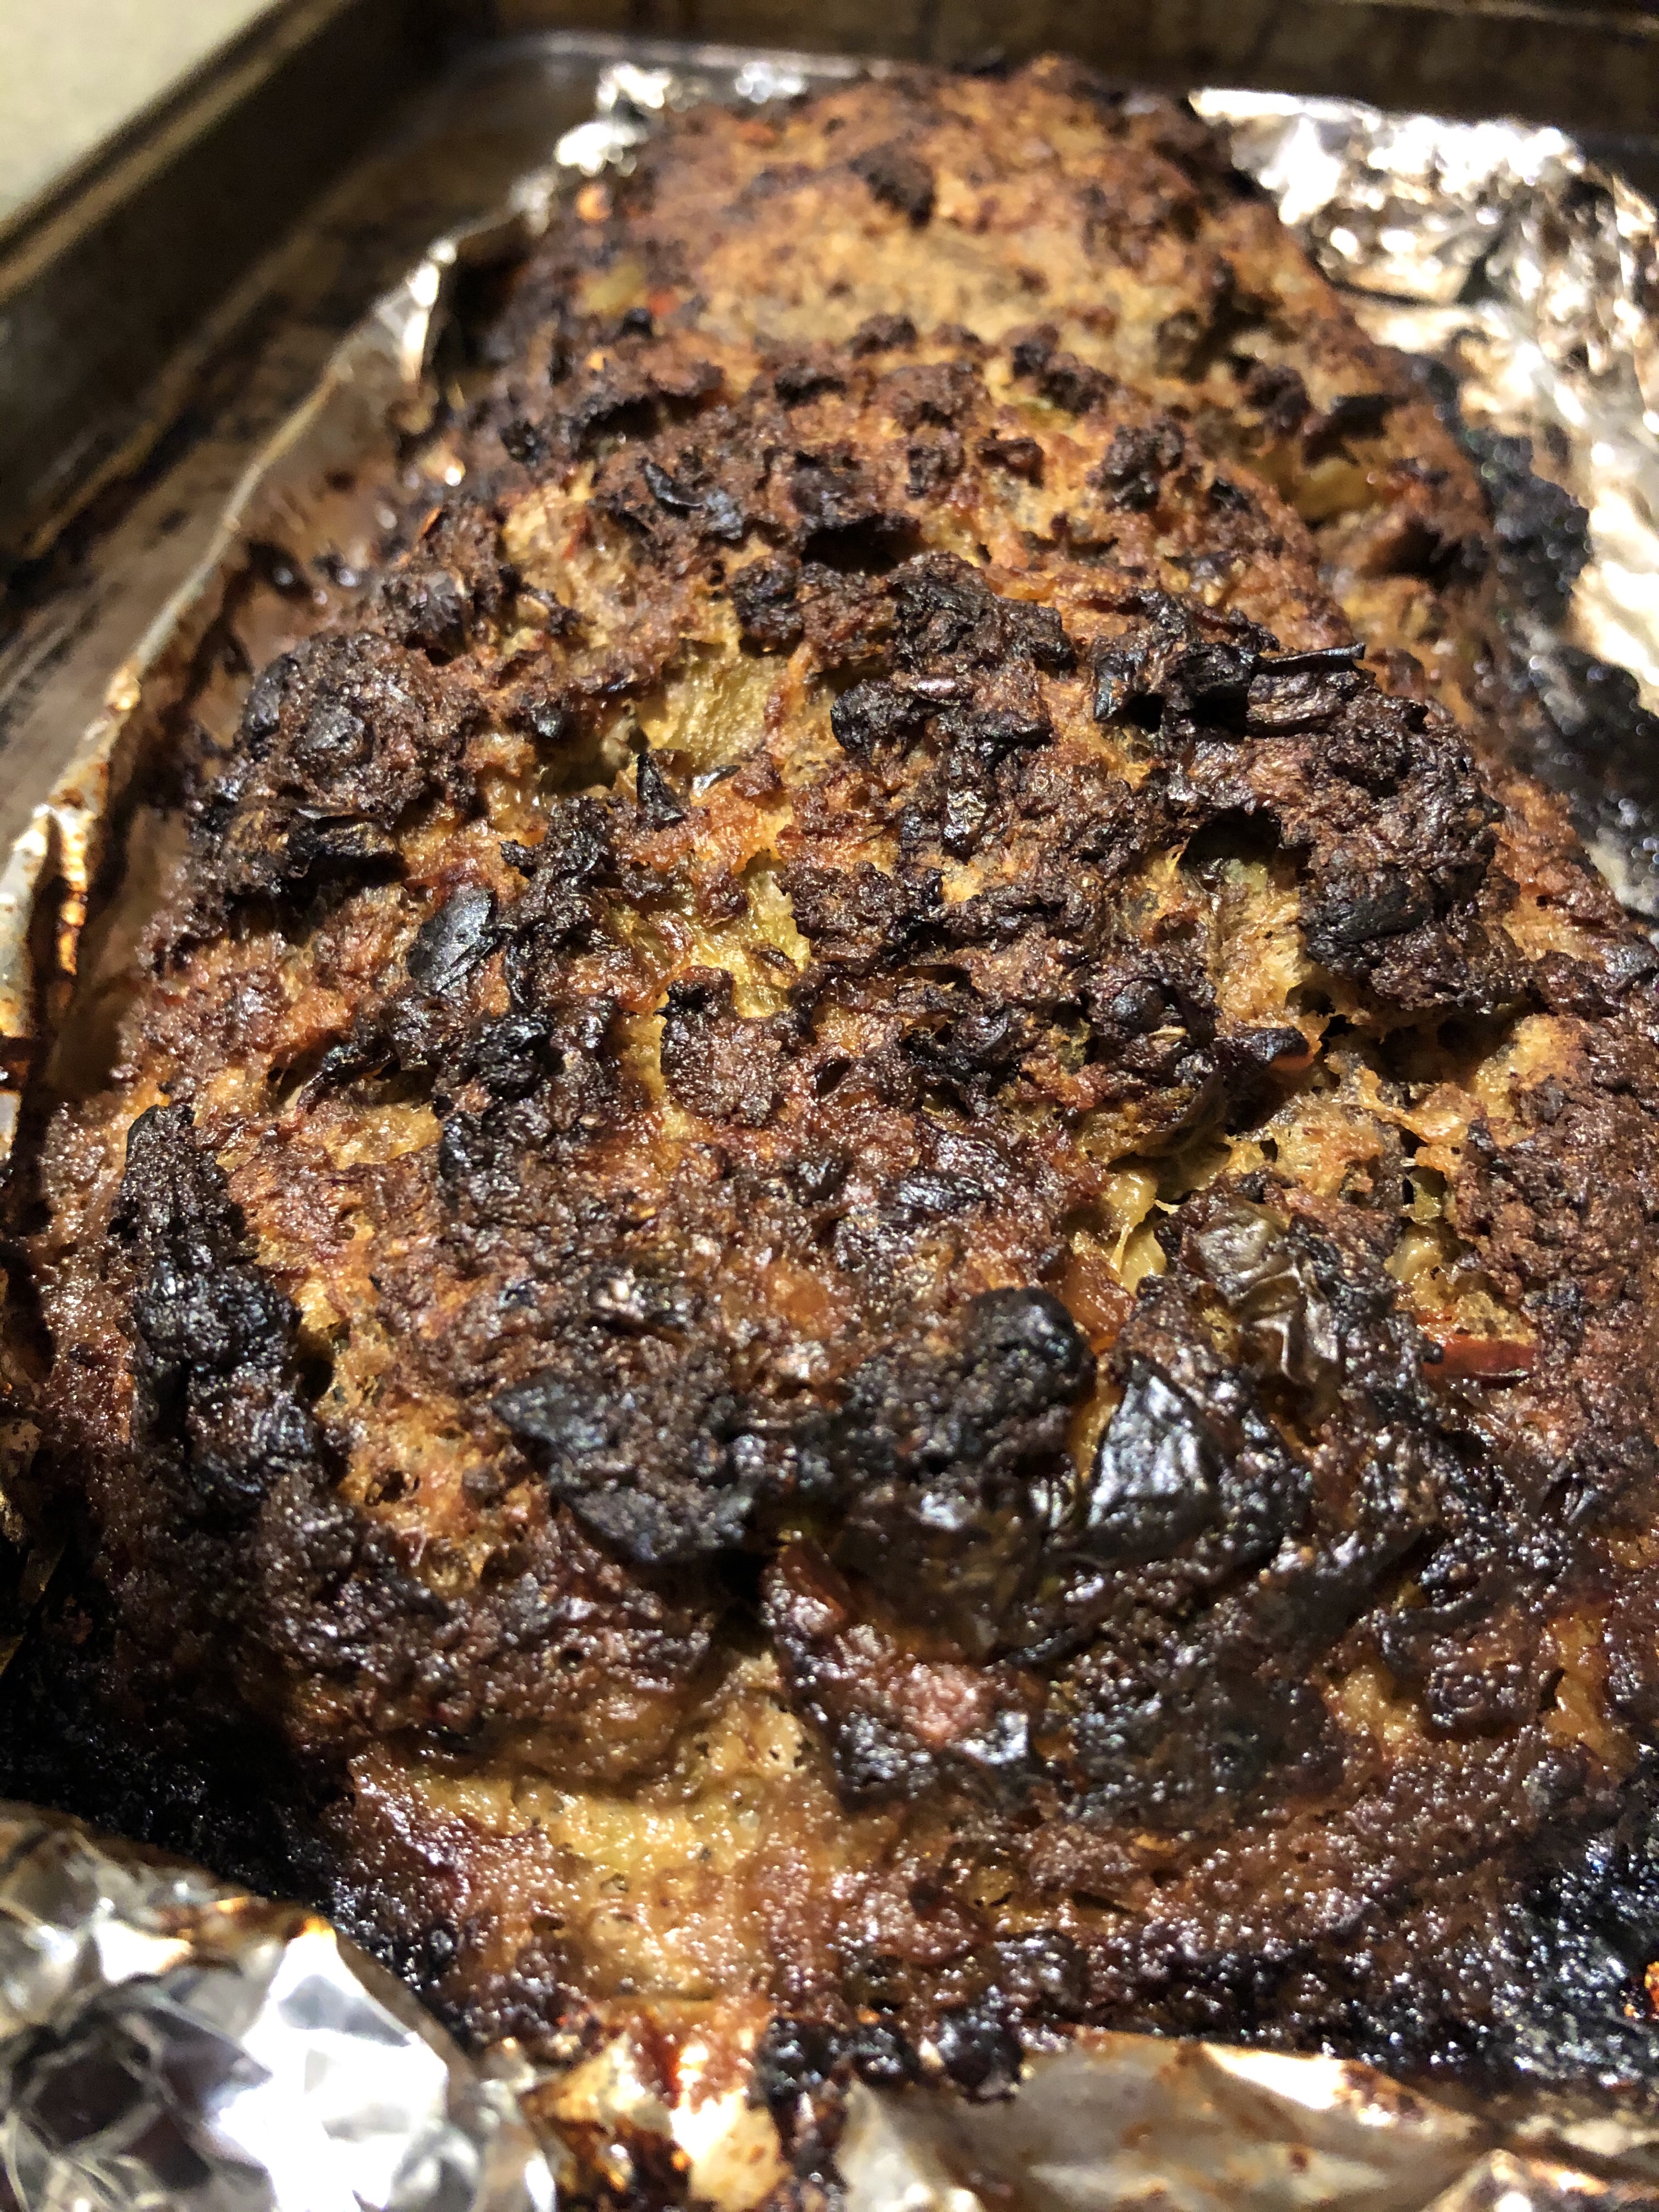
When cooking fish, the biggest mistake you can make is overcooking it; if you undercook it, you can always put it back on the heat again.

Advertisements
Advertisements

But once it is overcooked, there is no going back. Overcooked fish gets dried out and chewy, rather than the perfectly tender, flaky result we are going for.

The bake time will depend on the size and thickness of your halibut, so I recommend checking the “done-ness” by cutting into the centre of one of your halibut steaks at 10 minutes. The fish should be white when it is fully cooked; if it still has a translucent look, you should leave it in the oven for another minute or two.

Did I mention that this recipe is super fast? With only 10ish minutes in the oven, this meal can be ready in a flash!

While fresh halibut is ideal, you can also use frozen halibut steaks.

Growing up, we always had TONS of fish in the freezer from fishing season (though we usually had more salmon than halibut), so we ended up eating our fair share of fish throughout the year – hence getting creative with recipe ideas!

Advertisements
Advertisements

Pro tip for storing fish without getting freezer burn:

Fold your fresh fish fillet into thirds with the smallest part of the fillet toward the inside and freeze.

Once it is fully frozen, fill the freezer bag with cold water and freeze again.

The ice jacket that forms will protect your fillet from freezer burn for long-term storage.

Advertisements
Advertisements

If you are using frozen halibut for this recipe, allow it to thaw overnight in your fridge.

When you are ready to start dinner, pre-heat your oven to 450º F while you prep your halibut steaks.

Note: you likely want to start your other dishes at this point, as well, since the halibut steaks only take 10 minutes in the oven.

Pat your halibut dry with a paper towel and cut into strips about two inches wide, then sprinkle with a bit of salt & pepper.

Advertisements
Advertisements

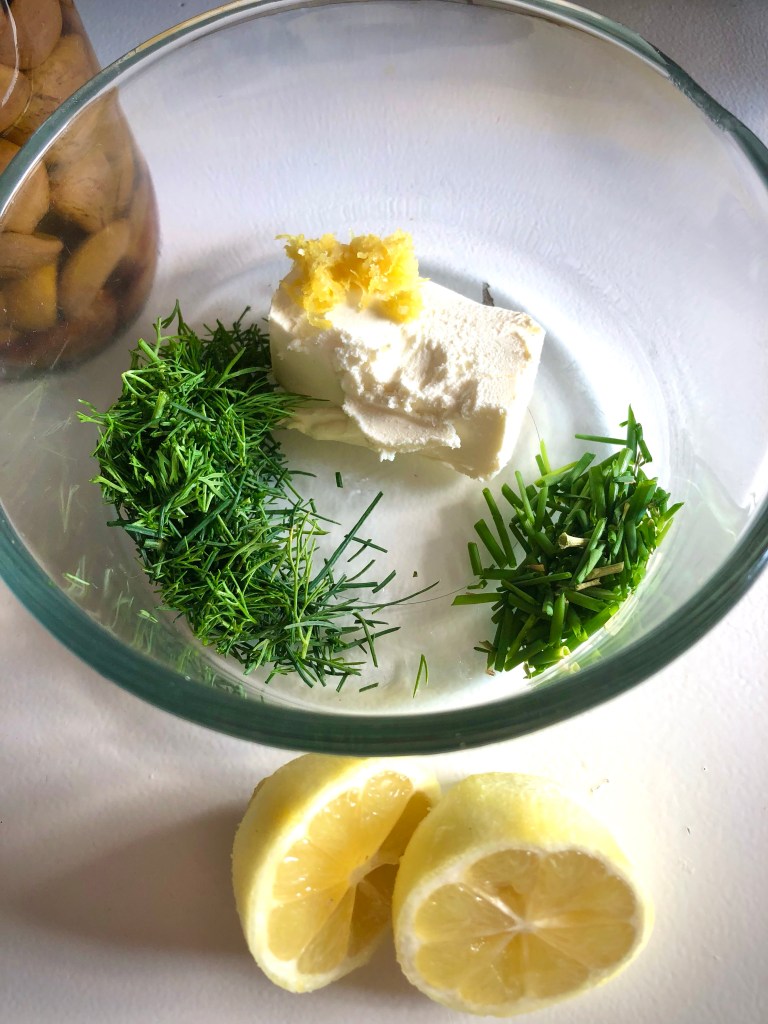
Next, mix your cream cheese, lemon juice, lemon zest, fresh dill, chives, and garlic.

Personally, I prefer to use oven roasted garlic, but you can simply mince a couple fresh cloves of fresh garlic if you don’t want to take the time to make oven roasted garlic.

As with most of my recipes, you can adjust the amount of garlic and herbs to your personal taste.

The cream cheese adds a creamy richness that pairs well with the halibut and the lemon-dill blend has such a bright, refreshing zing to it!

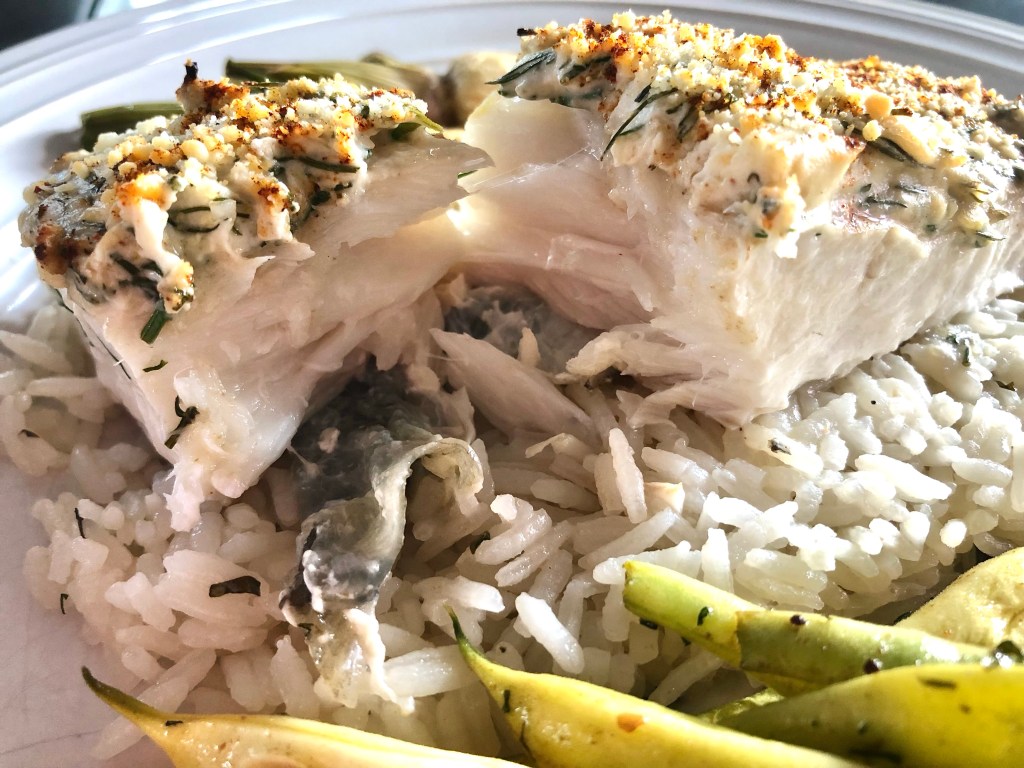
Once all the ingredients are well incorporated, spread the cream cheese & herb mix evenly over the top of your halibut steaks and then sprinkle a little smoked paprika over the top.

Advertisements
Advertisements

Transfer your halibut steaks to a lightly oiled baking sheet and place on the middle rack of the oven.

Bake for 10 minutes, and enjoy!

I personally love rice with fish, so I typically will make my rosemary rice recipe and do a side of green beans or some other garden-fresh veggie to go with dinner.

Advertisements
Advertisements

Roasted Halibut Steaks with Lemon-Dill Cream Cheese

Recipe

4 halibut steaks, cut to 2″ wide

1/4 cup cream cheese

1 teaspoon lemon juice

1/8 teaspoon lemon zest

1 Tablespoon fresh dill, chopped

1 teaspoon fresh chives, chopped

2-3 cloves oven roasted garlic, chopped

Smoked paprika

Salt & pepper to taste

Advertisements
Advertisements

Directions

  • Pat halibut dry and cut into 2″ wide steaks. Sprinkle salt & pepper to taste.
  • Chop garlic and herbs, then zest and juice the lemon.
  • Mix cream cheese, garlic, herbs, lemon juice, and lemon zest until well incorporated.
  • Spread cream cheese mixture over the halibut steaks, then sprinkle with paprika.
  • Transfer halibut steaks to a lightly oiled baking sheet and place in pre-heated oven.
  • Bake at 450º for 10 minutes or until no longer translucent in the middle of the halibut.

Serves 4

Advertisements
Advertisements

I also love grilling our meals and I imagine this recipe would be fabulous on a cedar blank, grilled on a hot summer day.

Advertisements
Advertisements
Advertisements
Advertisements

Zucchini Pizza Boats

Summer is the time for lazy days at the lake, yard work – or harvesting tons of fresh veggies from the garden!

Here in Saskatchewan, this is the time of year that the zucchini go crazy.

Gardeners use every possible recipe to use up their excess and then start giving zucchini to their friends, family, neighbours, and maybe even complete strangers!

We all want to make sure the produce we have worked so hard to grow doesn’t go to waste.

Advertisements
Advertisements

So I’m here today to give you inspiration for one more yummy way you can use your zucchini – Zucchini Pizza Boats!

The great part about this recipe is that it is low carb, does great on the grill, and you can use other garden fresh veggies.

Just like with pizza, it is a flexible recipe that you can pick and choose which toppings you would like to use.

I like to start with a zucchini that is borderline too large because the skin will be a little tough, which makes the “boat” hold its shape on the grill better. Plus this gives you a larger hollow to add your sauce and toppings to!

Advertisements
Advertisements

Cut the zucchini in half long-wise and scoop out the soft, seedy part.

Don’t throw it out, though! We will use the insides in the sauce in a minute.

Next, heat a pan on medium heat and add some butter, a few cloves of garlic, and diced onion.

I personally like to add whole cloves of garlic; once they are nice and soft, I just smash them with my knife on the cutting board and give them a quick chop.

I find that method a lot quicker than mincing or grating the garlic raw.

Advertisements
Advertisements

Oh! And this is where the zucchini insides get added; toss it into your sauce, seeds and all.

Next, add diced tomato and some chopped oregano & basil.

I like a bit of heat to my food, so I add an entire cayenne pepper (either a fresh, chopped pepper or a crumbled, dehydrated pepper).

Then, add a splash of balsamic vinegar and a splash of Worcestershire sauce. This really makes the flavour pop!

Advertisements
Advertisements

And as expected, give the sauce a nice seasoning of salt & pepper.

Allow it to come to a simmer and cook the sauce down until it is no longer watery.

The more tomato you add, the more like a pizza sauce it will be.

Adding the zucchini insides, however, makes the sauce a bit different texture than normal pizza sauce, but hey – waste not, want not!

Advertisements
Advertisements

Once your sauce has cooked down to the desired consistency, scoop it into your zucchini boats.

Then you get to add your toppings!

I find that the toppings work best when they are added first and then the cheese added on top; when the cheese gets gooey, anything on top tends to try to slide off if the zucchini boat isn’t quite flat.

Advertisements
Advertisements

You can bake the zucchini boats at 350º for about 40 minutes (depending on their size, time will vary).

My favorite, however, is throwing them on the grill with a bit of smoke!

The flavour is amazing that way, plus if it is a hot day you aren’t heating up your house.

Advertisements
Advertisements

On a pre-heated grill, it typically takes about 40 minutes on low-to-medium heat to cook the zucchini boats.

NOTE: Be careful how high your flame is; you do not want to char the skin!

You can also use a pre-soaked wood plank to add flavour (and catch any gooey cheese that tries to drip off).

I like my Maple Grilling Plank better for this recipe than my Cedar Grilling Planks because it has a lighter flavour.

I like the zucchini to be soft enough to easily pierce with a fork, but not so soft that it is falling apart.

Some people may prefer their zucchini to be firmer so they are almost crunchy still.

That is completely up to you!

Once you remove the zucchini boat from the heat, allow it to cool for a couple minutes.

Enjoy!

I promise this will become a fast favourite!

Advertisements
Advertisements

While zucchini is usually served as a side veggie, I like serving this dish as a main course – or even the entire meal because it is so filling!

Recipe

1 large zucchini

1 large tomato

1/2 large onion

2 cloves garlic

2 tablespoons butter

1 cayenne pepper (optional)

1 tablespoon balsamic vinegar

1 teaspoon Worcestershire sauce

Basil & oregano, to taste

Salt & pepper, to taste

Advertisements
Advertisements

Directions

Cut the zucchini in half long-wise and scoop out the soft, seedy centre (reserve for later).

In a pan on medium heat, sauté garlic, diced onion, and diced tomato in butter.

Add zucchini insides along with balsamic vinegar, Worcestershire sauce, basil, and oregano.

If you want some heat, add cayenne pepper as well.

Salt & pepper to taste.

Simmer until the sauce has reduced to desired consistency.

Scoop sauce into zucchini boats, then add toppings and cheese.

Bake at 350º for about 40 minutes or grill on low-to-medium heat for about 40 minutes.

Cook time will vary depending on the size of zucchini and desired softness.

Remove from heat and allow to cool for a few minutes.

Enjoy!

Advertisements
Advertisements
Advertisements

What is your favourite zucchini recipe? Drop a comment below!

Advertisements
Advertisements

Advertisements
Advertisements

Fire Roasted Salsa

As summer draws to a close and fall sets in, my tomatoes typically begin to come ripe in the basket-full!

I use lots of the fresh tomatoes in meals like sourdough pizza, zucchini pizza boats, and chunky salsa – but there is always more than we can use without preserving the tomatoes!

Some of my favourite ways to preserve tomatoes is by making spaghetti sauce, sun dried tomatoes or this fire roasted salsa recipe!

Advertisements
Advertisements

I often will make a couple of these recipes at the same time; in the photo above, I have a batch of tomato rounds in the dehydrator and the off-cut tops will be used for the fire roasted salsa.

That keeps my sun dried tomatoes in nice rounds, while the flesh left over from cutting the woody centre of the tomato out gets blended into the salsa.

Advertisements
Advertisements

Why is fire roasted salsa better than raw salsa?

Don’t get me wrong – I love a good Pico De Gallo (chunky salsa) on my fried tacos, but fire roasted salsa is much better for preserving because of its thick, even consistency.

Roasting the ingredients before blending them not only brings out the heat in the peppers, but it also enhances the flavour in the tomatoes and reduces the water content (no one wants watery salsa!)

PRO TIP: Using beefsteak tomatoes will also help achieve the desired consistency because they naturally have lower water content than other varieties of tomatoes.

Advertisements
Advertisements
Advertisements
Advertisements

Start by lining a large baking sheet with parchment paper and cover it with a layer of chopped tomatoes and onions, whole garlic cloves, and whole jalapeños and cayenne peppers.

Drizzle it with a bit of olive oil and mix well, then sprinkle a bit of salt to taste.

You don’t want the layer of veggies to be too deep or you won’t get the ideal results of an evenly roasted salsa.

Place the baking sheet on the top rack of a pre-heated oven, set on broil.

Watch your batch to make sure it doesn’t burn and flip once the peppers start to blister and the tomatoes start to brown.

This should only take a few minutes.

Advertisements
Advertisements
Advertisements
Advertisements

Once the other side of the peppers blister as well, remove the baking sheet from the oven and allow to cool.

Next, cut the stems off the peppers and add the roasted ingredients to the food processor, along with the cumin, fresh lemon juice, and cilantro.

Blend well and give it a taste test!

The beauty of making your own salsa is that you can decide just how mild or spicy you would like it to be; if it isn’t spicy enough for your taste, just add a bit of cayenne powder to kick it up a notch.

Advertisements
Advertisements
Advertisements
Advertisements

This recipe only makes about a pint, so you will need to roast multiple pans of veggies if you want to can large quantities of fire roasted salsa to use up the bounty from your tomato harvest.

If you just want a jar of fresh, homemade salsa to enjoy you’ll find this is the perfect size batch to whip up quickly!

Start to finish, this recipe only takes 15-20 minutes to make – including the roasting time!

Advertisements
Advertisements

Recipe

2 cups tomato, chopped

1/2 white onion, chopped

3 cloves garlic, whole

3 jalapeños , whole

2 cayenne peppers, whole

2 tablespoons olive oil

1 lemon, juiced

1 tablespoon cilantro dried or 1 cup fresh

1/4 teaspoon cumin

Salt & pepper to taste

Advertisements
Advertisements

Instructions

Drizzle olive oil on tomato, onion, garlic, jalapeño, and cayenne peppers – mix well.

Roast on a lined baking sheet in a pre-heated oven set to “broil” on the top rack.

Flip vegetables when the peppers start to blister.

Remove from oven when second side of peppers blister and allow to cool.

Cut pepper stems off and place all ingredients in food processor.

Blend well.

Add cayenne powder to reach desired spiciness, if it is not hot enough for your taste.

If canning the salsa, place in sanitized jars and process in hot water bath.

Enjoy!

Serving size: 1 pint

Advertisements
Advertisements
Advertisements
Advertisements
Advertisements
Advertisements

Processing…
Success! You're on the list.
Advertisements
Advertisements
Advertisements
Advertisements

Rhubarb Steak Sauce

Fall-time in Alaska has the richest smell – one that is hard to fully describe to someone who has never experienced the amazingly overwhelming combination of a thousand scents…

The ever-present sappy smell of evergreens…

The musky scent of rotting leaves, scattered across the ground in the chill breeze…

Advertisements
Advertisements

But most of all, the rich tang of ripe cranberries wafting through the crisp air.

Of all the mountain smells, ripe cranberry is the scent I miss the most!

I have always loved picking wild berries, so much so that my mom would have an extra task on her “to do” list when I would show up unexpectedly with a bucket of berries before I was old enough to process them myself.

Advertisements
Advertisements

Cranberry meat sauce has been a traditional family recipe since before I was born – and I love it to this day!

We typically would use the sauce when we had fried moose steaks – I mean, how much more Alaskan can it get?!

BUT, living on the prairies is very different than mountain living in many ways.

We lack the wild cranberry plants and I hate buying something I grew up picking, catching or growing (buying salmon is a huge no-no!)

Advertisements
Advertisements
Plate family original cranberry meat sauce recipe
Advertisements
Advertisements

Without cranberries, I realized that rhubarb has a similar amount of tartness and decided to give this recipe a make-over to use my abundance of homegrown rhubarb!

Advertisements
Advertisements
Advertisements
Advertisements

Highbush cranberries have much more water content than lowbush cranberries (did you even know there were other kinds of cranberries than your typical Thanksgiving spread..?) or rhubarb, so I added more water to the mix than the original recipe called for.

I cooked the rhubarb on low heat while I chopped and added onions and fresh celery.

Next came the vinegar, sugar, salt, pepper, and cloves.

But I didn’t have the allspice the recipe called for on hand!

Advertisements
Advertisements

Oh! Guess what? Allspice can be mimicked by mixture of cloves, cinnamon, and nutmeg – so I simply added the cinnamon and nutmeg to get the proper taste.

I love the flavour profile some garlic adds, so I threw in a couple cloves.

And while I was changing the recipe a bit, why not add a few drops of liquid smoke?

I mean, I was substituting rhubarb for cranberries anyway – may as well go all in with my intuitive cooking style!

Advertisements
Advertisements
Advertisements
Advertisements

Once all the ingredients were combined, I brought the mixture to a low simmer and turned it down so it barely bubbled.

Slow and steady wins the race here!

Trust me! If the mixture burns on the bottom, the entire batch will have a dark, burned taste that will ruin the sauce.

Thick sauces are prone to burn easily (even if stirred regularly) if the heat is too high.

Advertisements
Advertisements

PRO TIP #1: The thicker the bottom of the sauce pan is, the less likely the batch is to burn.

Slowly cooking the sauce down to the right thickness also helps the flavours to blend and enhances the end result.

PRO TIP #2: Place the sauce in a crock pot on low heat to allow it to reduce to the desired consistency.

Once it has cooked down to the thickness of applesauce, place the meat sauce in sanitized jars and process with a hot water bath.

This recipe makes about 2 pints.

Advertisements
Advertisements

Rhubarb meat sauce pairs extremely well with wild game, lamb, and other meats with its spiced tartness; it can also be used in wine reduction sauces and baked beans.

Advertisements
Advertisements

Recipe

8 cups rhubarb, chopped

2 stalks celery, chopped

2 cloves garlic, minced

1 cup water

1 onion, chopped

1 1/3 cup white vinegar

2 2/3 cups white sugar

2 teaspoons cloves

1/4 teaspoon cinnamon

1/4 teaspoon nutmeg

2 teaspoons salt

1/2 teaspoon pepper

6 drops liquid smoke

Advertisements
Advertisements

Directions

Combine rhubarb, garlic, celery, onion, and water. Cook until soft.

Add remaining ingredients and bring to a low simmer.

Cook on low heat, making sure not to burn, until mixture has reduced to a consistency similar to apple sauce. (NOTE: this can be done in a crockpot)

Place sauce in sanitized jars and process with water bath.

Serve with wild game, lamb or other meats. Can be used in wine reduction sauces and baked beans as well.

Enjoy!

Advertisements
Advertisements

What recipe brings a “taste of home” to your cooking? Drop a comment below!

Advertisements
Advertisements

Processing…
Success! You're on the list.
Advertisements
Advertisements
Advertisements
Advertisements

Spicy Shrimp Taco Lettuce Wraps (with crema sauce)

Tacos of any kind are always a hit, and with summer weather this light, tasty taco recipe is a favourite! (Not to mention healthy!)

The mixture of creamy avocado, crunchy cabbage, and zesty shrimp are an explosion of flavour, texture, and color!

They are so fast and easy to make that it begs the question why I don’t make them more often!

Advertisements
Advertisements

One of the other perks is the minimal heat that it adds to the house during a sweltering, summer day.

Start by thawing your frozen raw shrimp in cold water; this method helps thaw the shrimp more quickly than just setting it out to thaw and prevents it from cooking if you were to microwave it or use hot water.

If you have fresh raw shrimp, it will be that much better!

NOTE: pre-cooked shrimp will not have the ideal flavour or texture, so try to get raw shrimp if at all possible.

Advertisements
Advertisements

Next, collect all your fresh veggies; cabbage, red onion, avocado, jalapeño, lemon, lime and, of course, the butter lettuce to wrap it all up!

Advertisements
Advertisements

Slice the avocado, jalapeño, red onion, and cabbage into thin slices.

A slightly firmer avocado makes them easier to slice and keep the pieces together, rather than accidentally mashing them in the process.

Prepare the crema sauce by adding 1/4 cup sour cream to a bowl.

Zest 1/4 of the lime, then juice 1/4 of the lime into the same bowl.

Add salt & pepper to taste.

The crema sauce really makes all the flavours pop, so don’t skip this step!

Advertisements
Advertisements
Advertisements
Advertisements

By now your shrimp should be thawed; devein and shell them if they are not already prepared this way.

Place in a bowl and juice 1/4 fresh lemon, then add the cayenne, cumin, and paprika.

Mix well, making sure the spices are rubbed into the shrimp well (I use my hands).

Allow to sit for about 5 minutes so the shrimp absorbs as much flavour as possible.

Advertisements
Advertisements
Advertisements
Advertisements

Fry in a pre-heated pan on high heat with butter until just cooked.

You do not want to overcook shrimp; it makes them chewy.

You can tell they are ready to be flipped when they start turning pink on the bottom.

Once the second side turns pink and the center is white (and not translucent) you know they are ready.

Advertisements
Advertisements

Plate the lettuce, garnishing it with the cabbage, red onion, jalapeño, and sliced avocado.

A little bit goes a long way, so don’t overdo the toppings.

Finally, add the shrimp and drizzle with crema sauce.

If you are a cilantro lover, by all means sprinkle a few leaves on top!

This will be the life of the party next time you host dinner!

It pairs well with chips and chunky salsa and guacamole dips on the side.

Advertisements
Advertisements

Advertisements
Advertisements

Recipe

24 medium sized raw shrimp

1/4 teaspoon cayenne pepper

1/4 teaspoon smoked paprika

1/4 teaspoon cumin

1/4 lemon, juiced

8 leaves butter lettuce

Shredded cabbage, to taste

Thinly sliced red onion, to taste

Thinly sliced jalapeño, to taste

1/2 avocado, thinly sliced

Advertisements

Crema Sauce

1/4 cup sour cream

1/4 lime, juiced

1/4 lime zest

Advertisements

Directions

Devein and shell thawed, raw shrimp and combine with cayenne pepper, smoked paprika, cumin, and lemon juice.

Marinate for 5 minutes.

Thinly slice cabbage, red onion, jalapeño, and avocado.

Make crema sauce by combining sour cream, lime, and lime zest.

Fry shrimp in pre-heated pan on high heat with butter. Do not overcook!

Plate the lettuce leaves, then garnishing with cabbage, red onion, jalapeño, and avocado. Place 3 shrimp on each taco and drizzle with crema sauce.

Makes 8 tacos

Enjoy!

Advertisements
Advertisements

If you enjoyed this recipe, don’t forget to subscribe for all the latest yumminess!

Advertisements

Processing…
Success! You're on the list.
Advertisements
Advertisements
Advertisements
Advertisements

Sourdough Hamburger Buns

Barbecue season is upon us!

Who doesn’t love a classic hamburger with chips, fries or potato salad on a hot summer day?

Advertisements
Advertisements

Of course you can go with the quick-and-easy store-bought option for the buns and patties, but the homemade version is definitely the gourmet choice!

Sourdough hamburger buns quickly became a favourite when I started on my baking journey… They have so much more flavour, wonderful texture, and I know exactly what ingredients have gone into the food I am eating!

As with all sourdough recipes, it does take a little more planning ahead to make sure they have sufficient time to rise (and develop that nice, tangy sourdough flavour).

Advertisements
Advertisements

But, as I often say, it is all worth it for the superior quality you get by making it yourself!

If you are new to sourdough baking and don’t know how to make your own sourdough starter, check out this easy DIY tutorial for sourdough starter.

The first step in this sourdough hamburger bun recipe is to combine the sourdough starter, water, and 1/2 cup of the flour.

Advertisements
Advertisements

Cover with plastic wrap and allow to rise for 30-60 minutes.

Next, melt the butter and slightly heat the milk to about room temperature and add to the bowl.

Add the sugar, salt, and egg. Combine well.

Mix the remaining flour a little at a time; if you are using a mixer, the dough should begin to clear the bowl when it is the right consistency.

Place in a well oiled bowl and turn over so the dough is oiled on both sides, then cover with plastic wrap and allow to rise in a warm place for 30 minutes.

Advertisements
Advertisements

When the timer goes off, fold the dough into the centre from one side, then repeat with the remaining 3 sides.

Turn the dough upside down, cover it again, and allow to rise in a warm area for another 30 minutes.

Repeat this process and leave for 60 minutes.

Advertisements
Advertisements

Finally, the process is repeated one more time and another 60 minute rise time.

The dough should be a very elastic consistency at this point and smell nice and tangy.

Cut the dough into 8 equal sized pieces and roll into rounds, then squish them into roughly the diameter you would like for your hamburger buns.

Place on a baking tray lined with parchment paper, leaving enough room between the bun dough to allow them to rise without sticking to each other.

At this point, I add my sesame seeds and slightly press them into the bun; I find this helps them stick better than if they are added on top of the egg wash after the buns have risen.

Cover with a tea towel and allow to rise for 60 minutes or until they have doubled in size.

Brush with egg wash; this gives the hamburger buns a beautiful, golden color when they have finished baking.

Place into the pre-heated oven at 400º F for 10-15 minutes or until golden brown.

Advertisements
Advertisements
Advertisements
Advertisements

Place on a cooling rack and cover with a tea towel until cool.

Advertisements
Advertisements

I personally love to toast my hamburger buns in the oven before serving; to do this, I butter them well, then place on a baking sheet open side up – and stand and watch them the entire time they broil!

There have been too many times in my life that multi-tasking has caused burned buns… or garlic toast…

Trust me on this! The few minutes it takes them to broil is well worth keeping a diligent eye on them.

I find that broiling them, rather than grilling or placing them into a frying pan gives more even browning and retains more of the butter (because they are face up, rather than face down).

Advertisements
Advertisements

Next, add your topping of choice and enjoy!

Advertisements
Advertisements

Recipe

1 cup sourdough starter

1/4 cup warm water

3 cups white flour, divided

3/4 cup warm milk

2 tablespoons butter, melted

2 tablespoons white sugar

1 1/2 teaspoons salt

1 egg

Egg wash (1 egg + 1/4 teaspoon water, beaten)

Sesame seeds

Advertisements
Advertisements

Directions

Combine sourdough starter, 1/2 cup flour, and water.

Cover and let sit in a warm location for 30-60 minutes.

Melt butter and warm the milk to room temperature. Add to bowl with the sourdough mixture along with egg, sugar, and salt and mix well.

Add remaining flour a little at a time, mixing until the dough develops an elastic consistency. If you are using a mixer, the dough should begin to clear the bowl.

Place dough in a well-oiled bowl and flip, so the dough is oiled on all sides.

Cover with plastic wrap and allow to rise for 30 minutes.

Fold the dough into itself from 4 sides, turn over the dough over, and cover again.

Allow to rise for another 30 minutes.

Repeat the folding process and allow to rise for 60 minutes.

Finally, fold once more and allow to rise for another 60 minutes.

Place dough onto lightly floured surface and cut into 8 equal sized pieces.

Roll each piece into a ball with your hand, then squish into approximately the diameter you would like for your hamburger buns.

Place onto a baking sheet lined with parchment paper.

Sprinkle sesame seeds on top, then cover with a tea towel and allow to rise for 60 minutes or until doubled in size.

Brush with egg wash.

Place in pre-heated oven at 400º F for 10-15 minutes or until golden brown.

Move to cooling rack, cover with a tea towel, and allow to cool.

Enjoy!

Advertisements
Advertisements
Advertisements
Advertisements
Advertisements
Advertisements

Processing…
Success! You're on the list.
Advertisements
Advertisements
Advertisements
Advertisements

Meatloaf

This isn’t your typical “mystery meatloaf” with the bad rap – no random left-overs here!

I find that meatloaf is an under-appreciated dish and can be so tasty when done right!

The rare times that I make meatloaf, we have little-to-no leftovers (which is always a good sign).

Advertisements
Advertisements
Advertisements
Advertisements

While I still think taste is the #1 goal here, getting the right texture is a close second.

You don’t want mushy meatloaf – just as much as you don’t want it to be tough and overworked.

I add the ground beef to my mixing bowl and make a well in the middle, then add the bread crumbs and milk and let them sit until the bread crumbs have absorbed all the milk.

Advertisements
Advertisements

This helps keep everything tender.

Next, I add the egg to the bowl while I sauté the finely chopped onion, bell pepper, and garlic until soft.

(Allow to cool before adding to the mixing bowl)

Advertisements
Advertisements

I love food with a bit of heat, so I add red pepper flakes for that extra kick.

Oregano, Worcestershire sauce, salt, and pepper season it nicely and a bit of Miracle Whip (or Hellmans Mayo for you die hard mayo fans out there) helps keep the meatloaf moist.

Combine all ingredients gently, making sure not to overwork the mixture (overworking will make it tough).

Advertisements
Advertisements

Make a raised edge in some tin foil so any drippings will be contained on the foil.

This makes clean-up afterward so much easier!

Oil the tin foil to avoid sticking.

Shape the mixture into a loaf and place in the pre-heated oven at 375º for 45 minutes or until internal temperature reaches 160º and is golden brown (I often bake until it is a bit crispier than that).

Many people like topping their meatloaf with ketchup and brown sugar, allowing it to cook until set up.

I personally skip this step as I find my recipe is loaded with flavour and doesn’t need the extra boost.

Advertisements
Advertisements

Meatloaf pairs well with scalloped potatoes and some greens.

Advertisements

Recipe

2 pounds ground beef

1/2 cup bread crumbs

1/4 cup milk

1 egg

1/4 cup Miracle Whip

1/2 large onion

1/2 bell pepper

3 cloves garlic

1 tablespoon Worcestershire sauce

1 tablespoon red pepper flakes

2 teaspoons oregano

1/2 teaspoon salt

1/2 teaspoon pepper

Advertisements
Advertisements

Instructions:

Place ground beef in a large mixing bowl and create a hollow, placing the bread crumbs and milk inside.

Allow bread crumbs to absorb milk fully and add egg.

Sauté finely chopped onion, bell pepper, and minced garlic until soft.

Allow to cool before adding to the mixing bowl.

Add remaining ingredients and gently combine until it is an even consistency.

Do not over work!

Place on an oiled, foil-lined baking sheet.

Bake at 375º for 45 minutes or until internal temperature reaches 160º and is golden brown.

Enjoy!

(Serves 4)

Advertisements
Advertisements

Advertisements
Advertisements

Advertisements

Processing…
Success! You're on the list.
Advertisements
Advertisements
Advertisements
Advertisements

Scalloped Potatoes

Scalloped potatoes are a rare treat in our home, simply because I get into a rut and end up making the same 5 or 6 meals on repeat.

Who else has been there?

It can be so frustrating trying to break out of that cycle and think up something new and exciting to make for dinner!

And that is where scalloped potatoes come in to save the day!

Advertisements
Advertisements
Advertisements
Advertisements

Yes, they take a little longer to make than those easy meals-on-repeat, but it is so worth it for a fabulous dish that the whole family loves.

I tend to triple or even quadruple this recipe so I can freeze extra trays for an easy side dish with the prep time already out of the way.

Scalloped potatoes go well with so many meals, but meatloaf has been my go-to dish to serve it with (no, my recipe is not the notorious “MYSTERY” meatloaf!).

Advertisements
Advertisements
Advertisements
Advertisements

So let’s get down to it!

First, chop the onions, mushrooms, and garlic and sauté in butter until soft.

Add salt and pepper to taste.

Meanwhile, slice the potatoes into thin rounds of equal thickness.

Advertisements
Advertisements

Once the onions are soft and translucent, add the flour to the pot and mix well with the buttery mixture.

Allow it to brown, stirring occasionally so it doesn’t burn.

This step adds so much flavour and is the “secrete” to good sauces and gravy.

(I remember a family friend being impressed that I knew to brown my flour when I was only 14 years old)

Next, add the cream of mushroom soup and milk, stirring out any lumps.

Bring to a boil and remove from heat.

Advertisements
Advertisements
Advertisements
Advertisements

Layer the sliced potatoes in a greased pan and spoon the cream sauce over the potatoes, one layer at a time.

Typically this will take 4-5 layers in a standard 9×9 pan.

If you want a faster, easier option you can cube the potatoes rather than slice them and simply mix everything together in the baking pan.

I find that I am much faster at cubing potatoes than slicing them and then I can skip the layering step, however it does not get the traditional scalloped potatoes look.

Advertisements
Advertisements
Advertisements
Advertisements

Once you have layered all the ingredients, cover with tin foil and place in the pre-heated oven for an hour at 350º or until fork tender.

Remove the foil and allow to bake for another 5-10 minutes to brown the top.

Serve with your favourite main dish and veggies – and enjoy!

Some optional ingredients you can add are cheese on top, bacon bits mixed into the cream sauce or garnishing with green onions.

Advertisements
Advertisements
Advertisements
Advertisements

Recipe

4 medium potatoes, sliced

2 cups milk

1 large onion, finely chopped

2 cups mushrooms, chopped

3 cloves garlic, minced

3 tablespoons butter

2 tablespoons flour

1 teaspoon salt

1/4 teaspoon pepper

1 can cream of mushroom soup

Advertisements
Advertisements

Optional Ingredients

Cheddar cheese

Bacon bits

Green onions

Advertisements
Advertisements

Instructions

Slice potatoes into thin rounds of even thickness.

Sauté onions, mushrooms, and garlic in a large sauce pan with butter until soft.

Add salt, pepper, and flour and allow to brown before adding the cream of mushroom soup and milk, stirring out any lumps.

Bring to a boil and remove from heat.

Advertisements
Advertisements

Layer potatoes in a 9×9 greased baking pan and cover with sauce, then layer again and cover with sauce.

Repeat until all potatoes have been added and cover with a final layer of sauce.

Cover with tin foil and bake at 350º for 1 hour or until fork tender.

Remove foil and bake for another 5-10 minutes or until golden brown.

Enjoy!

Advertisements
Advertisements
Advertisements

Processing…
Success! You're on the list.
Advertisements
Advertisements
Advertisements
Advertisements

Round Steak and Gravy

Round Steak and Gravy has been a family favourite my whole life.

In fact, this was actually the very first meal I made from start to finish, all by myself at 12 years of age!

It was also our “featured special” for Kid’s Café when we would put on a date night for Mom and Dad, complete with candles and piano music from our recent lessons.

Advertisements
Advertisements
Advertisements
Advertisements

As with so many of my recipes, I have added or changed some of the ingredients over the years.

This recipe is hearty, packed with flavour, and is a “set it and forget it” crockpot champ!

Using cubed round steak, flour and brown the meat on high heat in a pan with oil.

Add salt and pepper as it cooks.

Advertisements
Advertisements

Note: you only want to brown the outside, not thoroughly cook the meat at this point; this helps add flavour while retaining the tenderness.

Once the cubes are golden brown on all sides, add to the crockpot with cream of mushroom soup and turn to low heat.

In the same frying pan, cook the chopped onion, mushrooms, and minced garlic until tender.

Advertisements
Advertisements
Advertisements
Advertisements

Add to the crock pot and mix well.

Leave on low heat for 3-4 hours.

At this point, the meat should be tender and flake apart.

Serve on top of boiled potatoes with a side of greens and you’re set!

Advertisements
Advertisements
Advertisements
Advertisements

Recipe

1 pound round steak, cubed

1/4 cup flour (or as needed to coat meat)

1 can cream of mushroom soup

1/2 large onion, chopped

2 cups mushrooms, chopped

3 cloves garlic, diced

Salt

Pepper

Advertisements
Advertisements

Instructions:

Coat cubed round steak in flour and fry in a pan with oil on high heat until golden brown on all sides.

Sprinkle with salt and pepper.

Place in crock pot with cream of mushroom soup on low heat.

In the same pan, cook onions, mushrooms, and garlic until soft.

Add to crock pot and mix well.

Cook on low for 3-4 hours.

Serve on boiled potatoes.

Enjoy!

(Serves 2)

Advertisements

Processing…
Success! You're on the list.
Advertisements
Advertisements
Advertisements
Advertisements

Chunky Salsa

Homemade salsa is so much better than store-bought and is quick and easy to make.

Whether serving it as a side, garnish or a stand-alone chip dip, chunky salsa is a winner.

Advertisements
Advertisements
Advertisements
Advertisements

Chop the tomatoes, jalapeño, onion, and cilantro finely.

Some people prefer to remove the seeds from the jalapeños, however I enjoy the extra crunch and heat they add.

Mix all ingredients well and sprinkle with salt, pepper, cayenne pepper, and sugar.

Advertisements
Advertisements

Yes, sugar!

I know that seems a little odd for a dish that is supposed to be spicy, but it makes the flavours pop!

Advertisements
Advertisements

Zest 1/4 of a lime and squeeze the lime juice over the salsa.

Serve as a chip dip along side homemade guacamole or pair with chicken fajita taquitos or fried tacos.

Advertisements
Advertisements

Recipe

1 large roma tomato

1/4 red onion

1 large jalapeño

1 bunch of cilantro

1/4 lime zest

1/4 lime juice

Salt

Pepper

Cayenne pepper

1/4 teaspoon sugar

Advertisements
Advertisements

Directions

Finely chop all vegetables and combine.

Zest 1/4 lime, then squeeze the juice into the salsa.

Sprinkle with salt, pepper, and cayenne to taste.

Add sugar and mix well.

Enjoy!

(Serves 2)

Advertisements
Advertisements

Advertisements

Processing…
Success! You're on the list.
Advertisements
Advertisements
Advertisements
Advertisements
%d bloggers like this: