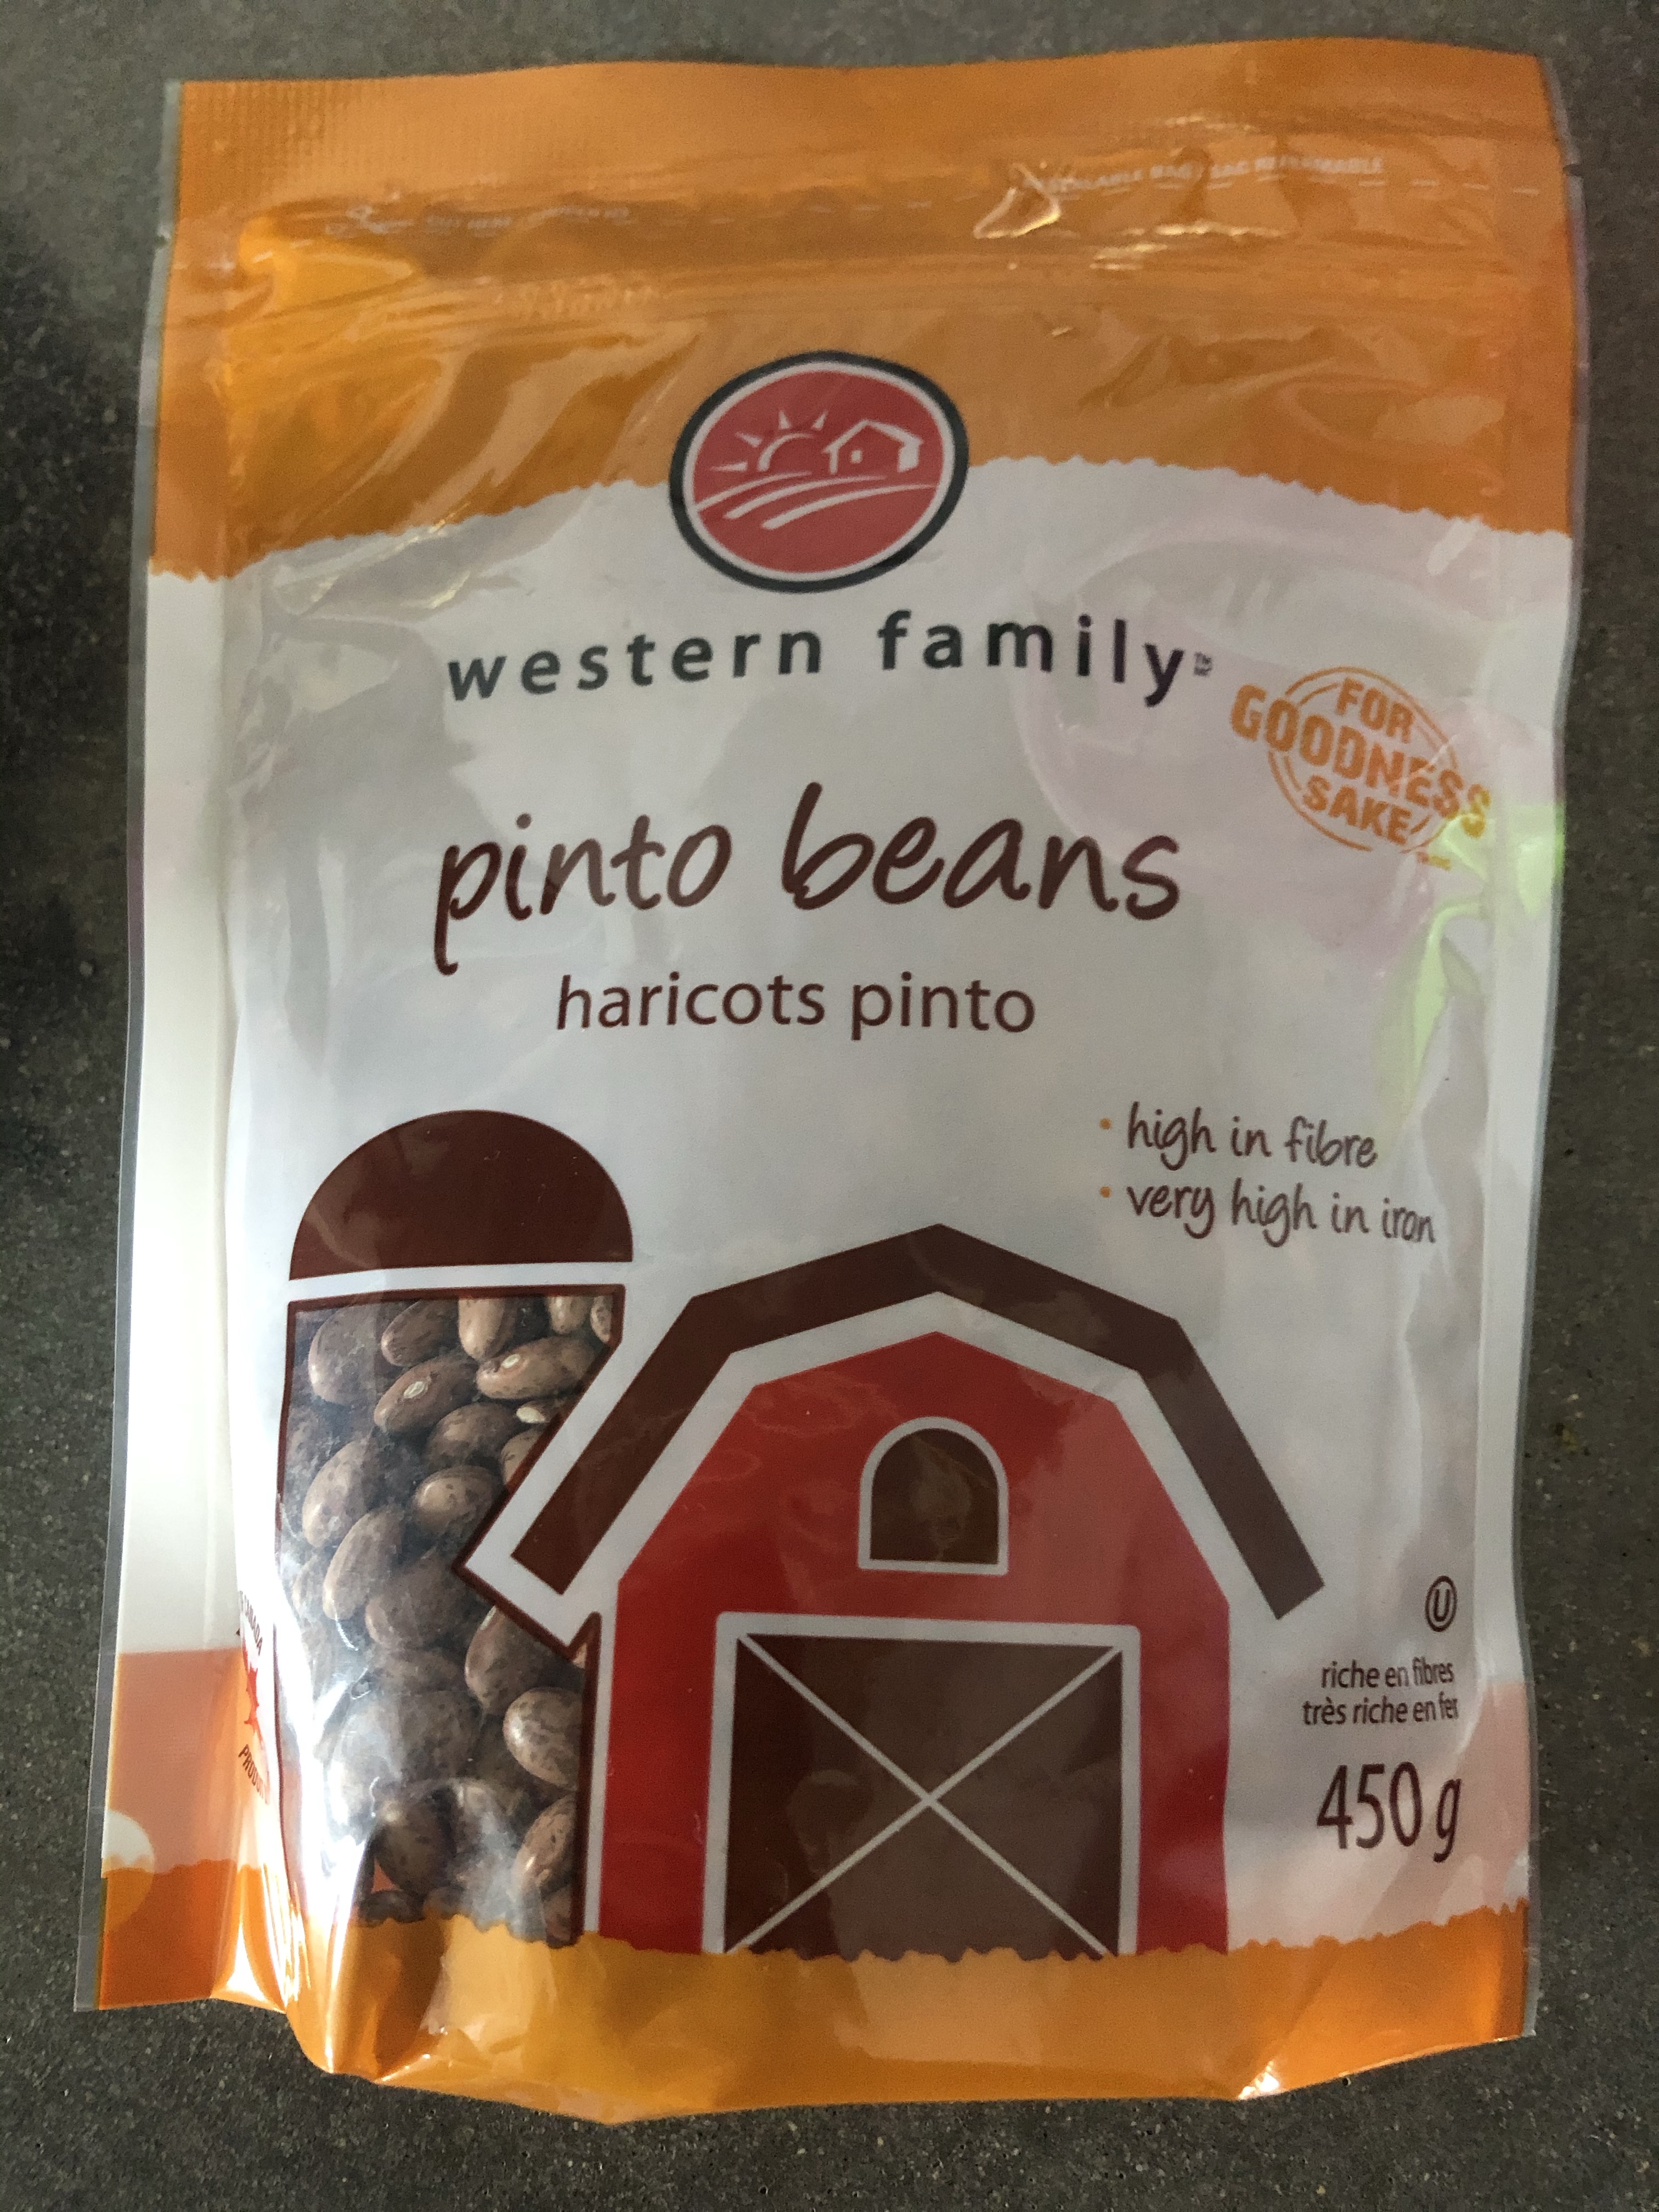
I personally find homemade refried beans much tastier than canned stuff you can buy from the store.
In addition, making my own ends up being more cost effective. A small can of beans is $2-$3 each, whereas a 450 gram bag of dried beans is about $3 and makes 4 times as much!
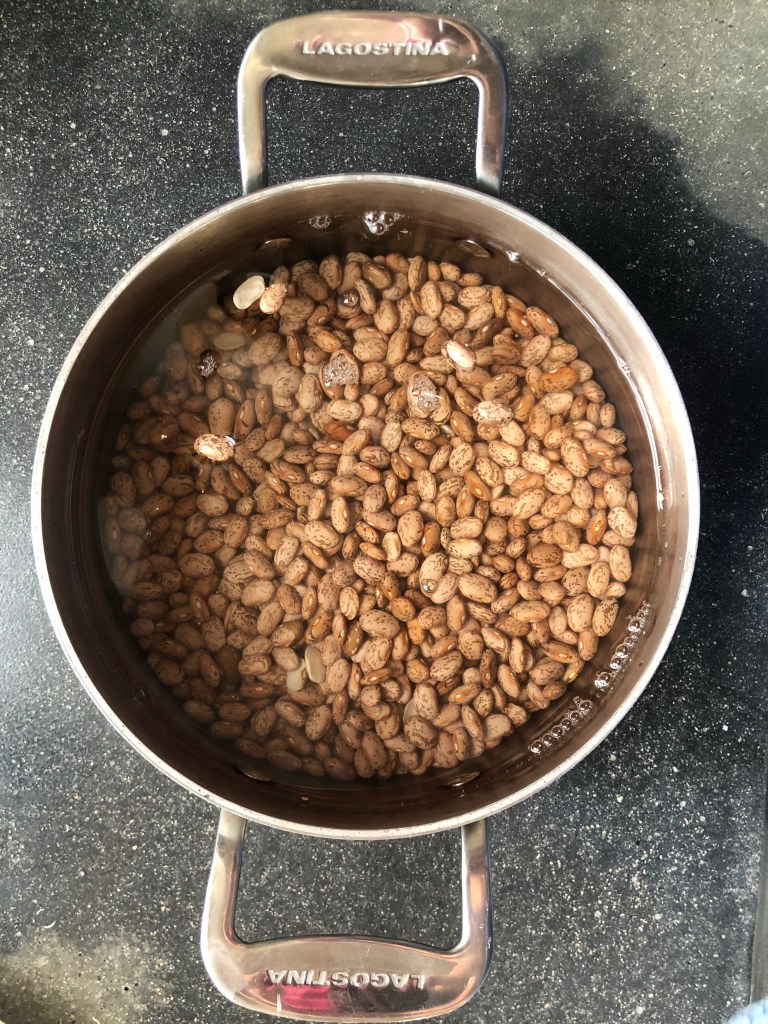
First, soak the Pinto Beans in cool water overnight. This helps cut down on the cook time once you get is on the stove.
Advertisements
Advertisements
It takes all of 2 minutes to start the beans soaking, and just requires a little planning ahead.
The next day, top up your water level and bring the spot to a boil. Reduce heat to a simmer for 2-3 hours or until the beans are soft.
I do not add salt while they cook during the first stage as I find it easier to taste test once the beans have been mashed.
Advertisements
Advertisements
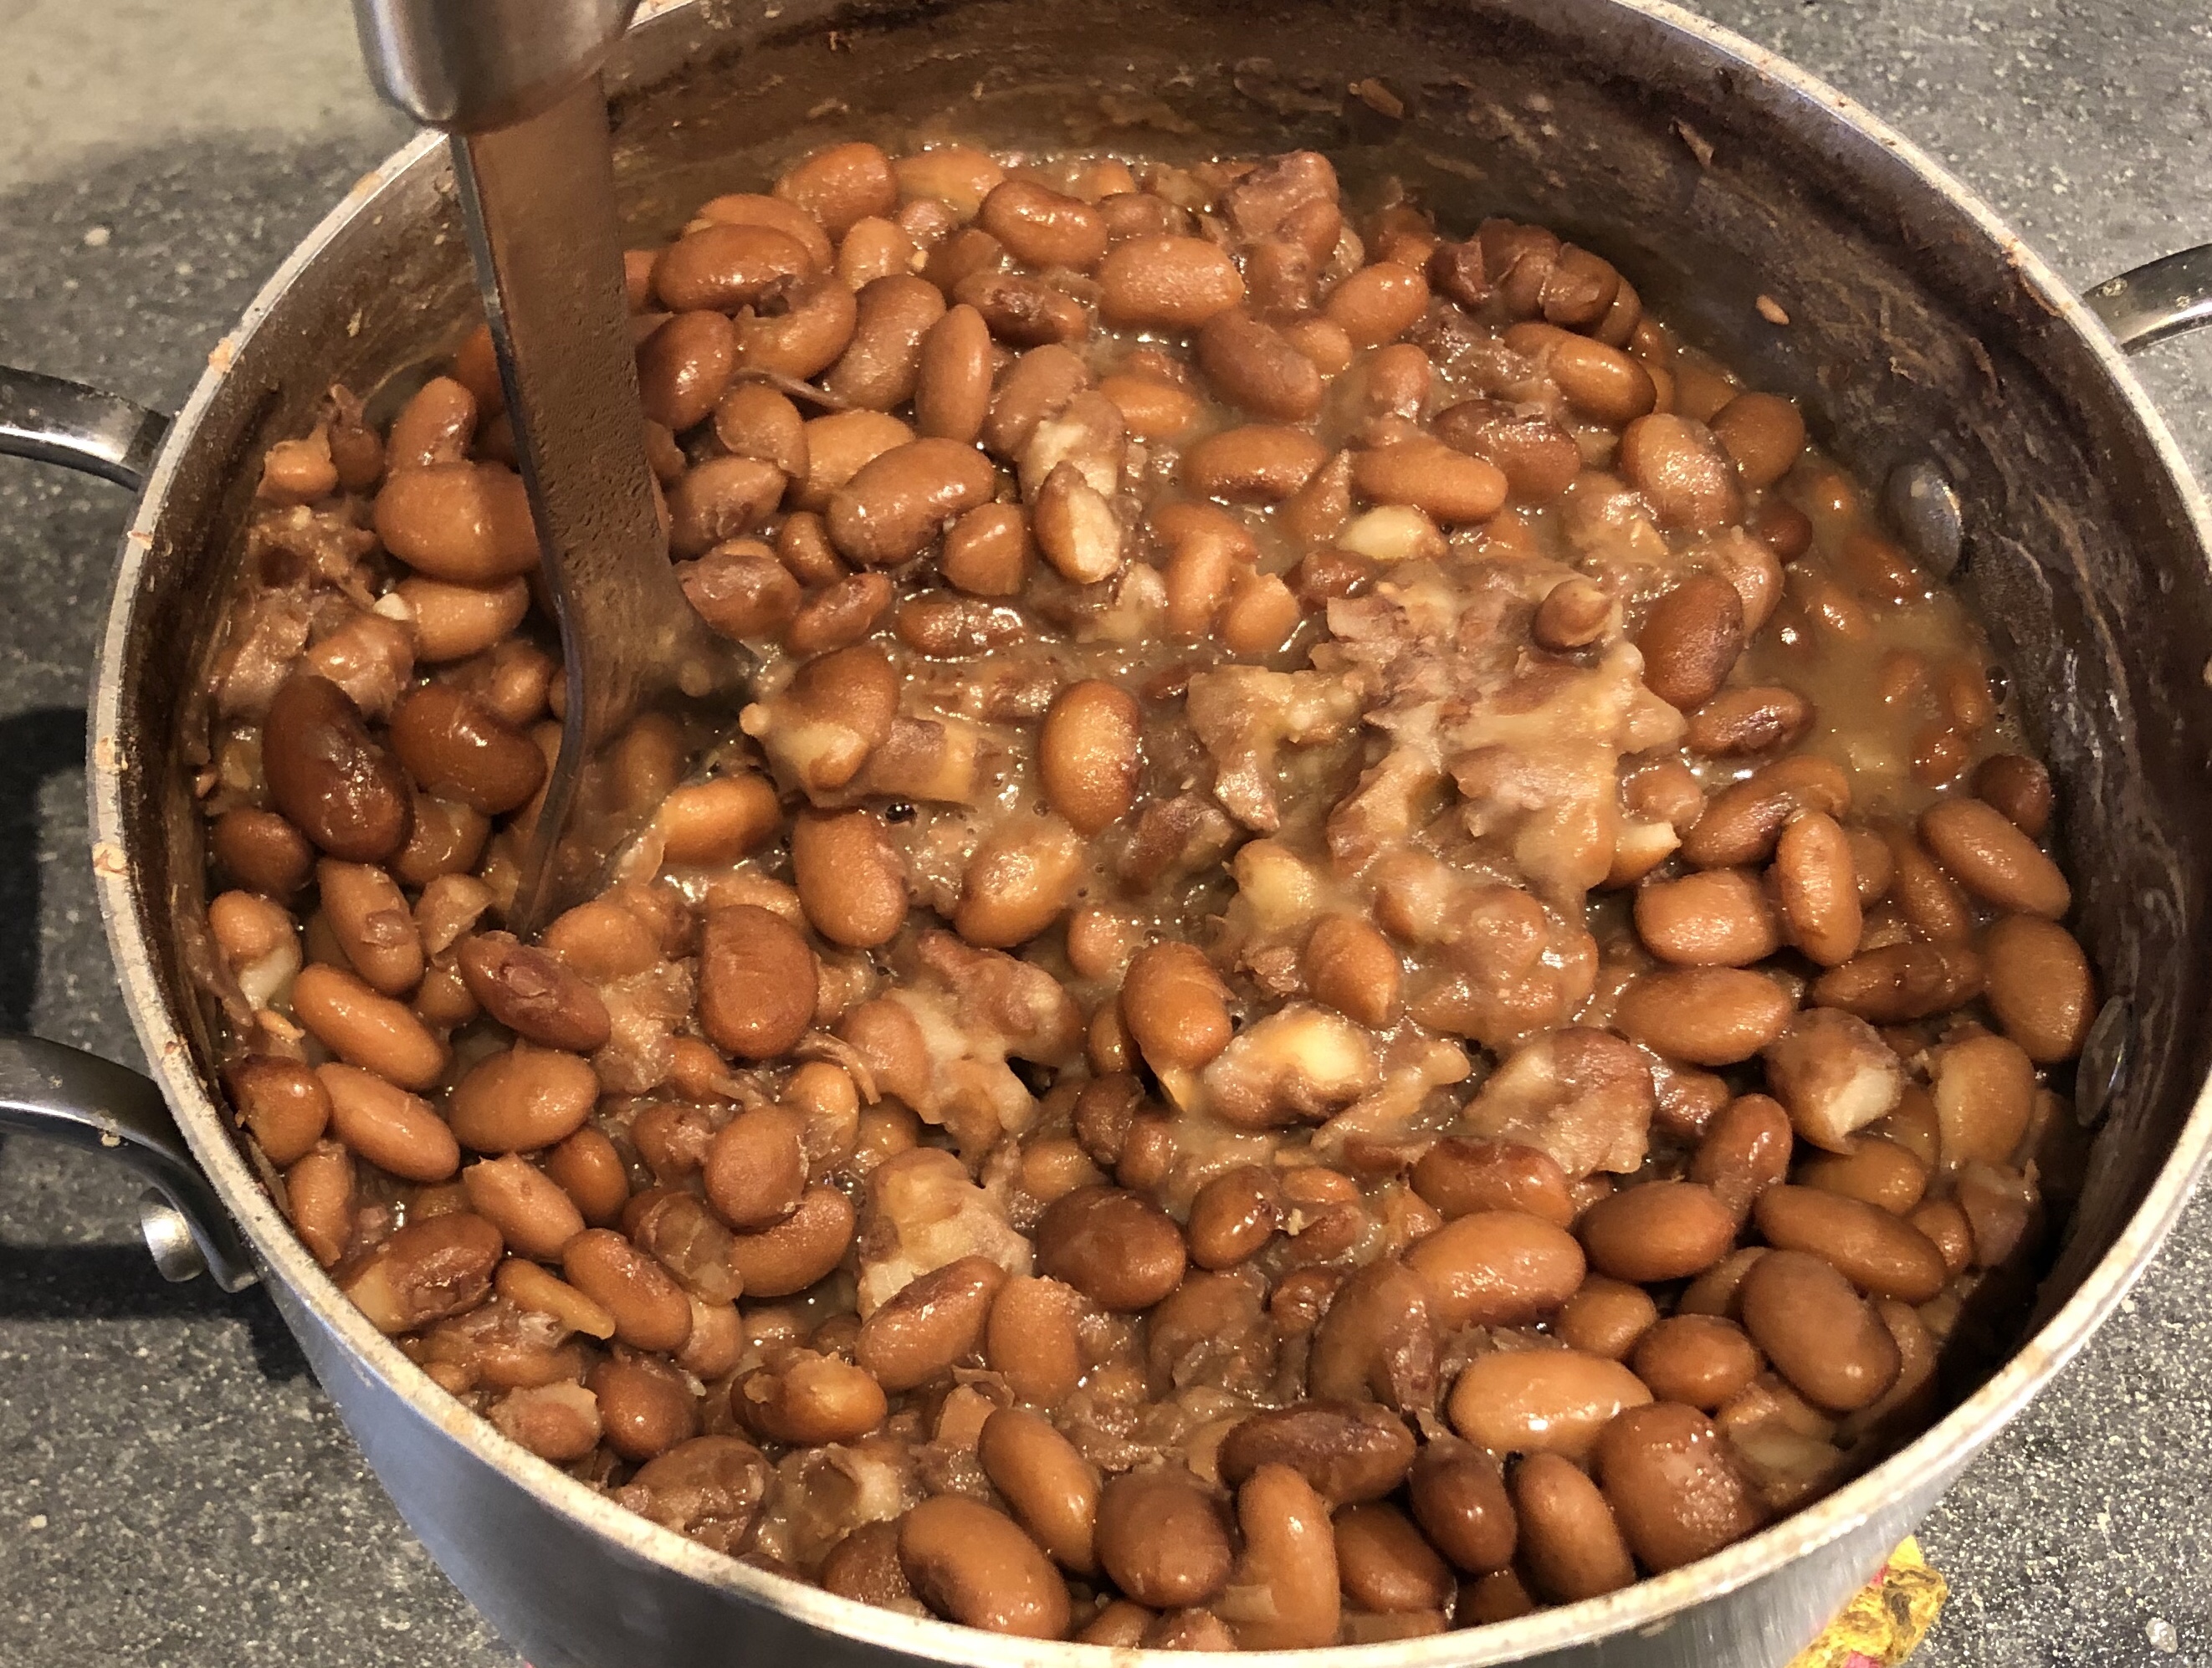
Drain the water and rinse the beans. Add 2 cups of fresh water and bring back to on a boil. At this point, turn the heat to low and mash the beans, adding about a teaspoon of salt.
Advertisements
Advertisements
You can either leave the beans plain or you can add 1/4 teaspoon cumin, 1/4 teaspoon paprika, and 1/4 teaspoon cayenne to add a bit of extra kick.
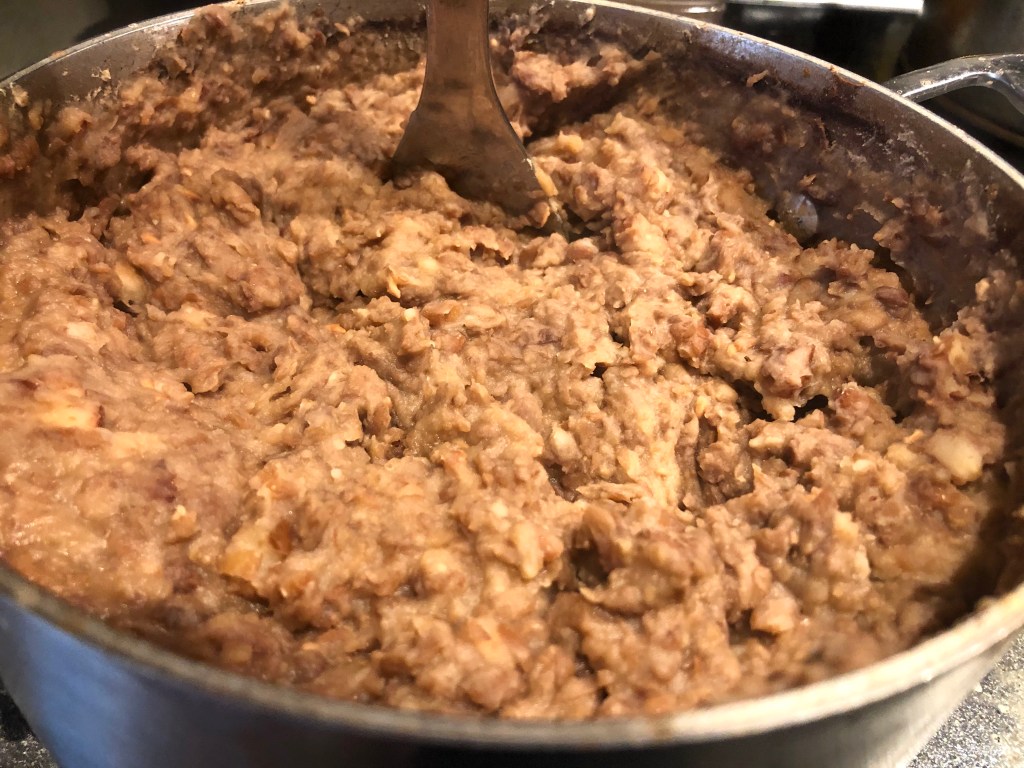
Cool on low heat until it is a consistent mixture and you do not have any hard lumps left.
Few things bring back happy childhood memories like good ol’ fashion apple pie.
For me, the first memory that comes to mind is coming home sopping wet, smelling like snow machine exhaust after a day out on the trails with my family… and walking through the door to the smell of freshly baked apple pie!
After dishing up, we would sit down to play a board game as a family, more often than not it was Solar Quest – a space version of Monopoly (I always tried getting the monopoly on Jupiter’s moons).
Advertisements
Advertisements
I used to help my mom make this homemade recipe as a kid and it is still a favourite treat.
Advertisements
Advertisements
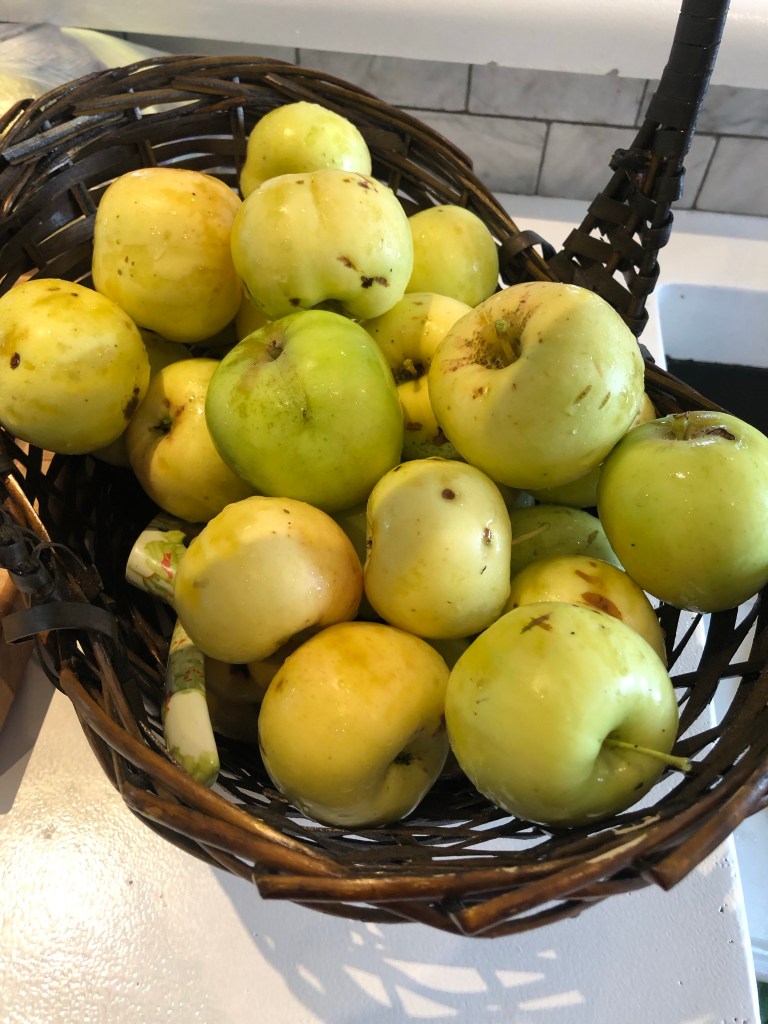
Last summer our apple tree produced enough apples to use home grown apples for the first time! I was elated!
Homegrown apples. Make sure to remove any damaged areas.
If I use store bought apples, I go with Granny Smith because their tartness adds so much flavour and their crispness is good for baking.
Advertisements
Advertisements
Peel and core the apples, then cut into dice sized cubes.
Add the sugar, flour, nutmeg, cinnamon and apples to a large bowl and combine.
It will be fairly dry at first, but after it sits for a few minutes the sugars draw some moisture out of the apples, making a nice sticky texture.
Advertisements
Advertisements
Next, make the pie crust.
Cut the flour and crisco together using a pastry blender.
In a separate bowl, mix the egg, vinegar, and water together well.
Once well mixed, add to the flour and crisco. Do not over-work the dough.
Divide dough into 4 equal sizes and roll out into rounds on a floured surface.
Advertisements
Advertisements
Place one crust into the bottom of each pie pan, making sure the edges are long enough to come just over the lip of the pie pan about 1/2 an inch.
Add the apple filling, 3 Tablespoons of milk, and 2 Tablespoons of butter to each pie pan.
Moisten the edge of the crust. This will help it bond to the top crust.
Next, place to top crust over the pie and roll the edge to seal. You can get creative with fancy crust edge designs if you want!
Advertisements
Advertisements
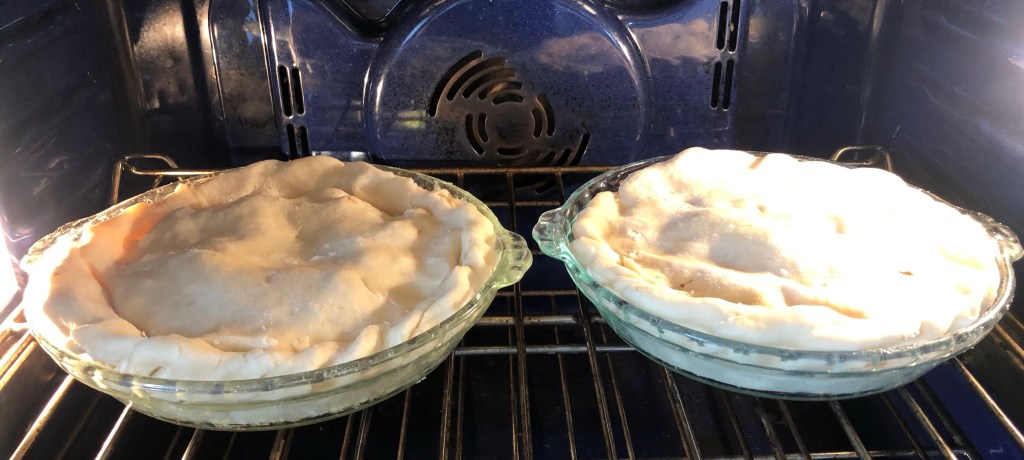
Ready to bake!
Add a few slits in the top crust to vent and prevent the filling from bubbling out the sides. May as well it make a pretty design while you’re at it!
Advertisements
Advertisements
Dust the top with cinnamon sugar for the finishing touch.
Place into pre-heated oven at 400° for 40-50 minutes or until golden brown.
Let cool for a few minutes.
Serve with ice cream and enjoy!
Advertisements
Advertisements
Recipe
Pie filling
8 large apples
2 cups white sugar
1 cup brown sugar
1 cup white flour
2 teaspoons cinnamon
1/2 teaspoon nutmeg
2 tablespoons butter, reserved
3 tablespoons milk, reserved
Advertisements
Advertisements
Crust
1 1/4 cup crisco
3 cups white flour
1 egg
1 tablespoon white vinegar
5 tablespoons cold water
Bake at 400° for 40-50 minutes or until golden brown.
Have you made apple pie from scratch before? I would love to hear about your experience in the comments below!
Advertisements
Processing…
Success! You're on the list.
Whoops! There was an error and we couldn't process your subscription. Please reload the page and try again.
You can never go wrong with tacos! I mean, we even have a day of the week dedicated to their deliciousness!
My family’s taco recipe is a little different than what you traditionally think of when you are planning Taco Tuesday (or TacoS Tuesday, as my niece calls it).
Advertisements
Advertisements
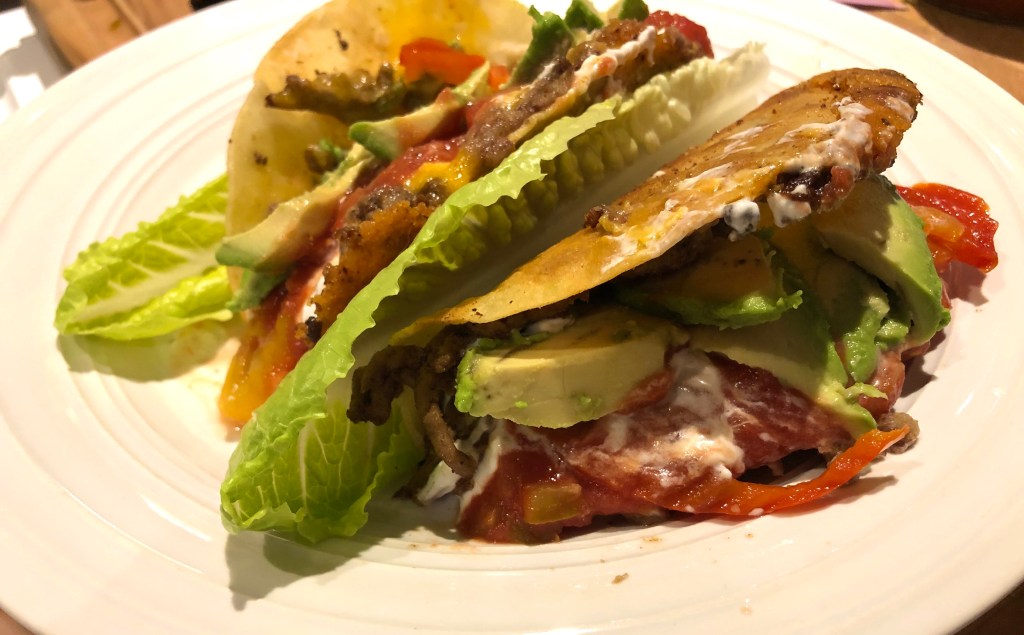
We actually fry our tacos, which makes the cheese super gooey and extra delicious!
First, you’ll need to fry the raw ground beef. I often will fry a large package of the ground beef all at once so I have extra meat to freeze for next time I am making tacos.
(I haven’t tried using ground turkey or pork, but I imagine those meats would work quite well, too!)
As you cook the meat, add salt & pepper to taste as well as cumin, paprika, cayenne pepper, and a splash of lemon juice. If you have taco seasoning, you can use that instead; I just keep all the individual spices on hand and tend to make the spice mix myself.
Make sure to break the ground meat into small chunks as it cooks.
Once it is fully cooked so there is no more pink showing, drain any excess fat off. I like to place the pan back on the heat again and fry the meat until it is slightly crispy, but that’s up to you.
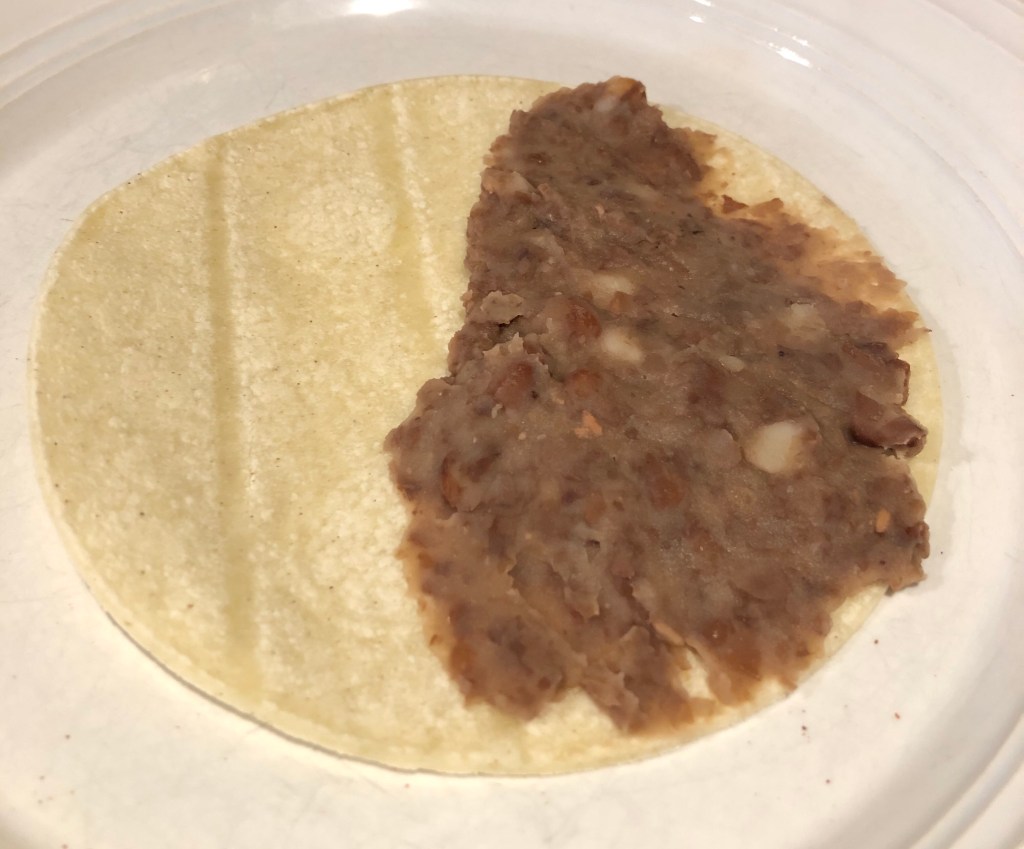
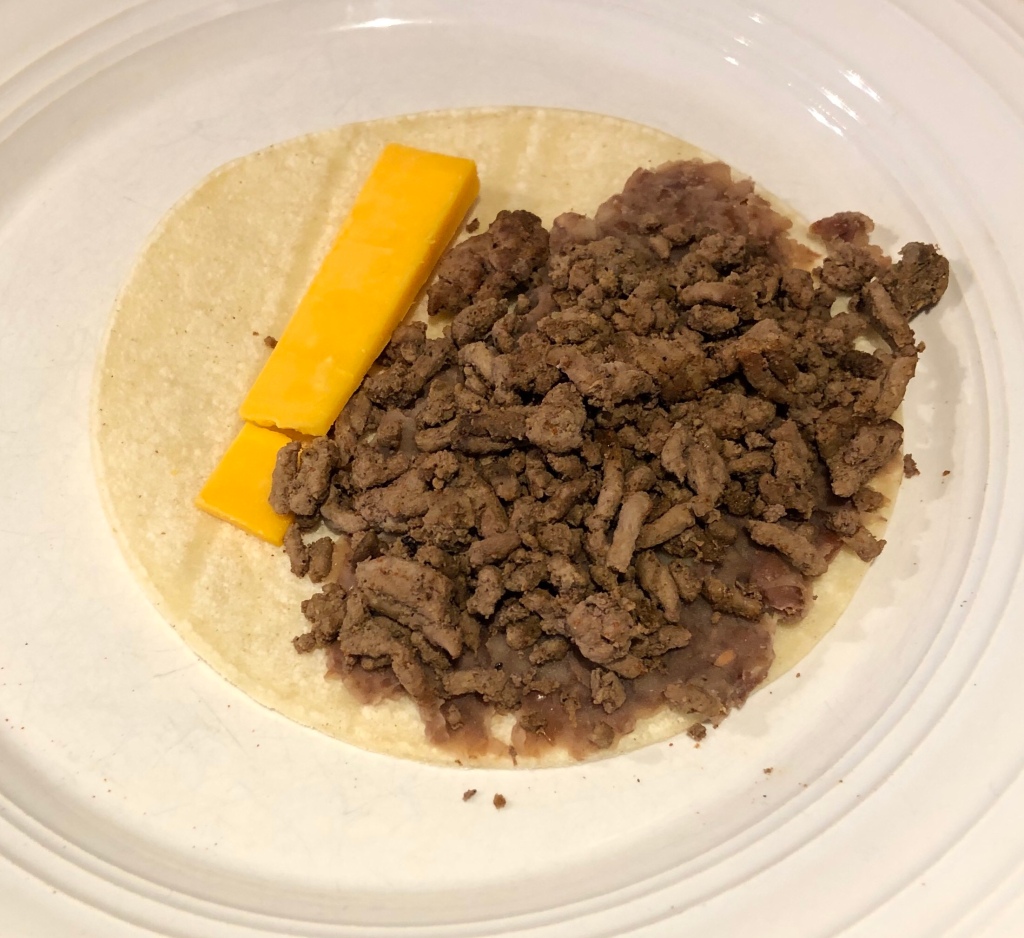
Next, spread refried beans on half the corn tortilla. CLICK HERE for the refried beans recipe.(I find making refried beans from scratch is WAY more cost effective than buying the canned version. And it really doesn’t take a ton of time as long as you plan ahead)
Then add your ground beef on top of the beans and then a slice of cheese.
The amount of meat you add is totally up to you! If you have carnivores in your house, you may want to add as much meat as you think will stay on the taco.
If you are on a tight budget, trying to make ends meet, you can keep this meal filling without breaking the bank by adding more beans and less of the meat.
Advertisements
Advertisements
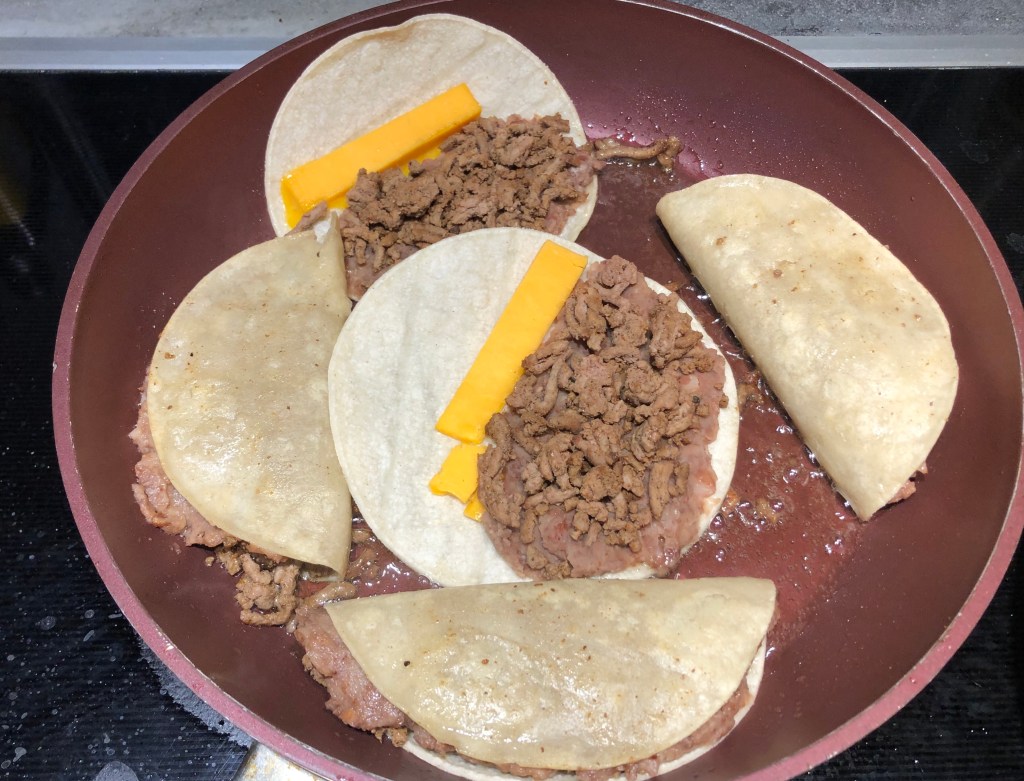
Fry the taco, folded over, in a pre-heated pan with oil. Don’t add too much oil; you just want enough to give the tortilla a nice golden finish.
If you end up with a lot of splattering, it means you added too much oil.
At one time during our kitchen renovations, I had to make a “temporary kitchen” work without a stove… and I actually just brushed oil on a griddle to make these tacos. It worked great! The point is, that’s how little oil you really need for this recipe.
To that point, I bet you could even make these tacos on the BBQ if you had a griddle accessory. Summer is so short where we live that I love using the grill as much as possible when the weather is nice!
Advertisements
Advertisements
Once the first side of the taco is golden-brown, flip it to the other side and fry it to the same crunchy perfection.
Advertisements
Advertisements
Once both sides have been fried, you add your toppings and enjoy!
I personally love sour cream, chunky salsa, jalapeños, cilantro, avocado, green onions, and lettuce on my tacos. You can also add Frank’s Red Hot Sauce, tomatoes or cucumbers. If you like spicy food, you could even try my Fire Roasted Salsa to turn up the heat.
They also freeze really well, so I will often make a large batch and freeze the leftover tacos (it seems impossible to have leftover tacos, right?!) to have as a quick, yummy lunch later on.
Advertisements
Advertisements
Just microwave for 2 minutes from frozen and – viola! Tacos!
Or toss them in the oven at 350º until they are hot and crispy.
Either way, they are the first on my “freezer meal prep” list for when baby arrives!
I love the tangy flavour sourdough adds, so why not use it with pizza crust?
Some people make dough from sourdough out of frugality, but for me it is really for the taste and the cost savings is an added bonus.
Add 1 cup sourdough starter, 1/2 cup water, and 1/2 cup flour. Mix well and let sit overnight.
Advertisements
Advertisements
This extra time gives the dough time to develop and adds oh-so-much more flavour!
The next day, add 1 teaspoon salt, 1 tablespoon dried oregano (or fresh, if you have it!), 1 tablespoon red pepper flakes, and 1 teaspoon garlic.
Advertisements
Advertisements
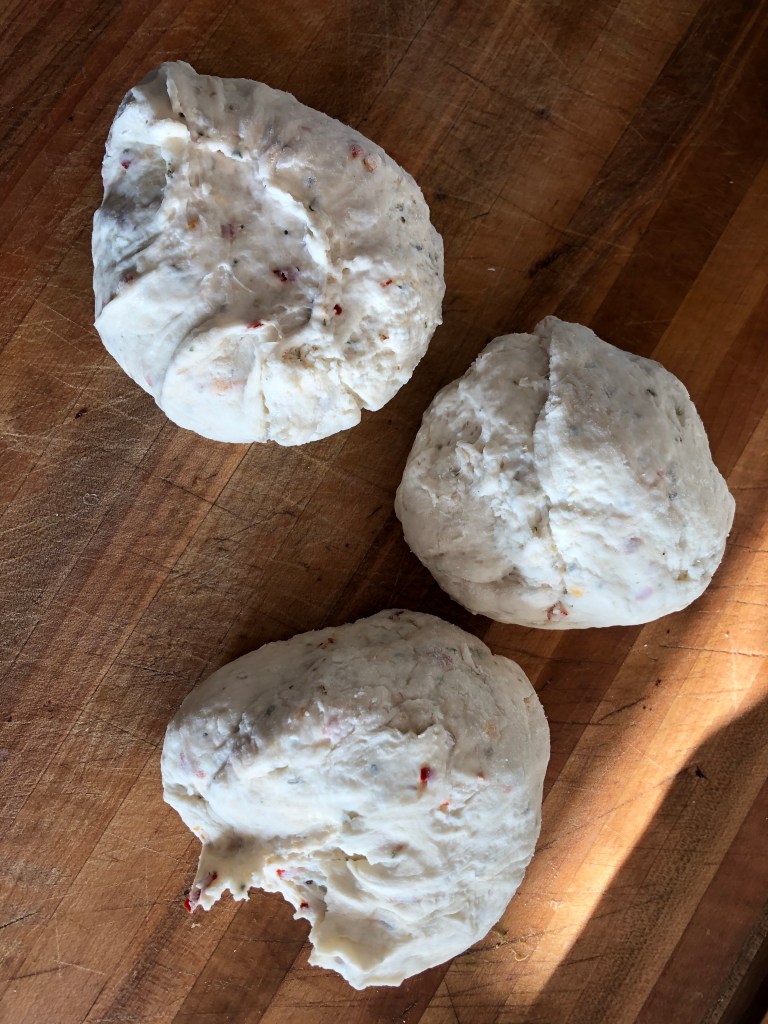
Add enough flour so the dough does not stick to the side of the bowl, about 1 1/2 cups.
Divide into 3 equal sized balls.
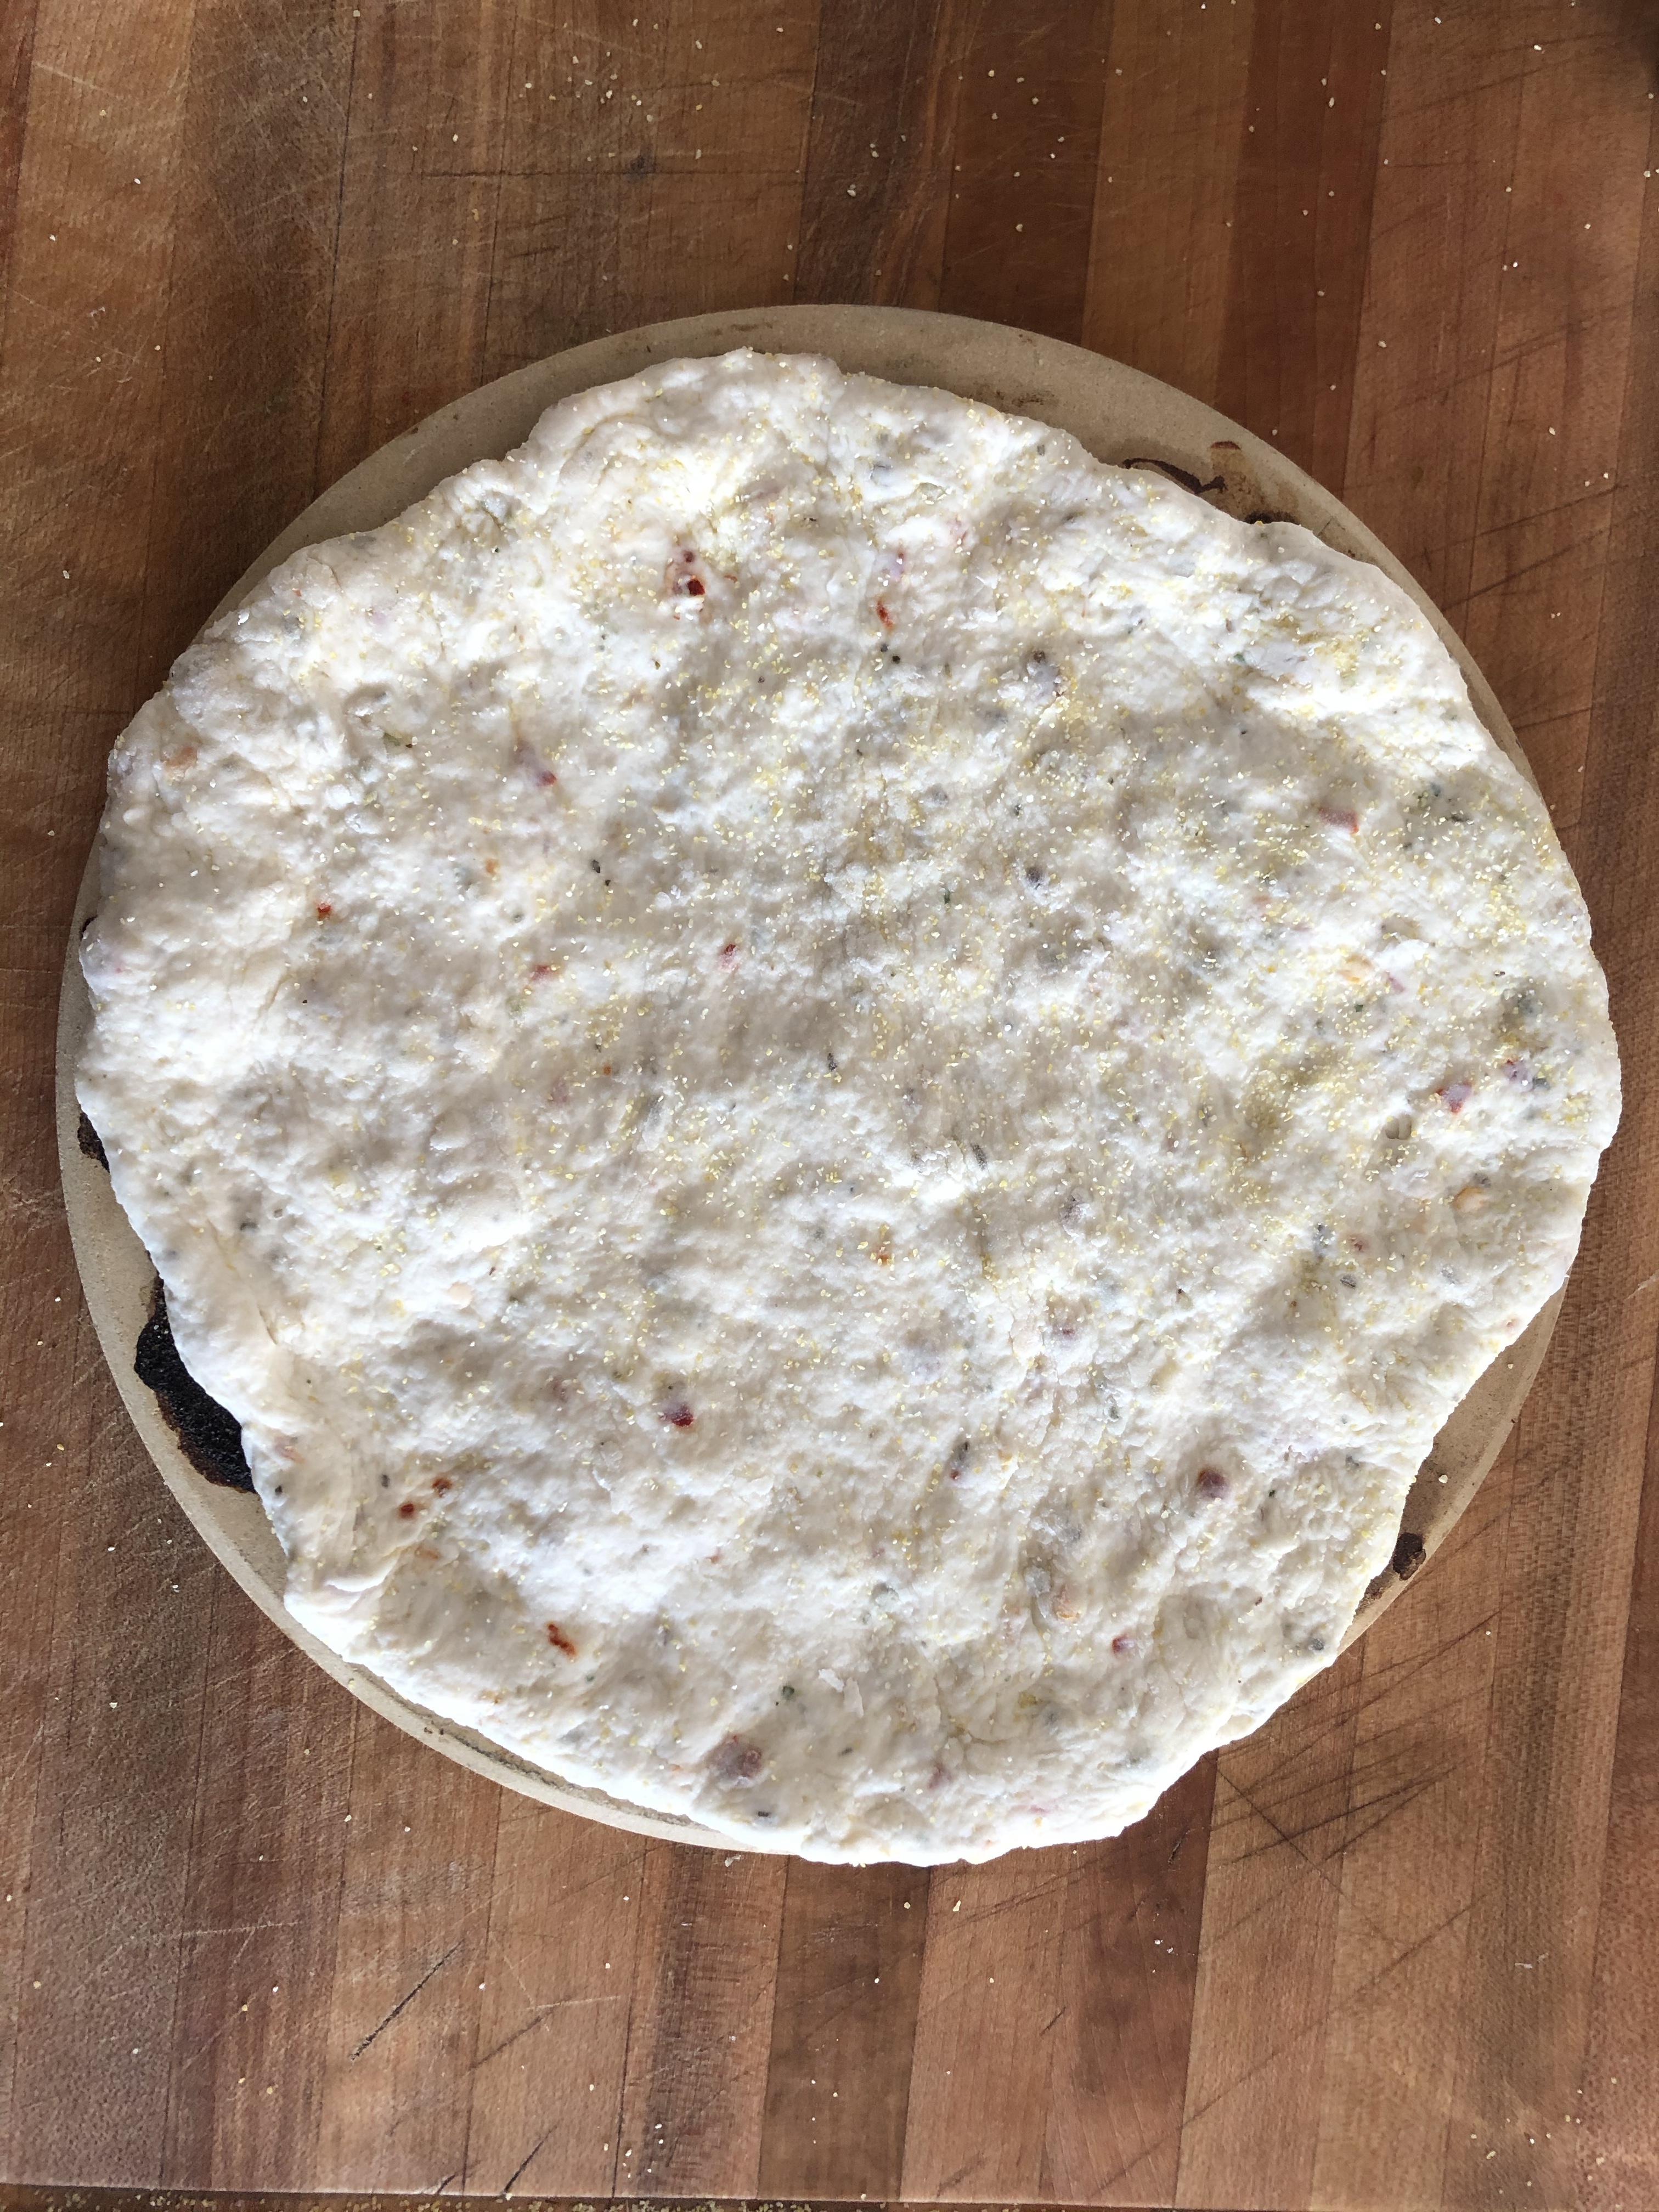
Roll out on a clean surface sprinkled with cornmeal. The cornmeal gives it a nice crunch and is the “secrete ingredient” a lot of restaurants use.
Place on pizza stones and add your toppings.
Advertisements
Advertisements
The beauty of pizza is the fact that you can add whatever you want for toppings! My family always made a fun night of everyone making their own pizza so they got exactly what each individual wanted.
Advertisements
Advertisements
If you think pineapple belongs on pizza, GO FOR IT!
If you hate onions, DITCH THEM!
The world is so full of possibilities.
Advertisements
Advertisements
Recipe
1 cup sourdough starter
1/2 cup water
1/2 cup flour
1 teaspoon salt
1 tablespoon oregano
1 tablespoon red pepper flakes
1 teaspoon garlic
1 1/2 cups flour as needed for proper consistency
Bake at 400º for about 20-25 minutes or until the cheese is nicely browned.
Add red pepper flakes and parmesan cheese if desired.
And enjoy the pizza party!
Advertisements
Advertisements
What toppings do you prefer on your pizza? Does pineapple belong on pizza or not? Drop a comment below!
Advertisements
Processing…
Success! You're on the list.
Whoops! There was an error and we couldn't process your subscription. Please reload the page and try again.
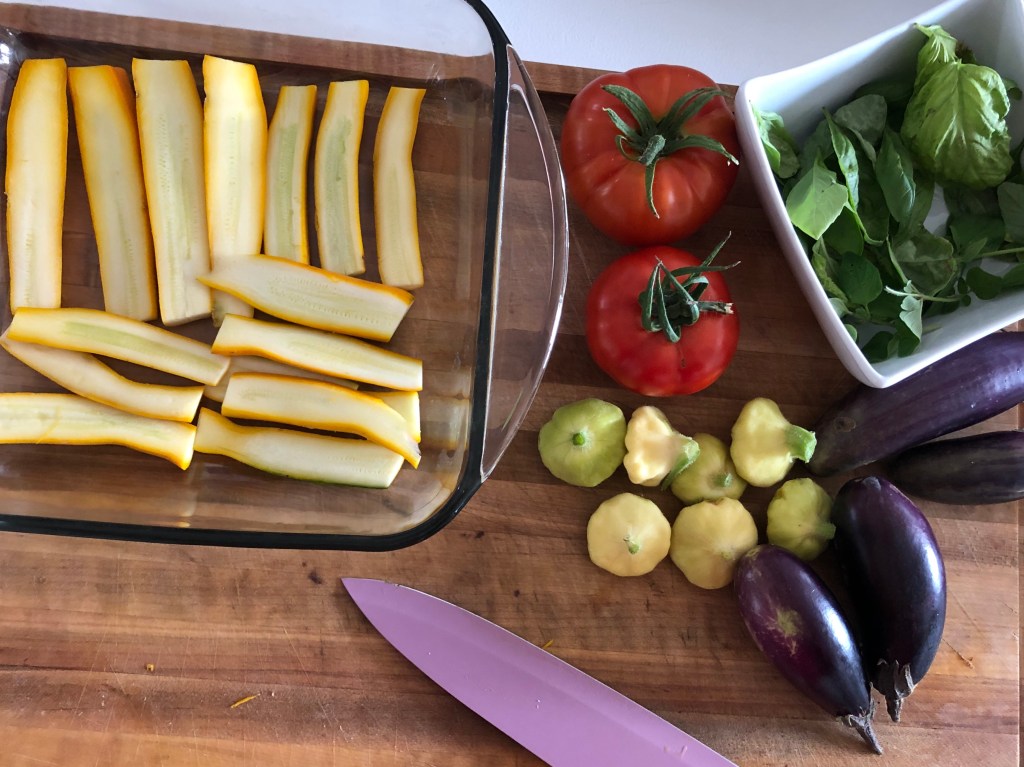
Garden lasagne is a recipe I created to use all the fresh veggie goodness coming out of my garden in a yummy new way.
It can be easy to fall into the same patterns of meals you make or recipe you use. I was ready to change it up and try something new!
Advertisements
Advertisements
Let’s be honest, lasagna is tasty, but tends to be pretty heavy for a hot summer dinner. So why not try making an all-veggie version? I mean, I get more Zucchini (and summer squash) from my garden than we can keep up with anyway.
Advertisements
Advertisements
I start by harvesting zucchini/summer squash, tomatoes, basil, and eggplant (optional). I sometimes add patty pan squash as well.
Then I slice them into thin pieces.
Advertisements
Advertisements
Next, I layer the veggies as one would with lasagna.
Finally, I top with crumbled feta or cheese of choice and add some ground pepper.
Advertisements
Advertisements
Cover with tin foil and place into oven , pre-heated to 400°
Advertisements
Advertisements
Depending on how deep you layer, it will take anywhere from an hour or two to cook fully.
When I have made this for potlucks or to entertain company for dinner, I have almost never had leftovers – but definitely a lot of compliments and requests for the recipe!
Advertisements
Advertisements
Recipe
Zucchini or summer squash
Tomato
Eggplant (optional)
Patty pan squash (optional)
Basil
Feta
Salt & pepper
Advertisements
Advertisements
Directions
Slice zucchini (or summer squash) longwise into thin “noodles”.
Thinly slice tomato into rounds.
If you are using eggplant and patty pan squash, slice thinly as well.
Layer zucchini noodles in a baking pan, then layer tomato, then eggplant and patty pan squash.
Repeat with as many layers as desired.
Finish the top layer with crumbled feta and fresh basil.
Add salt and pepper to taste.
Cover with tin foil and bake at 400º for 1-2 hours or until vegetables have reached desired softness (baking time will vary by number of layers you add).
Enjoy!
Advertisements
Advertisements
What unique recipes do you use to use fresh veggies throughout the summer? I’d love to hear about them if you comment below!
Advertisements
Processing…
Success! You're on the list.
Whoops! There was an error and we couldn't process your subscription. Please reload the page and try again.
As the weather gets warmer, I am sure many of you are excitedly thinking about planting your garden.
I know I am!
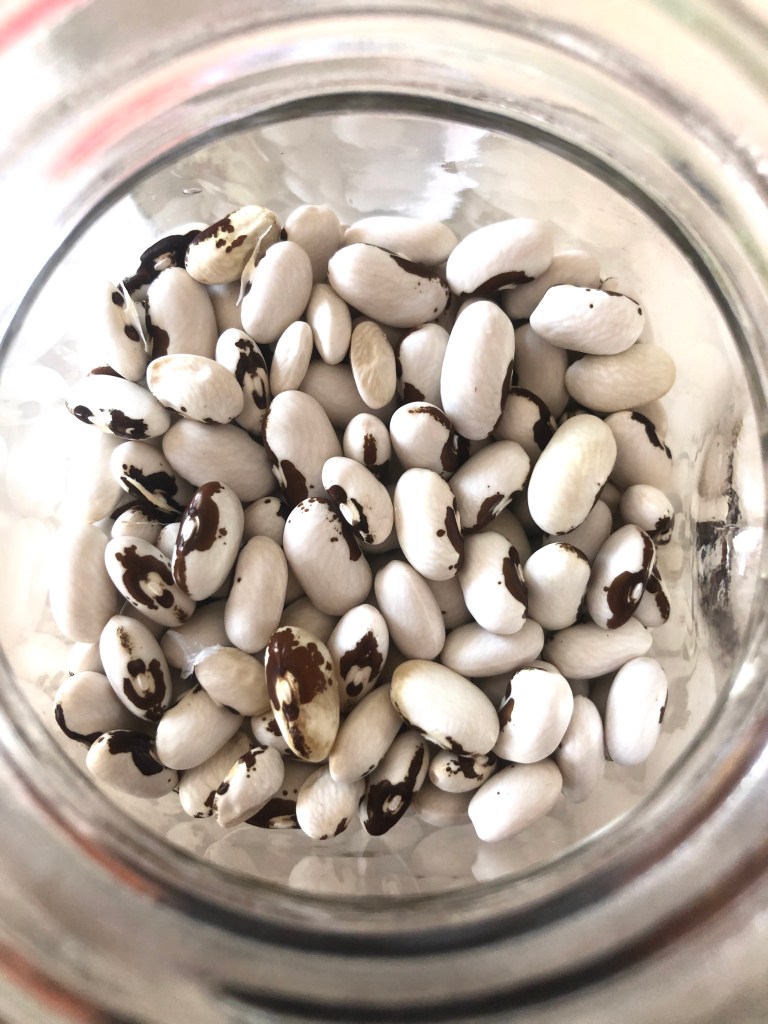
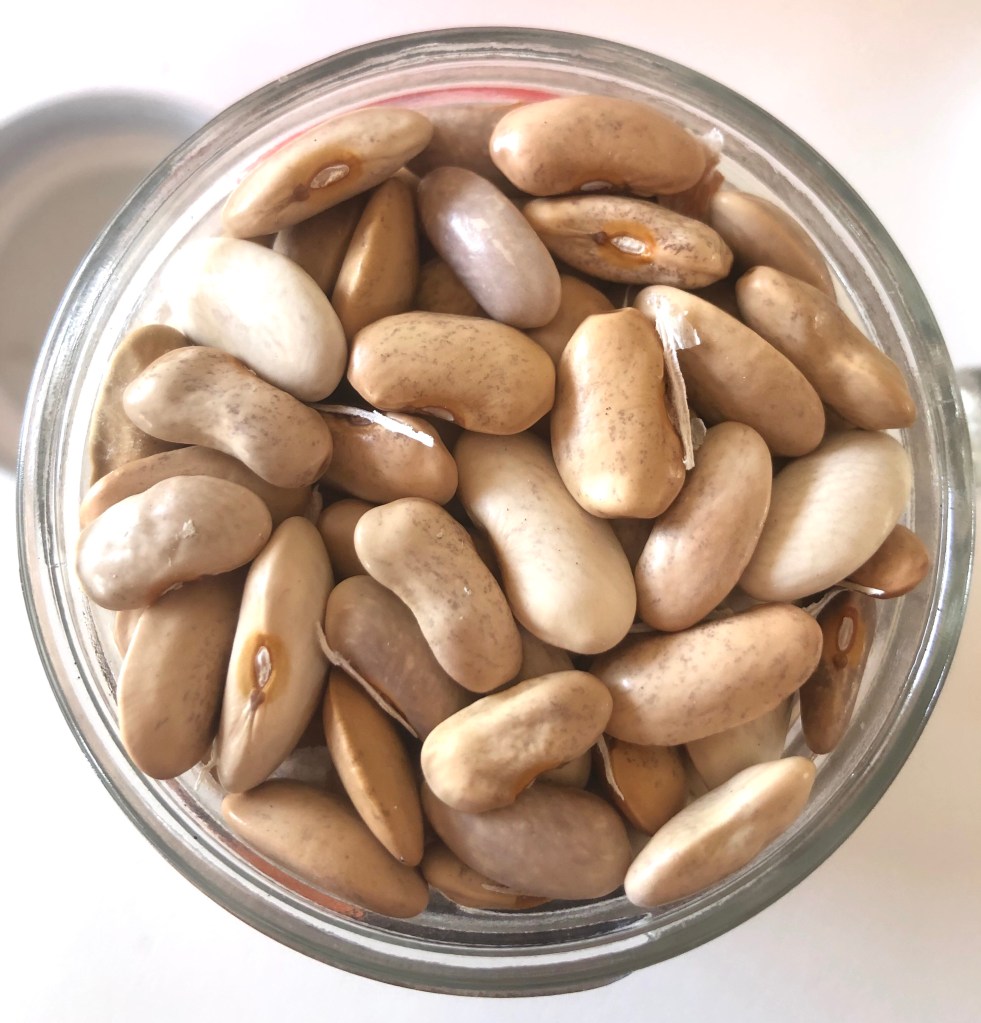
Wax beans and purple runner beans
Advertisements
Advertisements
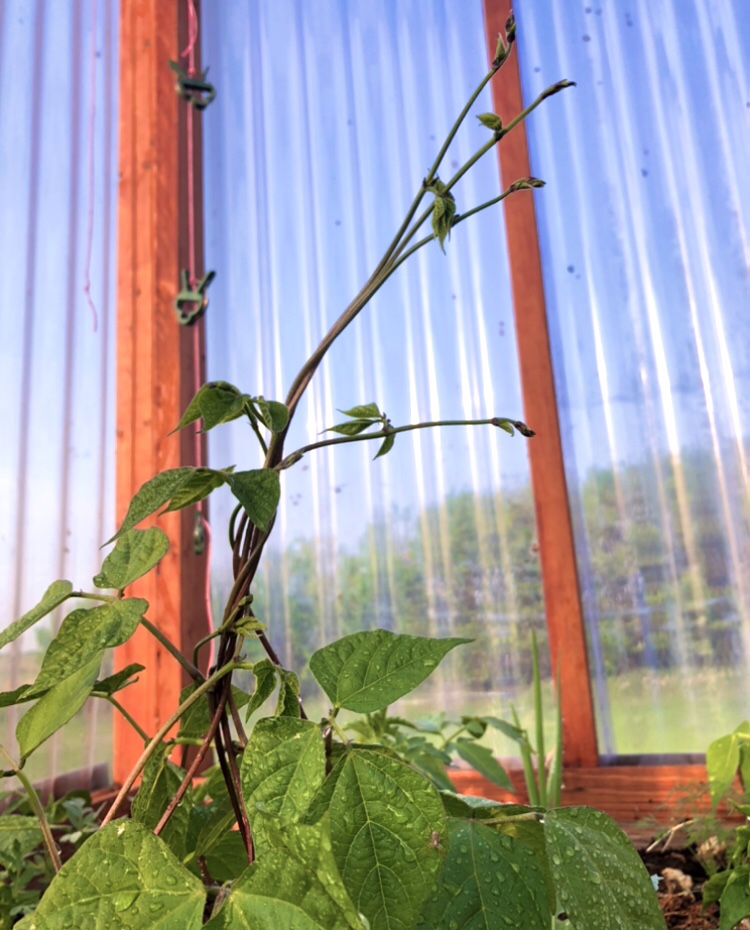
Green beans are one of my favourite things to grow; not only are they so easy to grow, but they also produce like crazy all summer long!
With green beans, there is no need to start them indoors. You can just plop those seeds right in the ground.
There are so many varieties to choose from, whether you are looking for a determinate, bush style plant or an indeterminate vining plant.
Advertisements
Advertisements
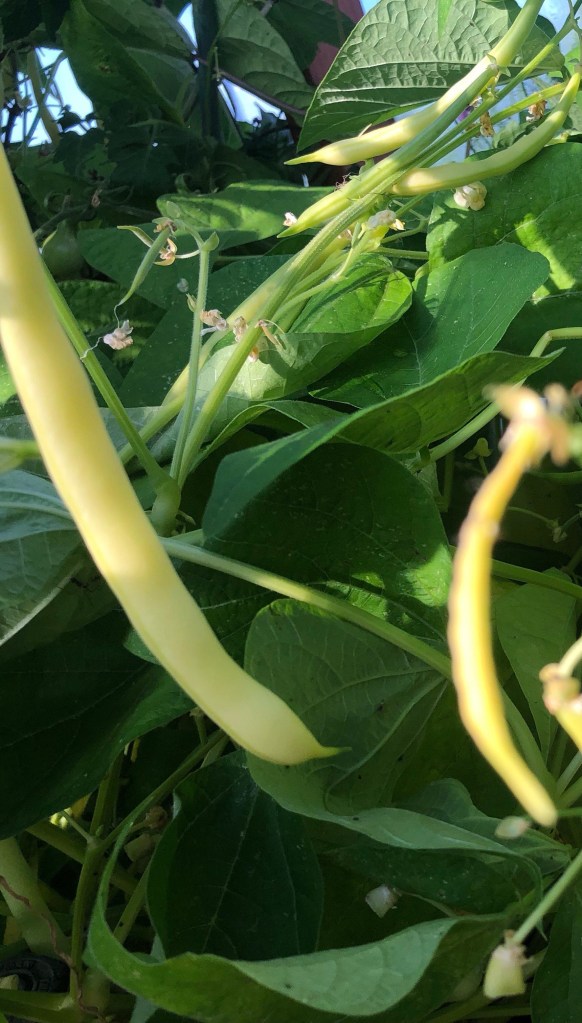
There are also some amazing color options to choose from! I love having a mix of yellow wax beans, purple runner beans, and of course good ol’ green beans. You can even find some interesting looking speckled varieties.
I find my yellow wax beans, a bush variety, tend to produce earlier in the season than my runner beans. My runner beans absolutely take off about half way into summer and are heavy producers the rest of the season.
I love the fact that the wax beans and purple runner beans are so tender and have smooth skins; the scarlet runner beans have little hairs on the skin which collect dandelion seeds or whatever else is blowing around in the wind.
Advertisements
Advertisements
Planting
Once you are beyond the risk of frost, you can start planting!
The night before you plan to plant your seeds, soak them in lukewarm water overnight. This will give them a head start on germination and you will see green shoots pushing through the soil more quickly.
Bean plant
Make sure the soil is moist, but not wet. You do not want to rot your seeds!
Advertisements
Advertisements
Purple runner beanstalk
Green beans are amazing companion plants as they add nitrogen to the soil. You can plant them with heavy feeders such as eggplant, tomatoes, and peppers. Pumpkins, squash, and corn also benefit from companion planting with green beans (check out the “3 sisters” for more info on that).
Advertisements
Advertisements
Care & Maintenance
Bush beans can support themselves and will not need any extra help.
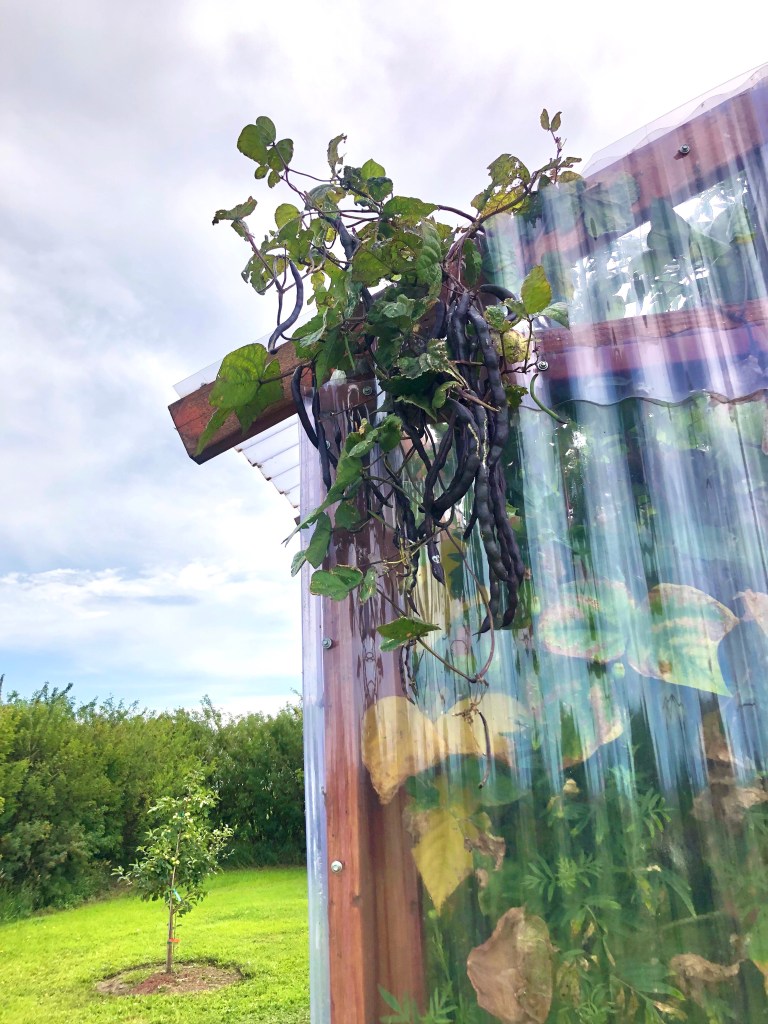
Runner beans, however, need a trellis to support their every-growing vines. You can take advantage of vertical growing space to maximize your harvest per square foot. Get creative! The foliage is lush and green and looks amazing to use on archways or as part of your landscaping.
Be very careful when watering!!! One of the easiest mistakes to make when growing beans is improper watering. Their leaves are prone to leaf rot if they are touched when wet.
I make sure to water at the base of the plant without getting the leaves wet. If it has just rained, I wait to harvest beans until the leaves have dried.
Advertisements
Advertisements
Harvesting
This is the fun part!
You can start harvesting the beans at any size, really, but if you wait until they are store-sized you will get more bang for your buck.
The yellow wax beans have a green twinge to the young beans and turn a bright yellow when they are ready to be harvested.
Maturing wax beans
Advertisements
Advertisements
The purple runner beans have a green twinge as well, turning a deep purple when they are ready. Oh! And did I mention that they turn from purple to green when they are cooked? Super fun!
Mature purple runner beans
When my garden is in full swing, I can harvest a heaping basket every-other-day. It is such a satisfying feeling to cook meals from garden to table. And to have enough to either preserve or share with others.
Advertisements
Advertisements
If you do not keep on top of harvesting almost daily, you will have some beans get too ripe and they will be tough and stringy. I choose to leave a number of beans on the plant to mature for seeds.
Seeds maturing to store for winter
That reminds me, another reason I love green beans is for how easy it is to save seeds for the next year! After the ripe beans have fully dried on the stalk, it is a fun and easy process of shelling the seeds.
Advertisements
Advertisements
Dry bean pods, ready to be shelled
Make sure the seeds are fully dry and store them in an airtight container in a cool, dark room for the winter.
Advertisements
Advertisements
Wax bean seeds
I have been saving bean seeds for about 5 years or so and have very good germination results, so that saves a few bucks on re-buying seeds every spring.
Purple runner bean seeds
Advertisements
Advertisements
Once the growing season is finished, I leave the beanstalks over winter. I find it much easier to pull them out in the Spring after they have fully dried out.
And of course, the last step is adding all the dead stalks to my composting to use in the garden later.
An average harvest
Do you have any extra tips on growing green beans? Drop a comment below!
Advertisements
Processing…
Success! You're on the list.
Whoops! There was an error and we couldn't process your subscription. Please reload the page and try again.
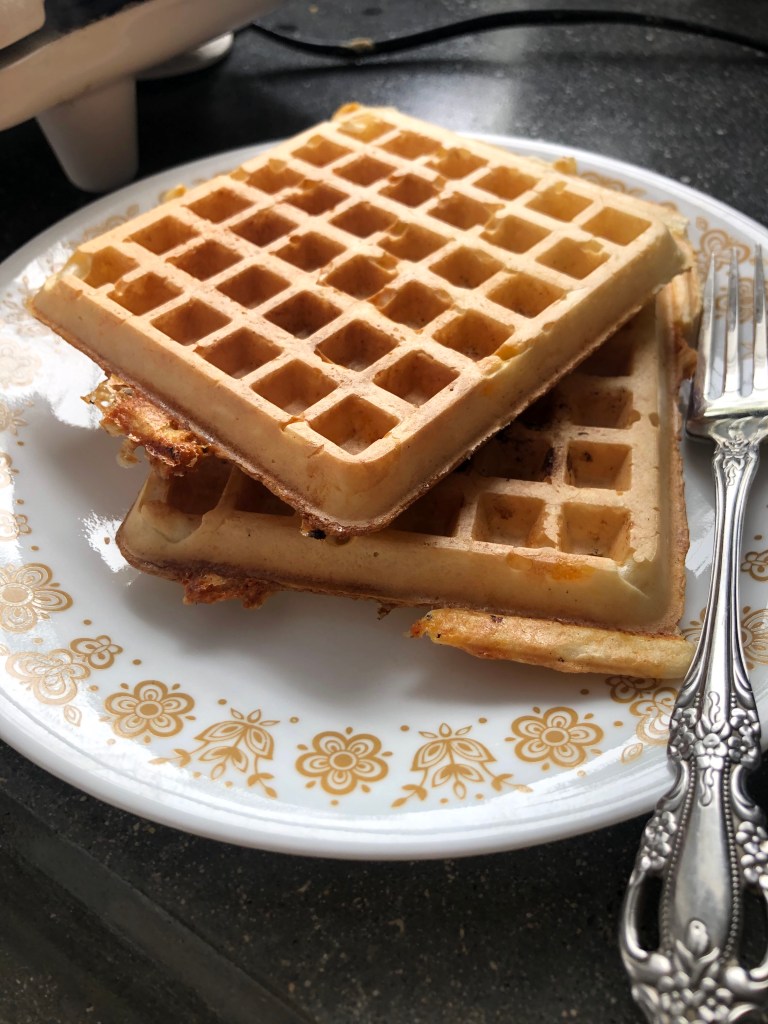
I prefer savoury over sweet, almost every time. Jalapeño waffles seemed like an interesting idea to test out, so I gave it a shot!
It gives an interesting twist to breakfast, changing up the boring routine of the same 3 breakfast options every morning.
Advertisements
Advertisements
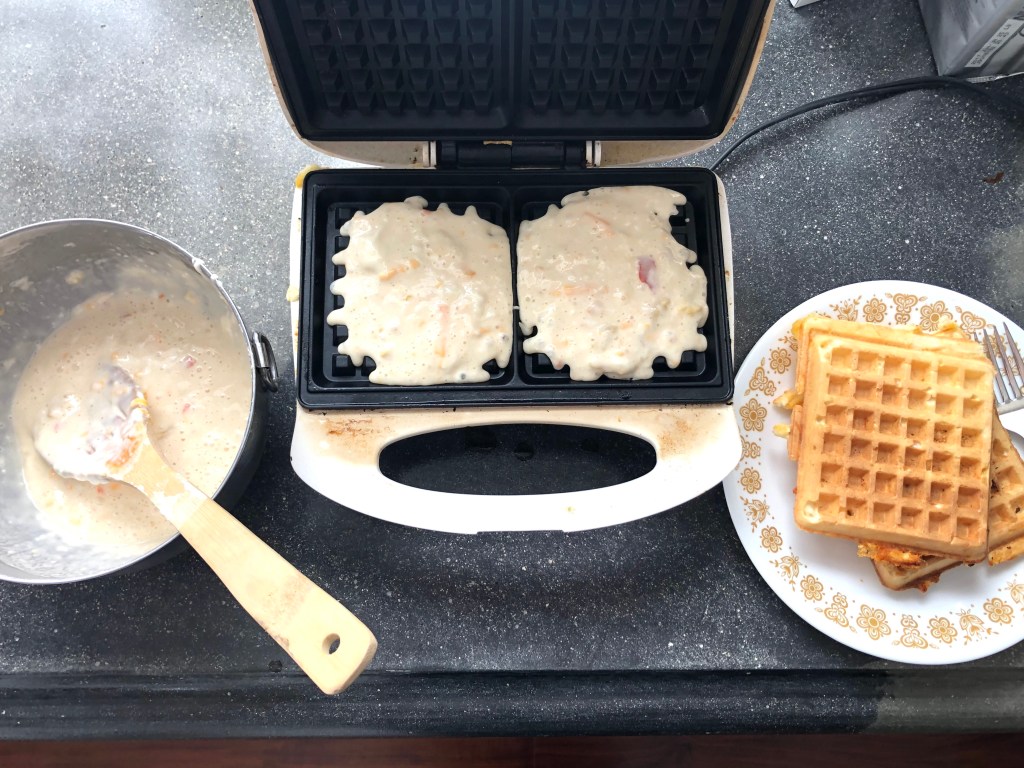
I added 1 cup sourdough starter, about a quarter cup cheddar cheese, a quarter cup of diced jalapeños, one egg, salt, and enough flour to bring it to the right “pancake batter” consistency.
To add a bit of protein, I scrambled up some eggs, added a side of bacon, and garnished with green onions, parsley, and freshly ground pepper.
Advertisements
Advertisements
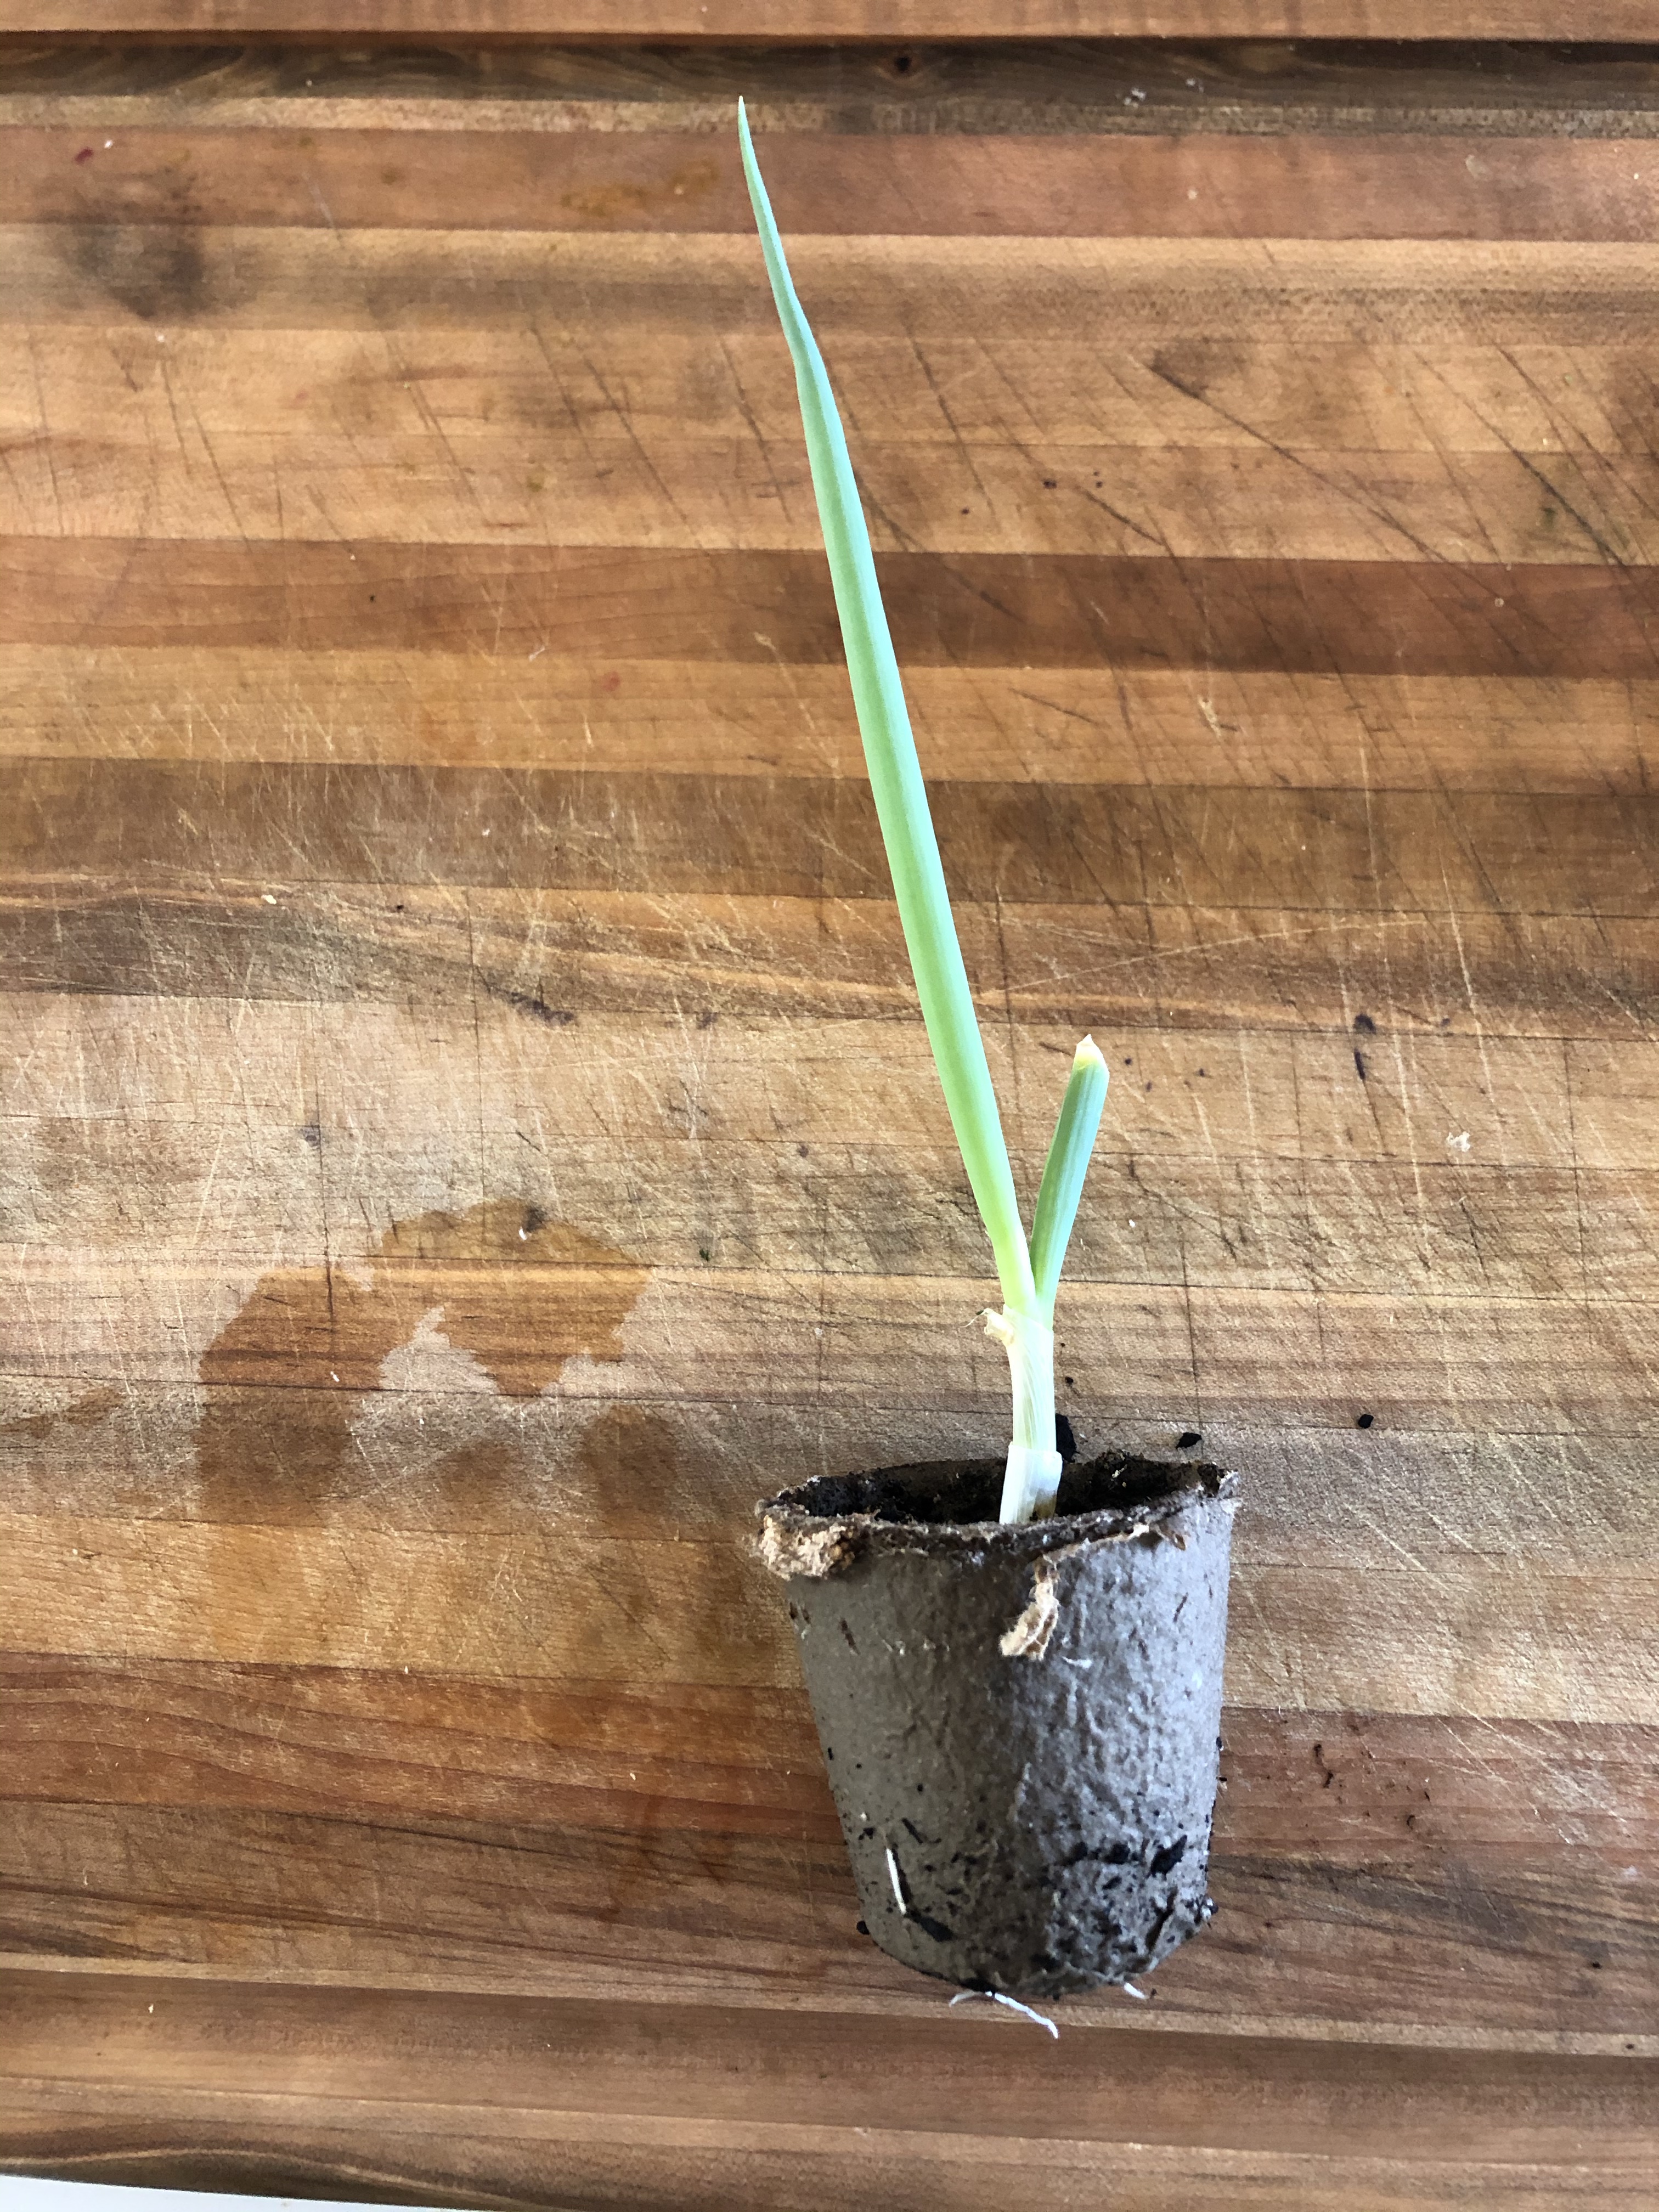
To see how to grow your own endless supply of green onions, click here.
Advertisements
Advertisements
Jalapeño Sourdough Waffles
1 cup sourdough starter
1/4 cup shredded cheddar cheese
1/4 cup diced jalapeños
1 egg
1/4 teaspoon salt
Flour – add just enough for a “pancake batter” consistency
Mix well, add to preheated waffle maker, cook and enjoy!
What do you do to switch it up for breakfast? Comment below!
Advertisements
Processing…
Success! You're on the list.
Whoops! There was an error and we couldn't process your subscription. Please reload the page and try again.
I typically do not order anything at a restaurant that I make at home.
Partially as a treat to myself to have something different when we go out and partially because I feel like my home cooked meals are just as good but for less cost.
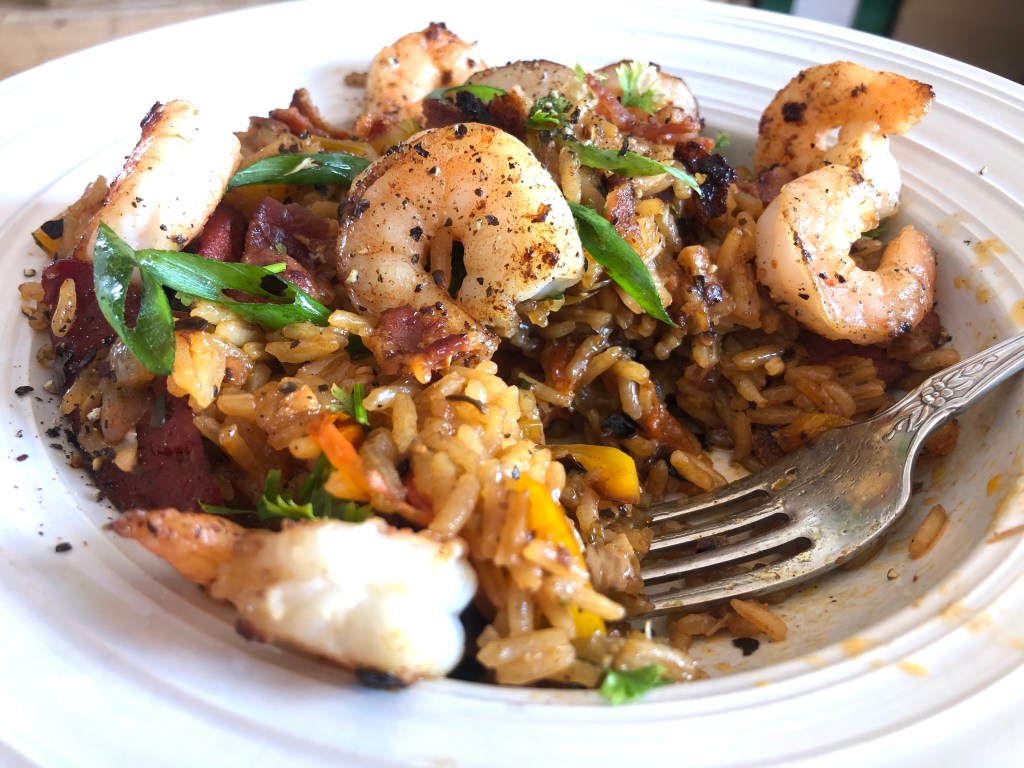
Well, Jambalaya is one of those meals I have rarely made at home. Until now.
Advertisements
Advertisements
We all know that restaruants are closed to sit-down meals during this pandemic, plus I live an hour out of town and don’t feel like doing that kind of drive for take-out!
So, of course, I decided to whip up a batch of my own. With no recipe to follow. And it turned out great!
Sure, I could have looked up a recipe on Pinterest, but I am notorious for changing almost any recipe I find anyway, so I chose to just make my own.
Advertisements
Advertisements
Sauté 2 cloves of minced garlic, 1/4 chopped onion, 1 chopped celery stalk, and about 6-8 cherry tomatoes in 1 tablespoon butter until slightly soft.
Add 1/4 yellow pepper and 1/2 teaspoon red pepper flakes.
When all vegetables are slightly soft, add 1/2 cup rice, 1 cup water, a splash of lemon juice, and 1/4 teaspoon creole seasoning. (I did not add salt as the creole seasoning contains salt)
Add 1/4 teaspoon oregano and 1/4 teaspoon thyme for that extra bit of flavour.
Advertisements
Advertisements
Bring to a boil, then reduce to a simmer and cover for 10-12 minutes or until the rice is soft.
Meanwhile, cook 1 strip of bacon until crispy. You can add chicken, sausage, and shrimp as meat options as desired.
When rice is fully cooked, dish into a deep bowl and top with crumbled bacon and desired meats.
Garnish with green onions and parsley (cilantro is yummy, too, but I didn’t have any on hand).
Love a bit of tasty guacamole as a side for your meal – or a stand-alone snack with corn chips? Okay, you still may want some chunky salsa or fire roasted salsa for those chips, too.
This is by far my favourite guacamole recipe yet.
Fresh, homemade guacamole is definitely the way to complete Taco Tuesday!
Advertisements
Advertisements
Recipe
1 large ripe avocado
1/4 cup sour cream
1/4 lemon, juiced
1 fresh jalapeño, finely chopped
1/4 teaspoon red pepper flakes
1/4 teaspoon chopped garlic
1/8 teaspoon cayenne pepper
A dash of Frank’s Red Hotsauce
Salt & pepper to taste
Garnish with chopped tomato, red onion and jalapeño.
Advertisements
Advertisements
Mash the avocado and add all ingredients.
Optional garnishes – chopped red onion, jalapeño, and tomatoes.
The sour cream gives a rich, creamy texture and the jalapeños and cayenne add a bit of bite.
If you enjoy spicy foods, add more heat as desired with more cayenne and jalapeño.
Enjoy!
This guacamole goes well with fried tacos, chicken fajitas or nachos.
Advertisements
Processing…
Success! You're on the list.
Whoops! There was an error and we couldn't process your subscription. Please reload the page and try again.