I love a good savoury jalapeño cheddar loaf during the cold winter months, so I decided to turn my recipe into super pretty dinner rolls!
Advertisements
It looks so fancy doing these as knots, but it is actually very easy to make. Why not get the “wow factor” with just a minute or two of extra effort?
I have a bread maker and use it quite a bit; some of my recipes I will do by hand, but this one I just pop into the bread maker on the “dough” setting and it kneads and rises until the dough is ready for me to roll out and finish.
Advertisements
And NO! I am not going to give you some big, long story before getting down to the nitty gritty of h0w to make this recipe (YOU’RE WELCOME! haha)
First, add all the ingredients to your bread maker. Start with the lukewarm water, then salt, butter (or oil works if you don’t have butter), powdered milk, flour, and then the yeast.
Advertisements
Then, add the diced jalapeños and cayenne powder on top. I typically use pickled jalapeños because I almost always have them on hand, but fresh jalapeños work too!
Now hit that dough setting and carry on with your day! Mine runs for about an hour and a half before the dough is ready to be rolled out and cut.
If you are in the middle of something and the dough sits a bit after the bread maker beeps (signalling it is ready), that’s fine. Just make sure it doesn’t sit sooo long that it gets dried out or falls. This means you have 30-60 minutes grace period.
Advertisements
When your dough is ready, roll it out on a floured surface so it is long and wide, as pictured below.
Next, drizzle some melted butter over the bottom two-thirds of the dough and spread it so you have an even coating.
Then, sprinkle your shredded cheddar cheese over that same area. You can add more or less cheese, depending on your taste, but keep in mind that if you add too much it will melt out and make a mess in the bottom of your oven!
After you’ve added the cheese, fold the dough over by one third and then one more time (as pictured below).
Advertisements
Advertisements
Gently press the roll so it sticks together well.
Now you are ready to start on the fun part!
Find the middle of the roll and cut it in half (I typically just fold it in half to find the middle, but some people actually get out a ruler to measure). Then cut each of the sides in half again, then cut each section into three pieces.
This will give you 12 sections total, which is a perfect dozen to fit in your muffin tins!
Optional: before cutting into sections, you can trim the ends so all your sections will have even sides and filling. I hate wasting, so I don’t trim the ends.
Advertisements
Once you have 12 sections, make two slices in each section, leaving just a little dough connecting it at the top (pictured below). This will give you three strands of dough to braid.
Do a simple braid, as pictured below.
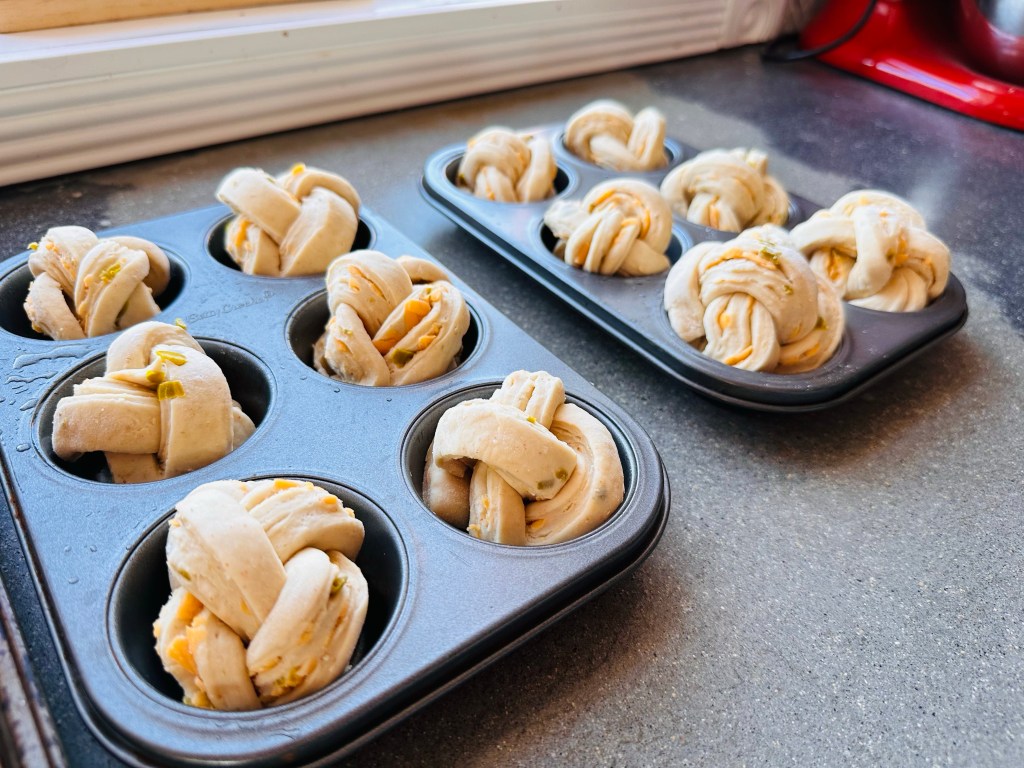
Then, tuck the ends underneath the jalapeño cheddar knot into a muffin tin that has been brushed with oil (or better yet, butter!)
They should look like the examples in the photo below.
Once you have repeated this step with all 12 sections, cover the jalapeño cheddar knots with a damp tea towel and allow them to rise in a warm location for about an hour.
Advertisements
Advertisements
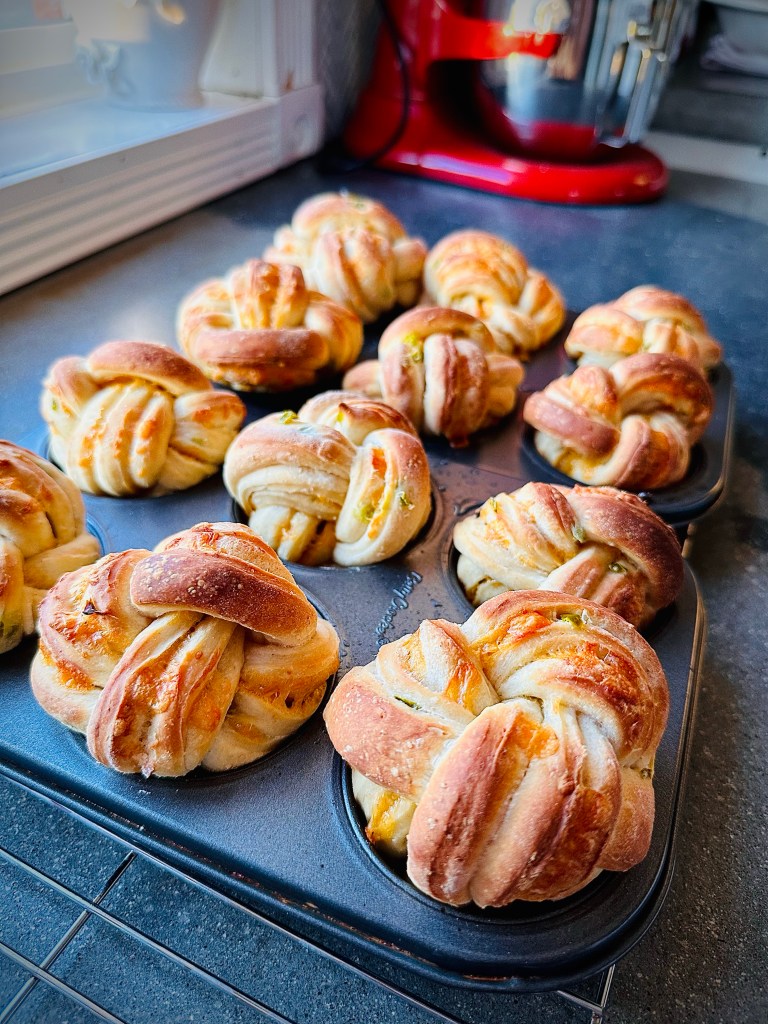
Once your knots have risen, pre-heat the oven to 480°
Place the jalapeño cheddar knots in the oven and immediately turn it down to 450° – this method may sound odd, but it gives the perfect golden finish with a nicely baked (and fluffy) inside.
Bake for 13-15 minutes, depending on how golden you would like the knots to be.
Advertisements
Advertisements
Optional: before baking, you can brush your jalapeño cheddar knots with butter or egg wash to change the final look. I did not do this for the photos included and it is just a matter of personal preference.
You can also brush the knots with melted butter after they have finished baking for an extra soft, delicious finish. Once again, I did not do this in the example photos and it is a matter of personal preference and if you want to spend a little extra effort doing this.
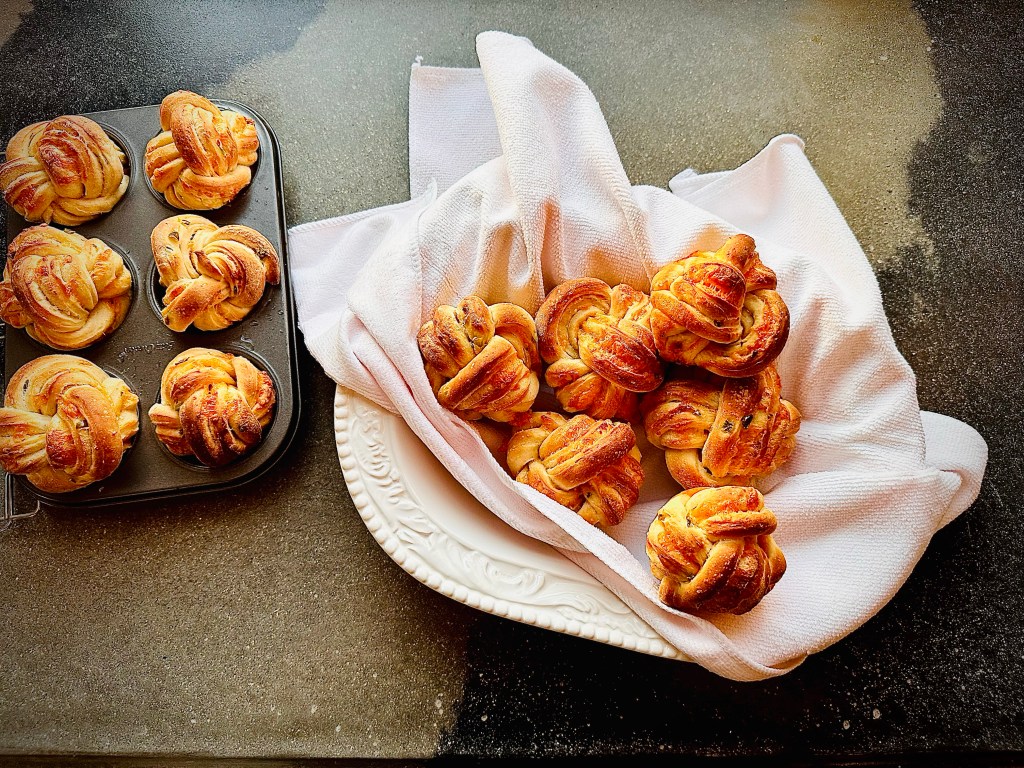
Allow the jalapeño cheddar knots to cool just enough that they won’t burn you before you dig in! Haha
Advertisements
Advertisements
One of my favourite parts of making the jalapeño cheddar knots like this versus a traditional dinner roll is #1 – they look so pretty and #2 – they pull apart in tender little pieces that are fun to eat.
For the extra couple steps it takes to braid these, I feel like it elevates the look of a simple, homemade dinner roll to a high-end, luxurious experience. So why not?? (or should I say “KNOT?” lol)
Advertisements
Advertisements
I hope you have enjoyed my recipe! If you did, please be sure to share it with your friends and leave a comment below with a photo of how yours turned out!
Ingredients
1 cup lukewarm water
1 1/2 teaspoons salt
1 1/2 Tablespoons butter (room temperature)
1/4 cup powdered milk
1/4 cup diced jalapeños (fresh or pickled)
1/4 teaspoon cayenne powder (OPTIONAL)
3 cups all-purpose flour
1 1/2 teaspoons yeast
3 Tablespoons butter, melted
1/4 cup cheddar cheese, shredded
Advertisements
Advertisements
Instructions
Combine all ingredients in your bread maker with the paddle facing upward.
Select “dough” setting and start.
Once the dough cycle has finished, roll the dough out on a floured surface into a long, wide strip as pictured above.
Next, brush the dough with melted butter.
Sprinkle shredded cheddar cheese over the bottom 2/3 of the long portion of the dough (refer to picture above, if needed).
Then, fold the dough over into thirds, longwise (refer to picture above, if needed).
Cut into 12 strips, then slice each piece twice, leaving a small amount at the top of each piece to connect them (refer to picture above, if needed)
Do a simple braid for each piece, then tuck the ends underneath and place in a greased or buttered muffin tin.
Allow to rise for 1 hour in a warm location, covered with a damp tea towel.
Pre-heat oven to 480º
Place muffin tin in the oven and immediately turn the oven down to 450º
Bake for 13-15 minutes (depending on the desired goldenness).
Remove muffin tins from oven and place on cooling rack; cover with a tea towel and allow to cool.
Advertisements
Advertisements
Optional Finishing Touches
Brush the Jalapeño cheddar knots with egg wash prior to baking
Brush with melted butter after removing from the oven
Serves 12
… The End… And they lived happily ever after. 😉
If you like short, to-the-point recipes, check out my other posts!
Summer is the time for lazy days at the lake, yard work – or harvesting tons of fresh veggies from the garden!
Here in Saskatchewan, this is the time of year that the zucchini go crazy.
Gardeners use every possible recipe to use up their excess and then start giving zucchini to their friends, family, neighbours, and maybe even complete strangers!
We all want to make sure the produce we have worked so hard to grow doesn’t go to waste.
Advertisements
Advertisements
So I’m here today to give you inspiration for one more yummy way you can use your zucchini – Zucchini Pizza Boats!
The great part about this recipe is that it is low carb, does great on the grill, and you can use other garden fresh veggies.
Just like with pizza, it is a flexible recipe that you can pick and choose which toppings you would like to use.
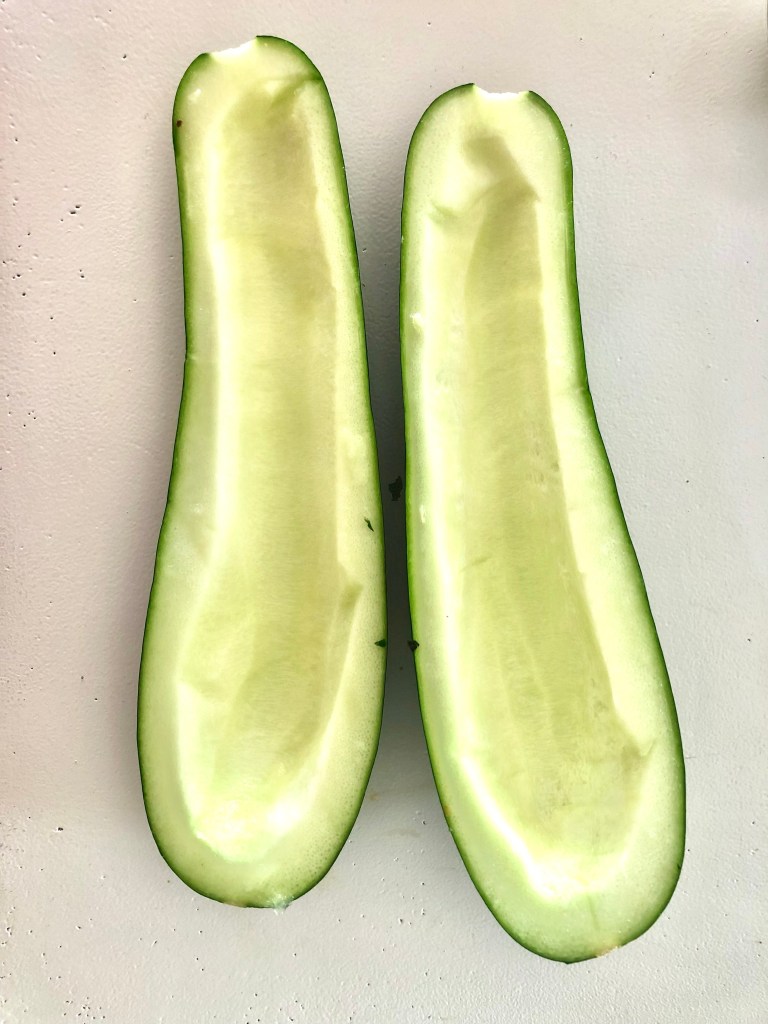
I like to start with a zucchini that is borderline too large because the skin will be a little tough, which makes the “boat” hold its shape on the grill better. Plus this gives you a larger hollow to add your sauce and toppings to!
Advertisements
Advertisements
Cut the zucchini in half long-wise and scoop out the soft, seedy part.
Don’t throw it out, though! We will use the insides in the sauce in a minute.
Next, heat a pan on medium heat and add some butter, a few cloves of garlic, and diced onion.
I personally like to add whole cloves of garlic; once they are nice and soft, I just smash them with my knife on the cutting board and give them a quick chop.
I find that method a lot quicker than mincing or grating the garlic raw.
Advertisements
Advertisements
Oh! And this is where the zucchini insides get added; toss it into your sauce, seeds and all.
Next, add diced tomato and some chopped oregano & basil.
I like a bit of heat to my food, so I add an entire cayenne pepper (either a fresh, chopped pepper or a crumbled, dehydrated pepper).
Then, add a splash of balsamic vinegar and a splash of Worcestershire sauce. This really makes the flavour pop!
Advertisements
Advertisements
And as expected, give the sauce a nice seasoning of salt & pepper.
Allow it to come to a simmer and cook the sauce down until it is no longer watery.
The more tomato you add, the more like a pizza sauce it will be.
Adding the zucchini insides, however, makes the sauce a bit different texture than normal pizza sauce, but hey – waste not, want not!
Advertisements
Advertisements
Once your sauce has cooked down to the desired consistency, scoop it into your zucchini boats.
Then you get to add your toppings!
I find that the toppings work best when they are added first and then the cheese added on top; when the cheese gets gooey, anything on top tends to try to slide off if the zucchini boat isn’t quite flat.
Advertisements
Advertisements
You can bake the zucchini boats at 350º for about 40 minutes (depending on their size, time will vary).
My favorite, however, is throwing them on the grill with a bit of smoke!
The flavour is amazing that way, plus if it is a hot day you aren’t heating up your house.
Advertisements
Advertisements
On a pre-heated grill, it typically takes about 40 minutes on low-to-medium heat to cook the zucchini boats.
NOTE: Be careful how high your flame is; you do not want to char the skin!
You can also use a pre-soaked wood plank to add flavour (and catch any gooey cheese that tries to drip off).
I like my Maple Grilling Plank better for this recipe than my Cedar Grilling Planks because it has a lighter flavour.
I like the zucchini to be soft enough to easily pierce with a fork, but not so soft that it is falling apart.
Some people may prefer their zucchini to be firmer so they are almost crunchy still.
That is completely up to you!
Once you remove the zucchini boat from the heat, allow it to cool for a couple minutes.
Enjoy!
I promise this will become a fast favourite!
Advertisements
Advertisements
While zucchini is usually served as a side veggie, I like serving this dish as a main course – or even the entire meal because it is so filling!
Recipe
1 large zucchini
1 large tomato
1/2 large onion
2 cloves garlic
2 tablespoons butter
1 cayenne pepper (optional)
1 tablespoon balsamic vinegar
1 teaspoon Worcestershire sauce
Basil & oregano, to taste
Salt & pepper, to taste
Advertisements
Advertisements
Directions
Cut the zucchini in half long-wise and scoop out the soft, seedy centre (reserve for later).
In a pan on medium heat, sauté garlic, diced onion, and diced tomato in butter.
Add zucchini insides along with balsamic vinegar, Worcestershire sauce, basil, and oregano.
If you want some heat, add cayenne pepper as well.
Salt & pepper to taste.
Simmer until the sauce has reduced to desired consistency.
Scoop sauce into zucchini boats, then add toppings and cheese.
Bake at 350º for about 40 minutes or grill on low-to-medium heat for about 40 minutes.
Cook time will vary depending on the size of zucchini and desired softness.
Remove from heat and allow to cool for a few minutes.
Enjoy!
Advertisements
Advertisements
Advertisements
What is your favourite zucchini recipe? Drop a comment below!
Some of my favourite ways to preserve tomatoes is by making spaghetti sauce, sun dried tomatoes or this fire roasted salsa recipe!
Advertisements
Advertisements
I often will make a couple of these recipes at the same time; in the photo above, I have a batch of tomato rounds in the dehydrator and the off-cut tops will be used for the fire roasted salsa.
That keeps my sun dried tomatoes in nice rounds, while the flesh left over from cutting the woody centre of the tomato out gets blended into the salsa.
Advertisements
Advertisements
Why is fire roasted salsa better than raw salsa?
Don’t get me wrong – I love a good Pico De Gallo (chunky salsa) on my fried tacos, but fire roasted salsa is much better for preserving because of its thick, even consistency.
Roasting the ingredients before blending them not only brings out the heat in the peppers, but it also enhances the flavour in the tomatoes and reduces the water content (no one wants watery salsa!)
PRO TIP: Using beefsteak tomatoes will also help achieve the desired consistency because they naturally have lower water content than other varieties of tomatoes.
Advertisements
Advertisements
Advertisements
Advertisements
Start by lining a large baking sheet with parchment paper and cover it with a layer of chopped tomatoes and onions, whole garlic cloves, and whole jalapeños and cayenne peppers.
Drizzle it with a bit of olive oil and mix well, then sprinkle a bit of salt to taste.
You don’t want the layer of veggies to be too deep or you won’t get the ideal results of an evenly roasted salsa.
Place the baking sheet on the top rack of a pre-heated oven, set on broil.
Watch your batch to make sure it doesn’t burn and flip once the peppers start to blister and the tomatoes start to brown.
This should only take a few minutes.
Advertisements
Advertisements
Advertisements
Advertisements
Once the other side of the peppers blister as well, remove the baking sheet from the oven and allow to cool.
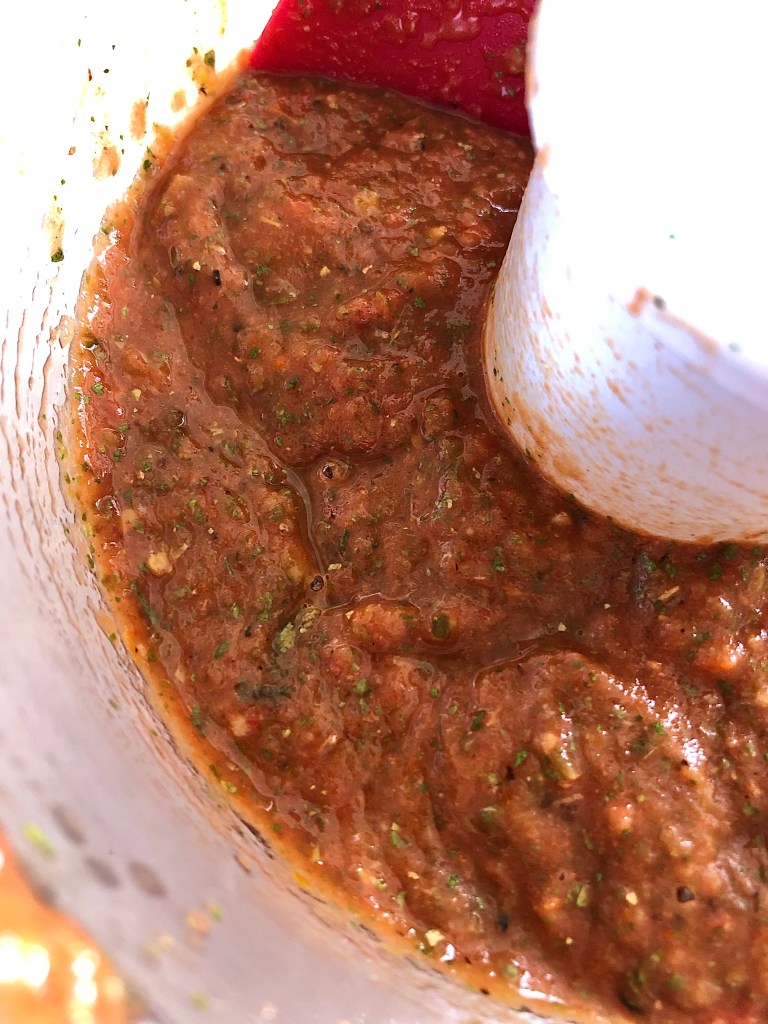
Next, cut the stems off the peppers and add the roasted ingredients to the food processor, along with the cumin, fresh lemon juice, and cilantro.
Blend well and give it a taste test!
The beauty of making your own salsa is that you can decide just how mild or spicy you would like it to be; if it isn’t spicy enough for your taste, just add a bit of cayenne powder to kick it up a notch.
Advertisements
Advertisements
Advertisements
Advertisements
This recipe only makes about a pint, so you will need to roast multiple pans of veggies if you want to can large quantities of fire roasted salsa to use up the bounty from your tomato harvest.
If you just want a jar of fresh, homemade salsa to enjoy you’ll find this is the perfect size batch to whip up quickly!
Start to finish, this recipe only takes 15-20 minutes to make – including the roasting time!
Advertisements
Advertisements
Recipe
2 cups tomato, chopped
1/2 white onion, chopped
3 cloves garlic, whole
3 jalapeños , whole
2 cayenne peppers, whole
2 tablespoons olive oil
1 lemon, juiced
1 tablespoon cilantro dried or 1 cup fresh
1/4 teaspoon cumin
Salt & pepper to taste
Advertisements
Advertisements
Instructions
Drizzle olive oil on tomato, onion, garlic, jalapeño, and cayenne peppers – mix well.
Roast on a lined baking sheet in a pre-heated oven set to “broil” on the top rack.
Flip vegetables when the peppers start to blister.
Remove from oven when second side of peppers blister and allow to cool.
Cut pepper stems off and place all ingredients in food processor.
Blend well.
Add cayenne powder to reach desired spiciness, if it is not hot enough for your taste.
If canning the salsa, place in sanitized jars and process in hot water bath.
Enjoy!
Serving size: 1 pint
Advertisements
Advertisements
Advertisements
Advertisements
Advertisements
Advertisements
Processing…
Success! You're on the list.
Whoops! There was an error and we couldn't process your subscription. Please reload the page and try again.
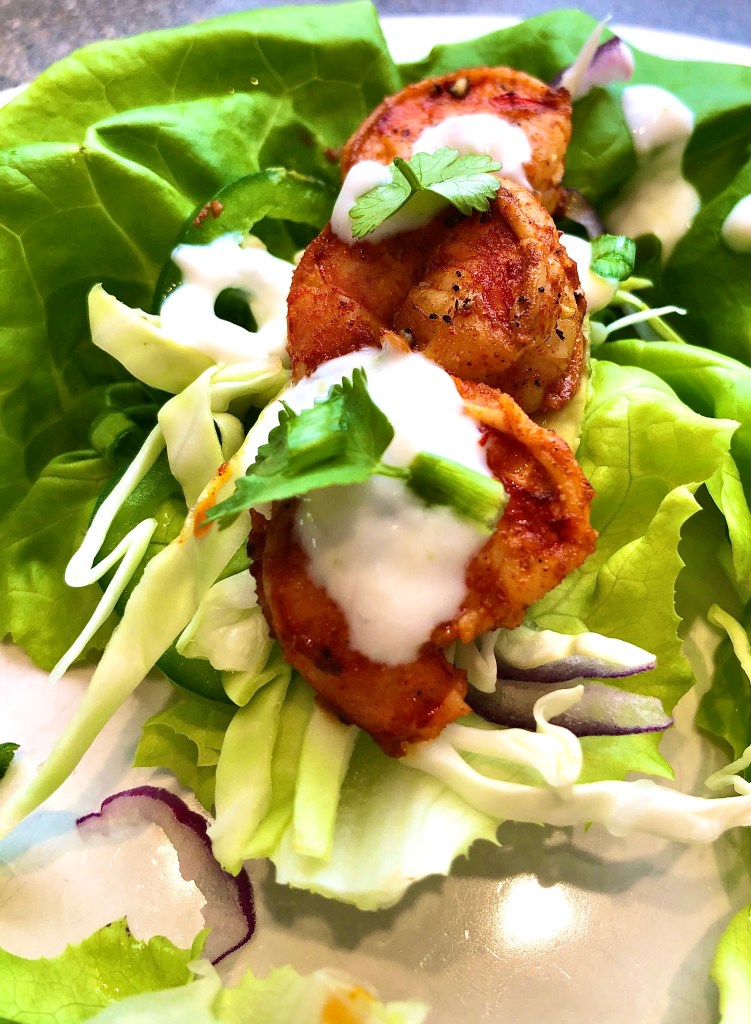
Tacos of any kind are always a hit, and with summer weather this light, tasty taco recipe is a favourite! (Not to mention healthy!)
The mixture of creamy avocado, crunchy cabbage, and zesty shrimp are an explosion of flavour, texture, and color!
They are so fast and easy to make that it begs the question why I don’t make them more often!
Advertisements
Advertisements
One of the other perks is the minimal heat that it adds to the house during a sweltering, summer day.
Start by thawing your frozen raw shrimp in cold water; this method helps thaw the shrimp more quickly than just setting it out to thaw and prevents it from cooking if you were to microwave it or use hot water.
If you have fresh raw shrimp, it will be that much better!
NOTE: pre-cooked shrimp will not have the ideal flavour or texture, so try to get raw shrimp if at all possible.
Advertisements
Advertisements
Next, collect all your fresh veggies; cabbage, red onion, avocado, jalapeño, lemon, lime and, ofcourse, the butter lettuce to wrap it all up!
Advertisements
Advertisements
Slice the avocado, jalapeño, red onion, and cabbage into thin slices.
A slightly firmer avocado makes them easier to slice and keep the pieces together, rather than accidentally mashing them in the process.
Prepare the crema sauce by adding 1/4 cup sour cream to a bowl.
Zest 1/4 of the lime, then juice 1/4 of the lime into the same bowl.
Add salt & pepper to taste.
The crema sauce really makes all the flavours pop, so don’t skip this step!
Advertisements
Advertisements
Advertisements
Advertisements
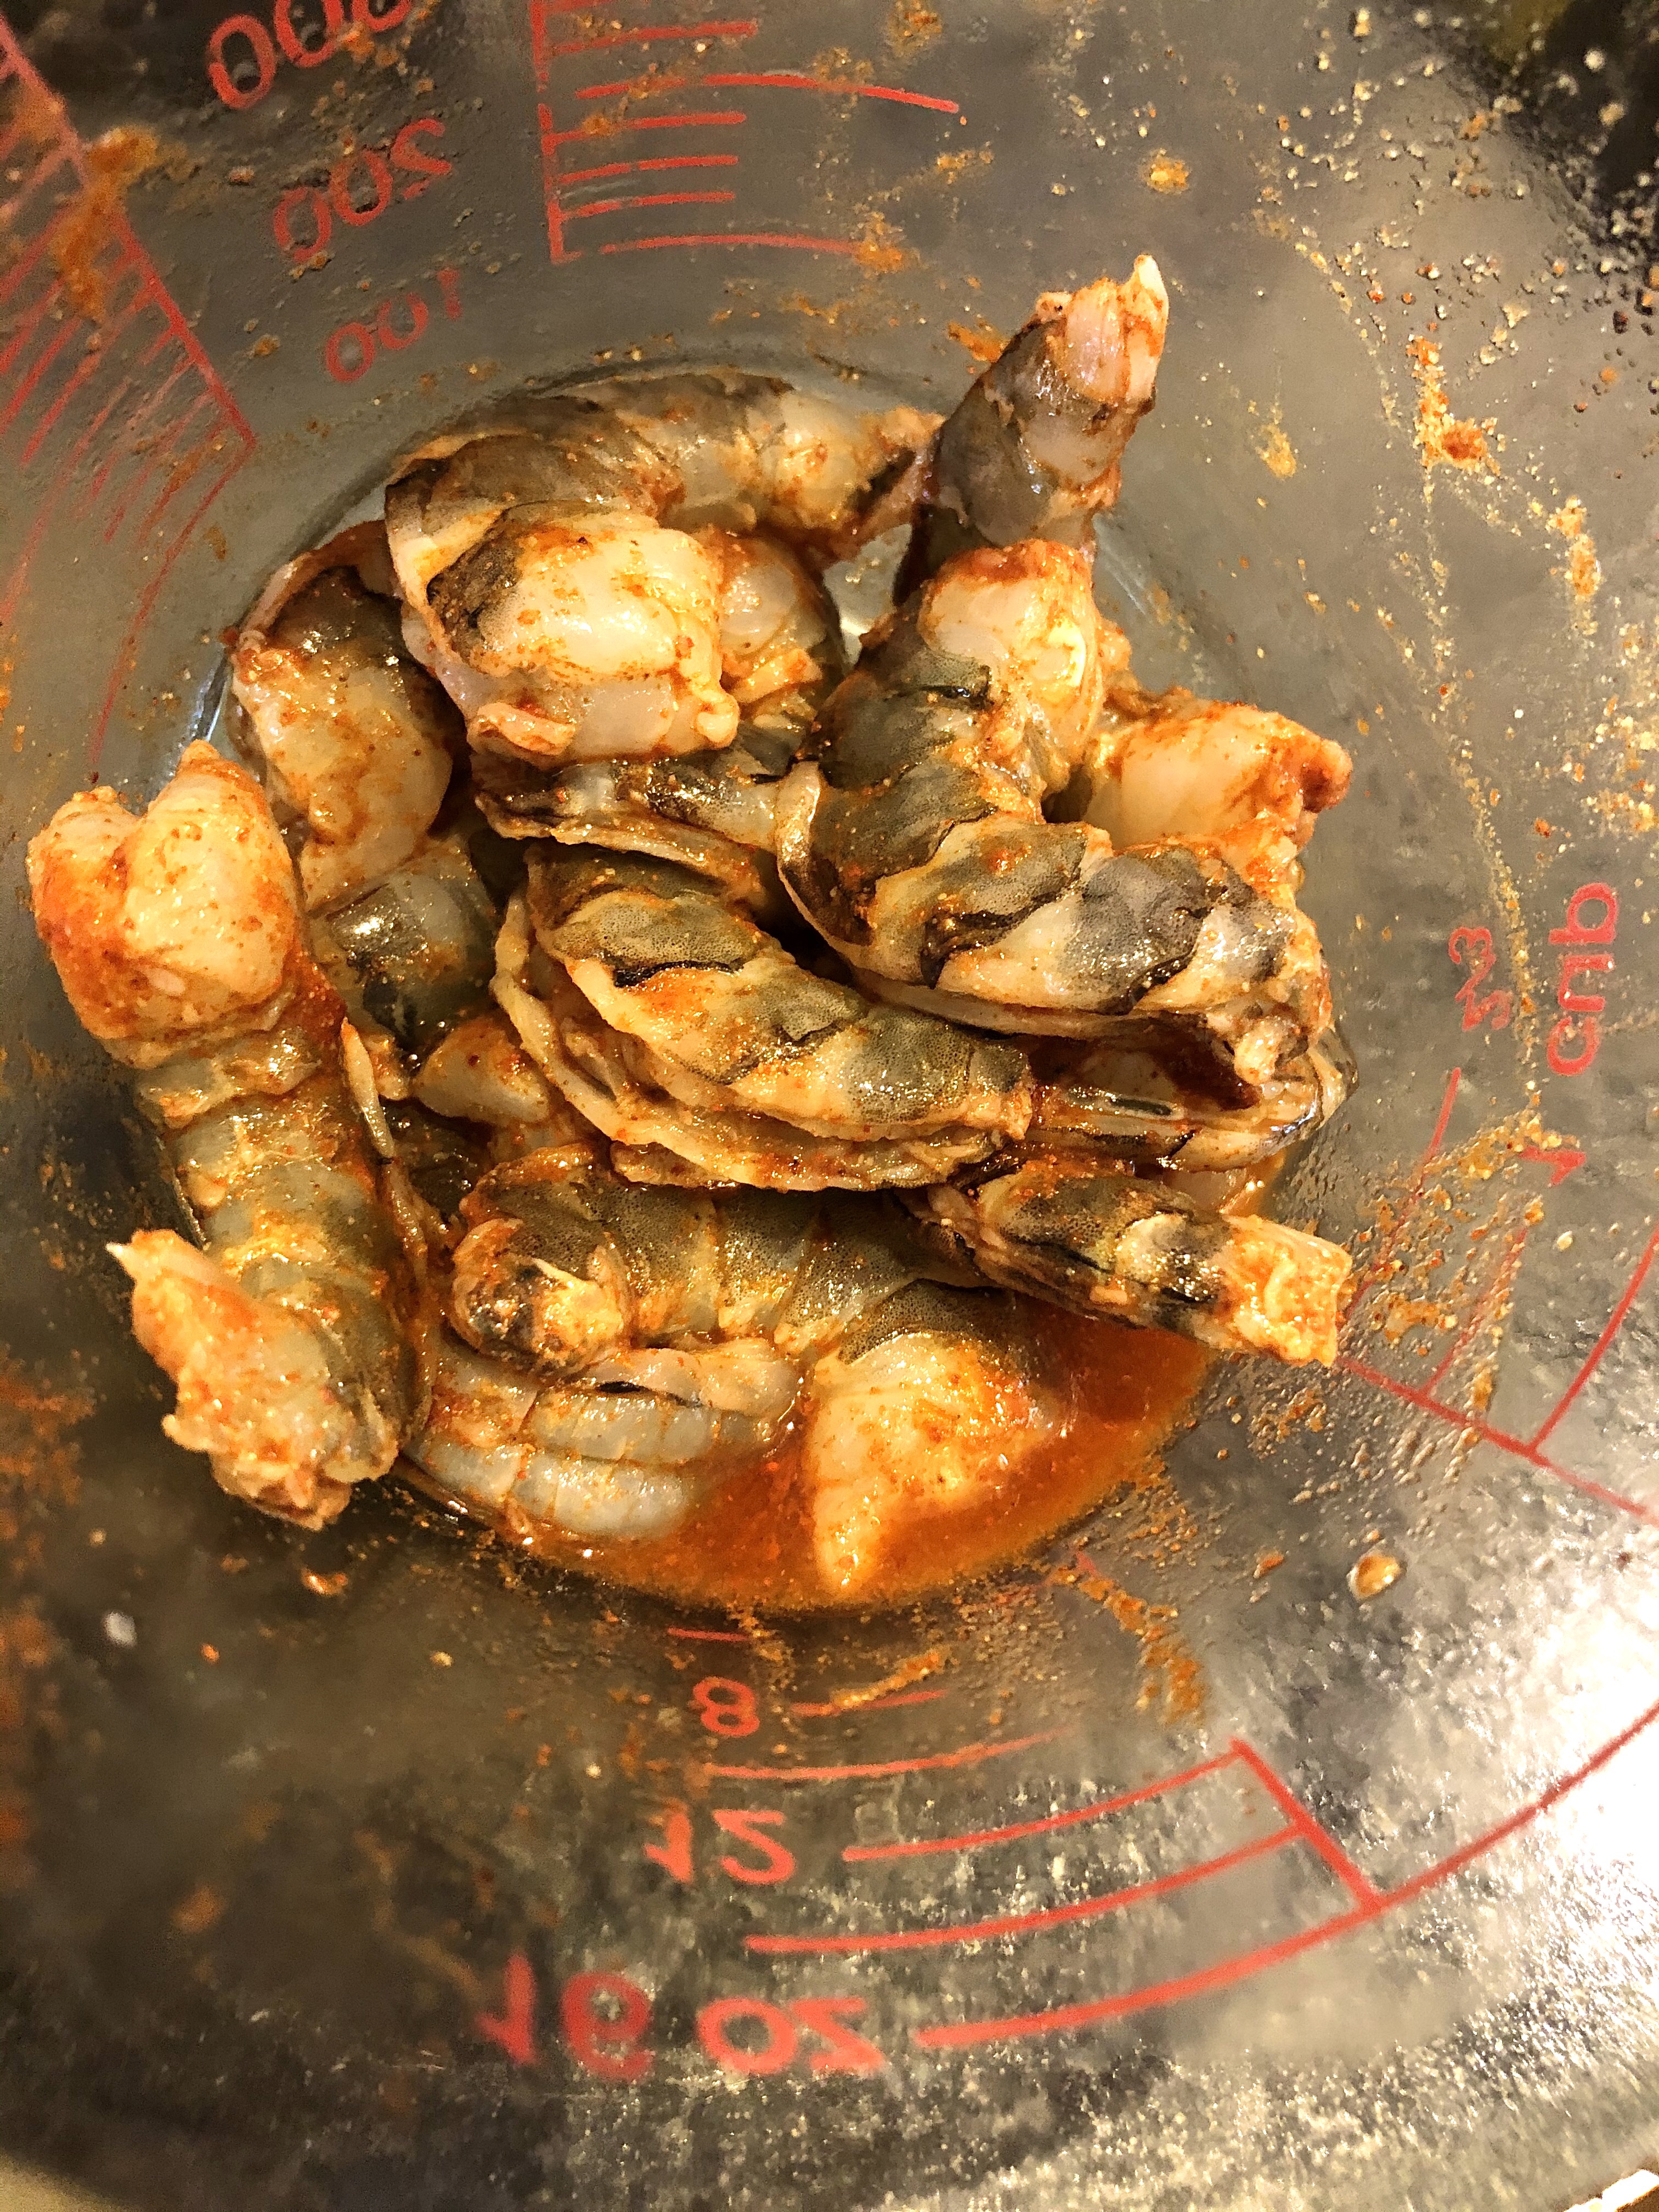
By now your shrimp should be thawed; devein and shell them if they are not already prepared this way.
Place in a bowl and juice 1/4 fresh lemon, then add the cayenne, cumin, and paprika.
Mix well, making sure the spices are rubbed into the shrimp well (I use my hands).
Allow to sit for about 5 minutes so the shrimp absorbs as much flavour as possible.
Advertisements
Advertisements
Advertisements
Advertisements
Fry in a pre-heated pan on high heat with butter until just cooked.
You do not want to overcook shrimp; it makes them chewy.
You can tell they are ready to be flipped when they start turning pink on the bottom.
Once the second side turns pink and the center is white (and not translucent) you know they are ready.
Advertisements
Advertisements
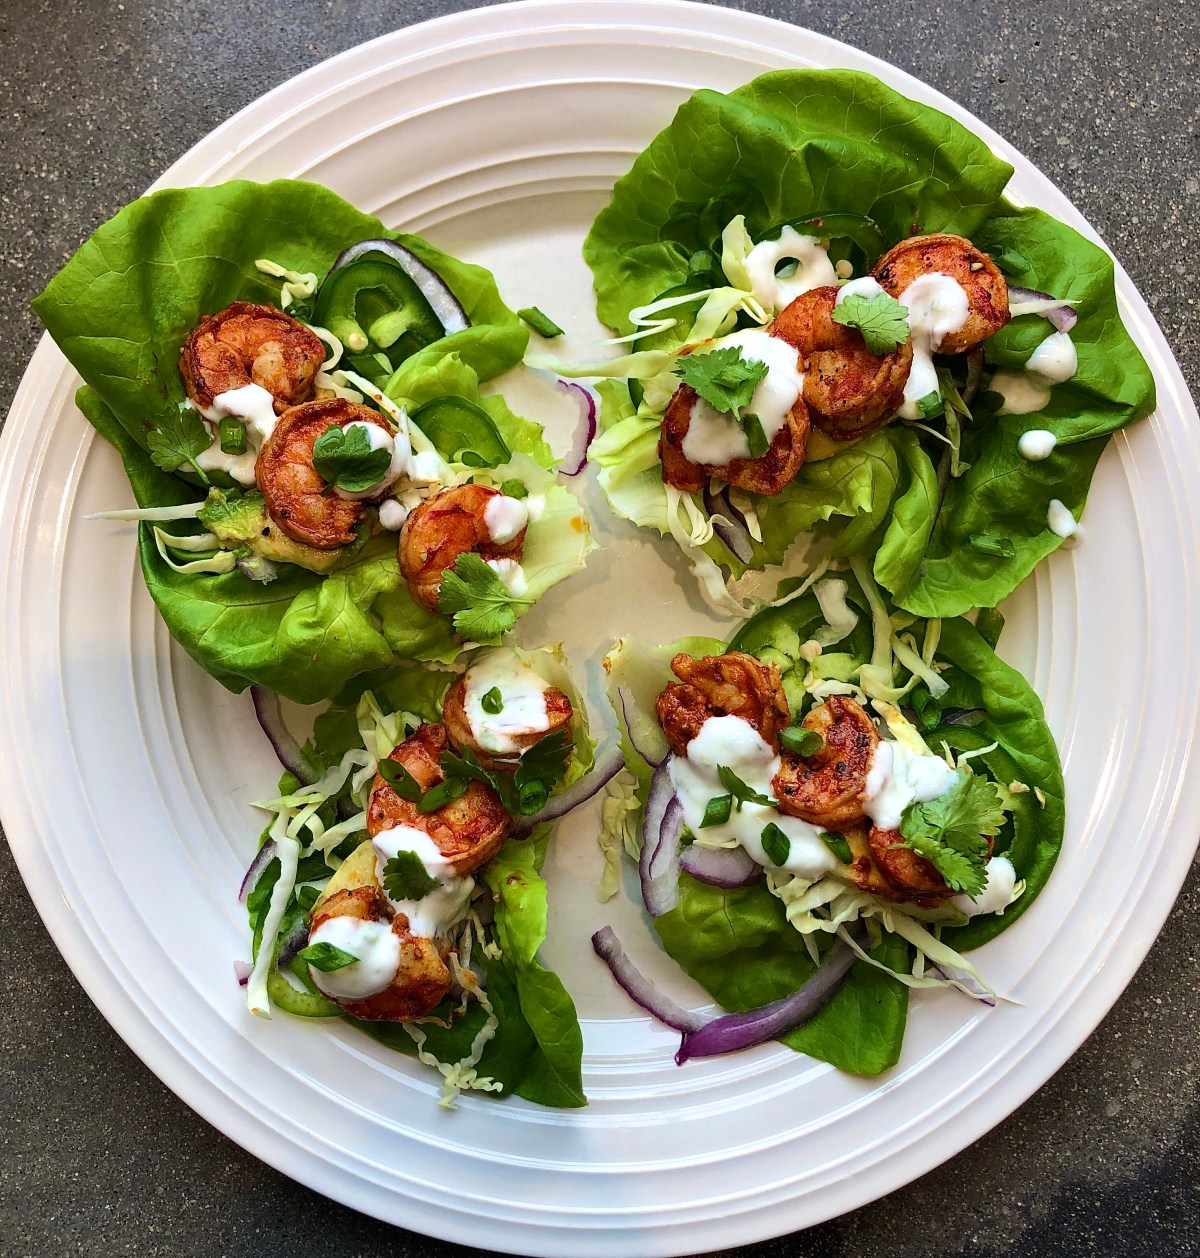
Plate the lettuce, garnishing it with the cabbage, red onion, jalapeño, and sliced avocado.
A little bit goes a long way, so don’t overdo the toppings.
Finally, add the shrimp and drizzle with crema sauce.
If you are a cilantro lover, by all means sprinkle a few leaves on top!
This will be the life of the party next time you host dinner!
Want to make a fancy meal that isn’t expensive and is even pretty easy to make?
This recipe is bound to impress!
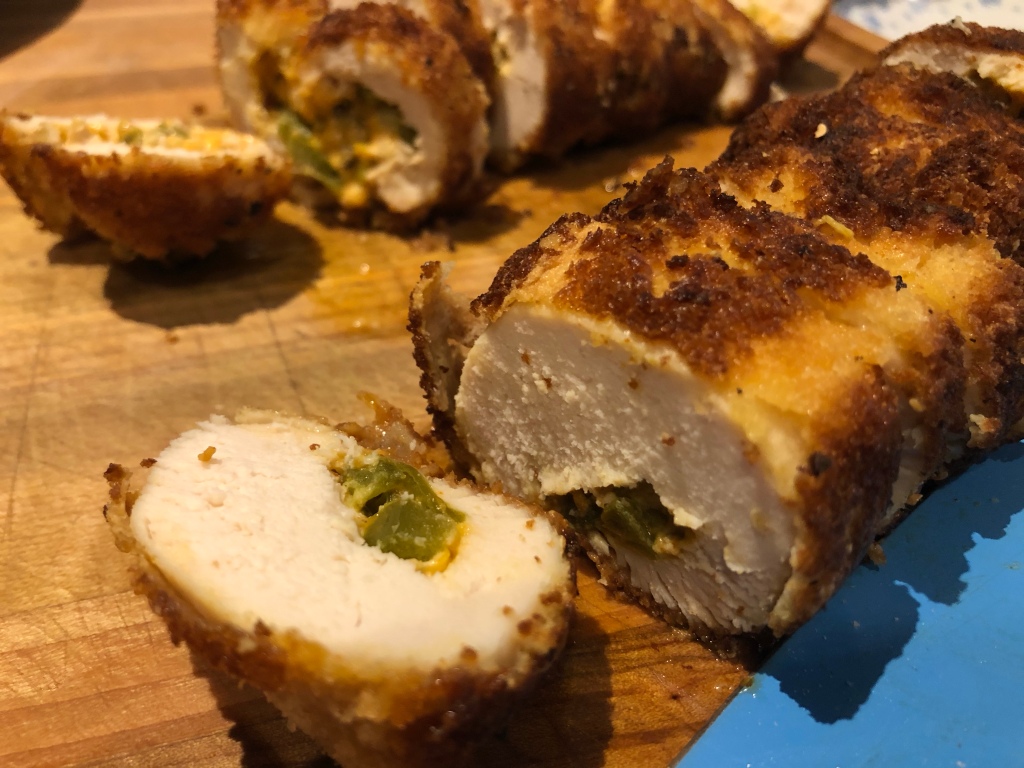
Not only does it taste amazing and look like a gourmet chef created it, but it is also easy to make – and won’t break the bank!
I am a big fan of foods with a bit of heat, so I took the concept of Cordon Bleu and spiced it up a bit. (It has Jalapeños, so yep! It had a bit of kick!)
Advertisements
Advertisements
First, thaw 2 large chicken breasts. If you want to go with fresh cuts, go for it! Frozen tends to be less expensive and lasts longer.
Prep your ingredients: shred your cheese, dice the jalapeños, mince the garlic, and soften the cream cheese.
Combine these ingredients, along with the salt, pepper, and cayenne powder and mix well.
Advertisements
Advertisements
Advertisements
Advertisements
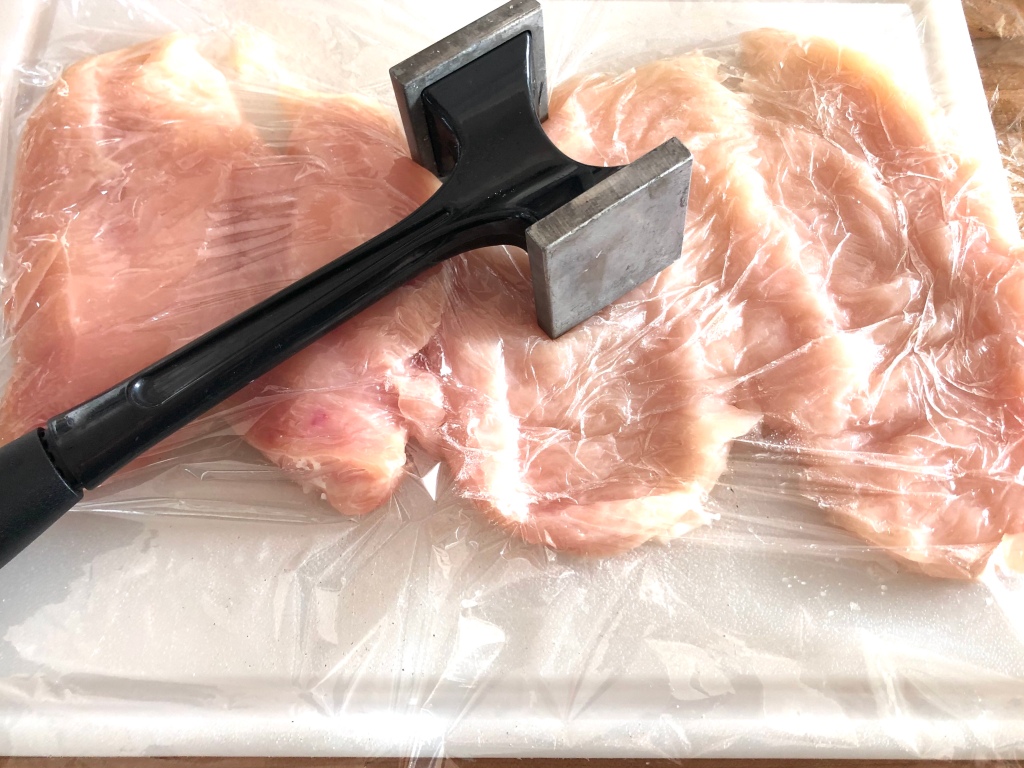
Next, butterfly cut your breasts. This simply means cutting it almost in half between the top and bottom of the breast, but leaving it attached at one side.
Cover with plastic wrap and flatten with a meat tenderizer. Don’t hammer it too thin, though!
Pat the chicken dry with paper towel.
Advertisements
Advertisements
Add the cheese mix and spread evenly on the chicken.
Advertisements
Advertisements
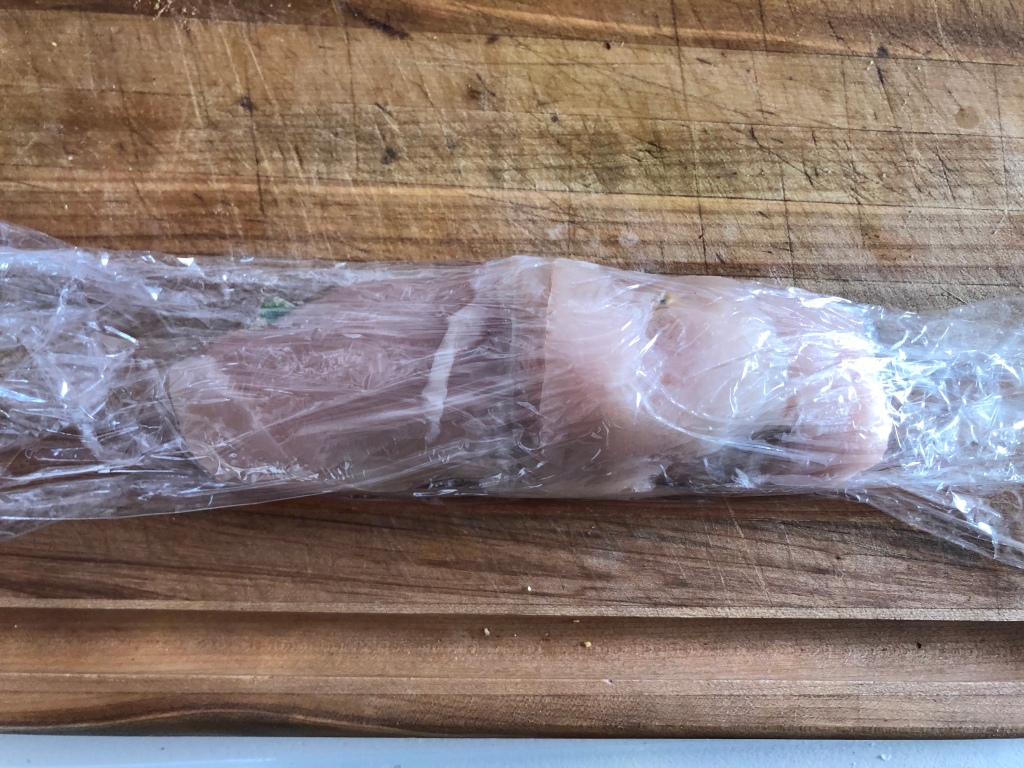
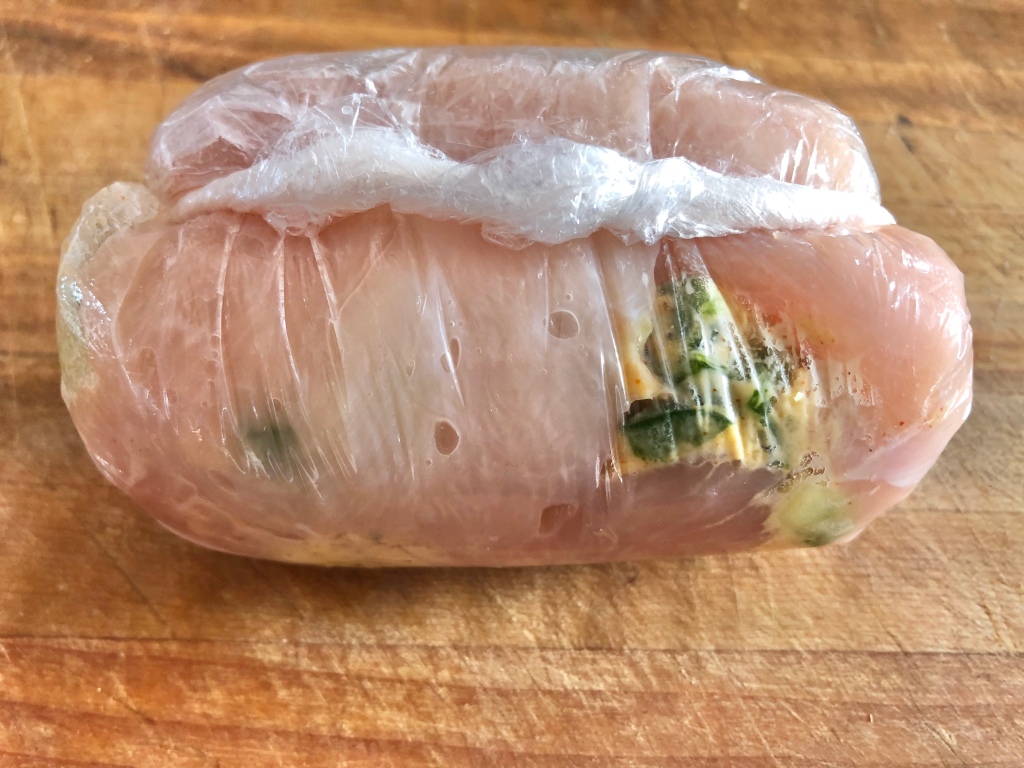
Next, roll it up!
Wrap in plastic…
Advertisements
Advertisements
… and roll it tightly so it looks like the photo above.
Refrigerate for 30 minutes. This will help the roll to hold shape during the cooking process.
If you are in a hurry, you can pop them in the freezer for about 10 minutes, instead.
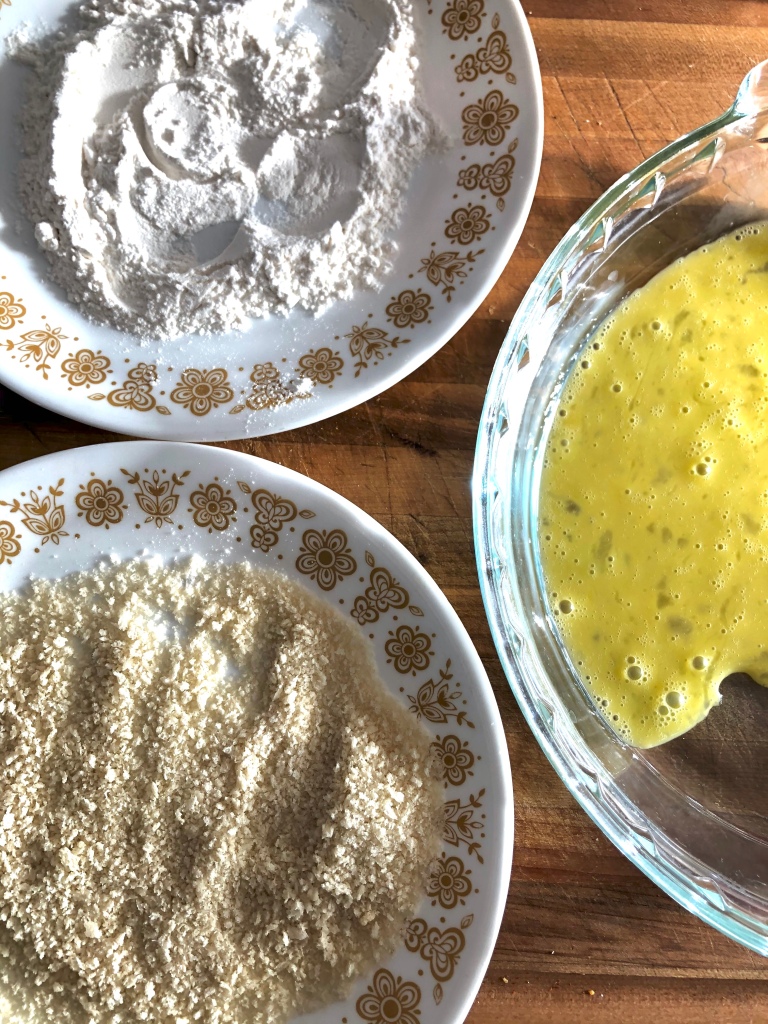
To coat it and give it a nice crunchy finish with a golden color, dredge in flour. I used to skip this step and go straight to the beaten eggs, however flour helps the egg adhere to the chicken.
Once floured, cover well in egg, then dredge in the Panko crumbs.
Advertisements
Advertisements
Advertisements
Advertisements
Add to a pre-heated pan with canola oil on high heat.
Rotate the rolls so they brown evenly on all sides.
You are not trying to cook them thoroughly at this point, so don’t worry about that. You are simply getting that golden finish.
Advertisements
Advertisements
Place on a baking sheet and put in the oven for 20 minutes at 350º or until the internal temperature reaches 165º