Tacos of any kind are always a hit, and with summer weather this light, tasty taco recipe is a favourite! (Not to mention healthy!)
The mixture of creamy avocado, crunchy cabbage, and zesty shrimp are an explosion of flavour, texture, and color!
They are so fast and easy to make that it begs the question why I don’t make them more often!
Advertisements
Advertisements
One of the other perks is the minimal heat that it adds to the house during a sweltering, summer day.
Start by thawing your frozen raw shrimp in cold water; this method helps thaw the shrimp more quickly than just setting it out to thaw and prevents it from cooking if you were to microwave it or use hot water.
If you have fresh raw shrimp, it will be that much better!
NOTE: pre-cooked shrimp will not have the ideal flavour or texture, so try to get raw shrimp if at all possible.
Advertisements
Advertisements
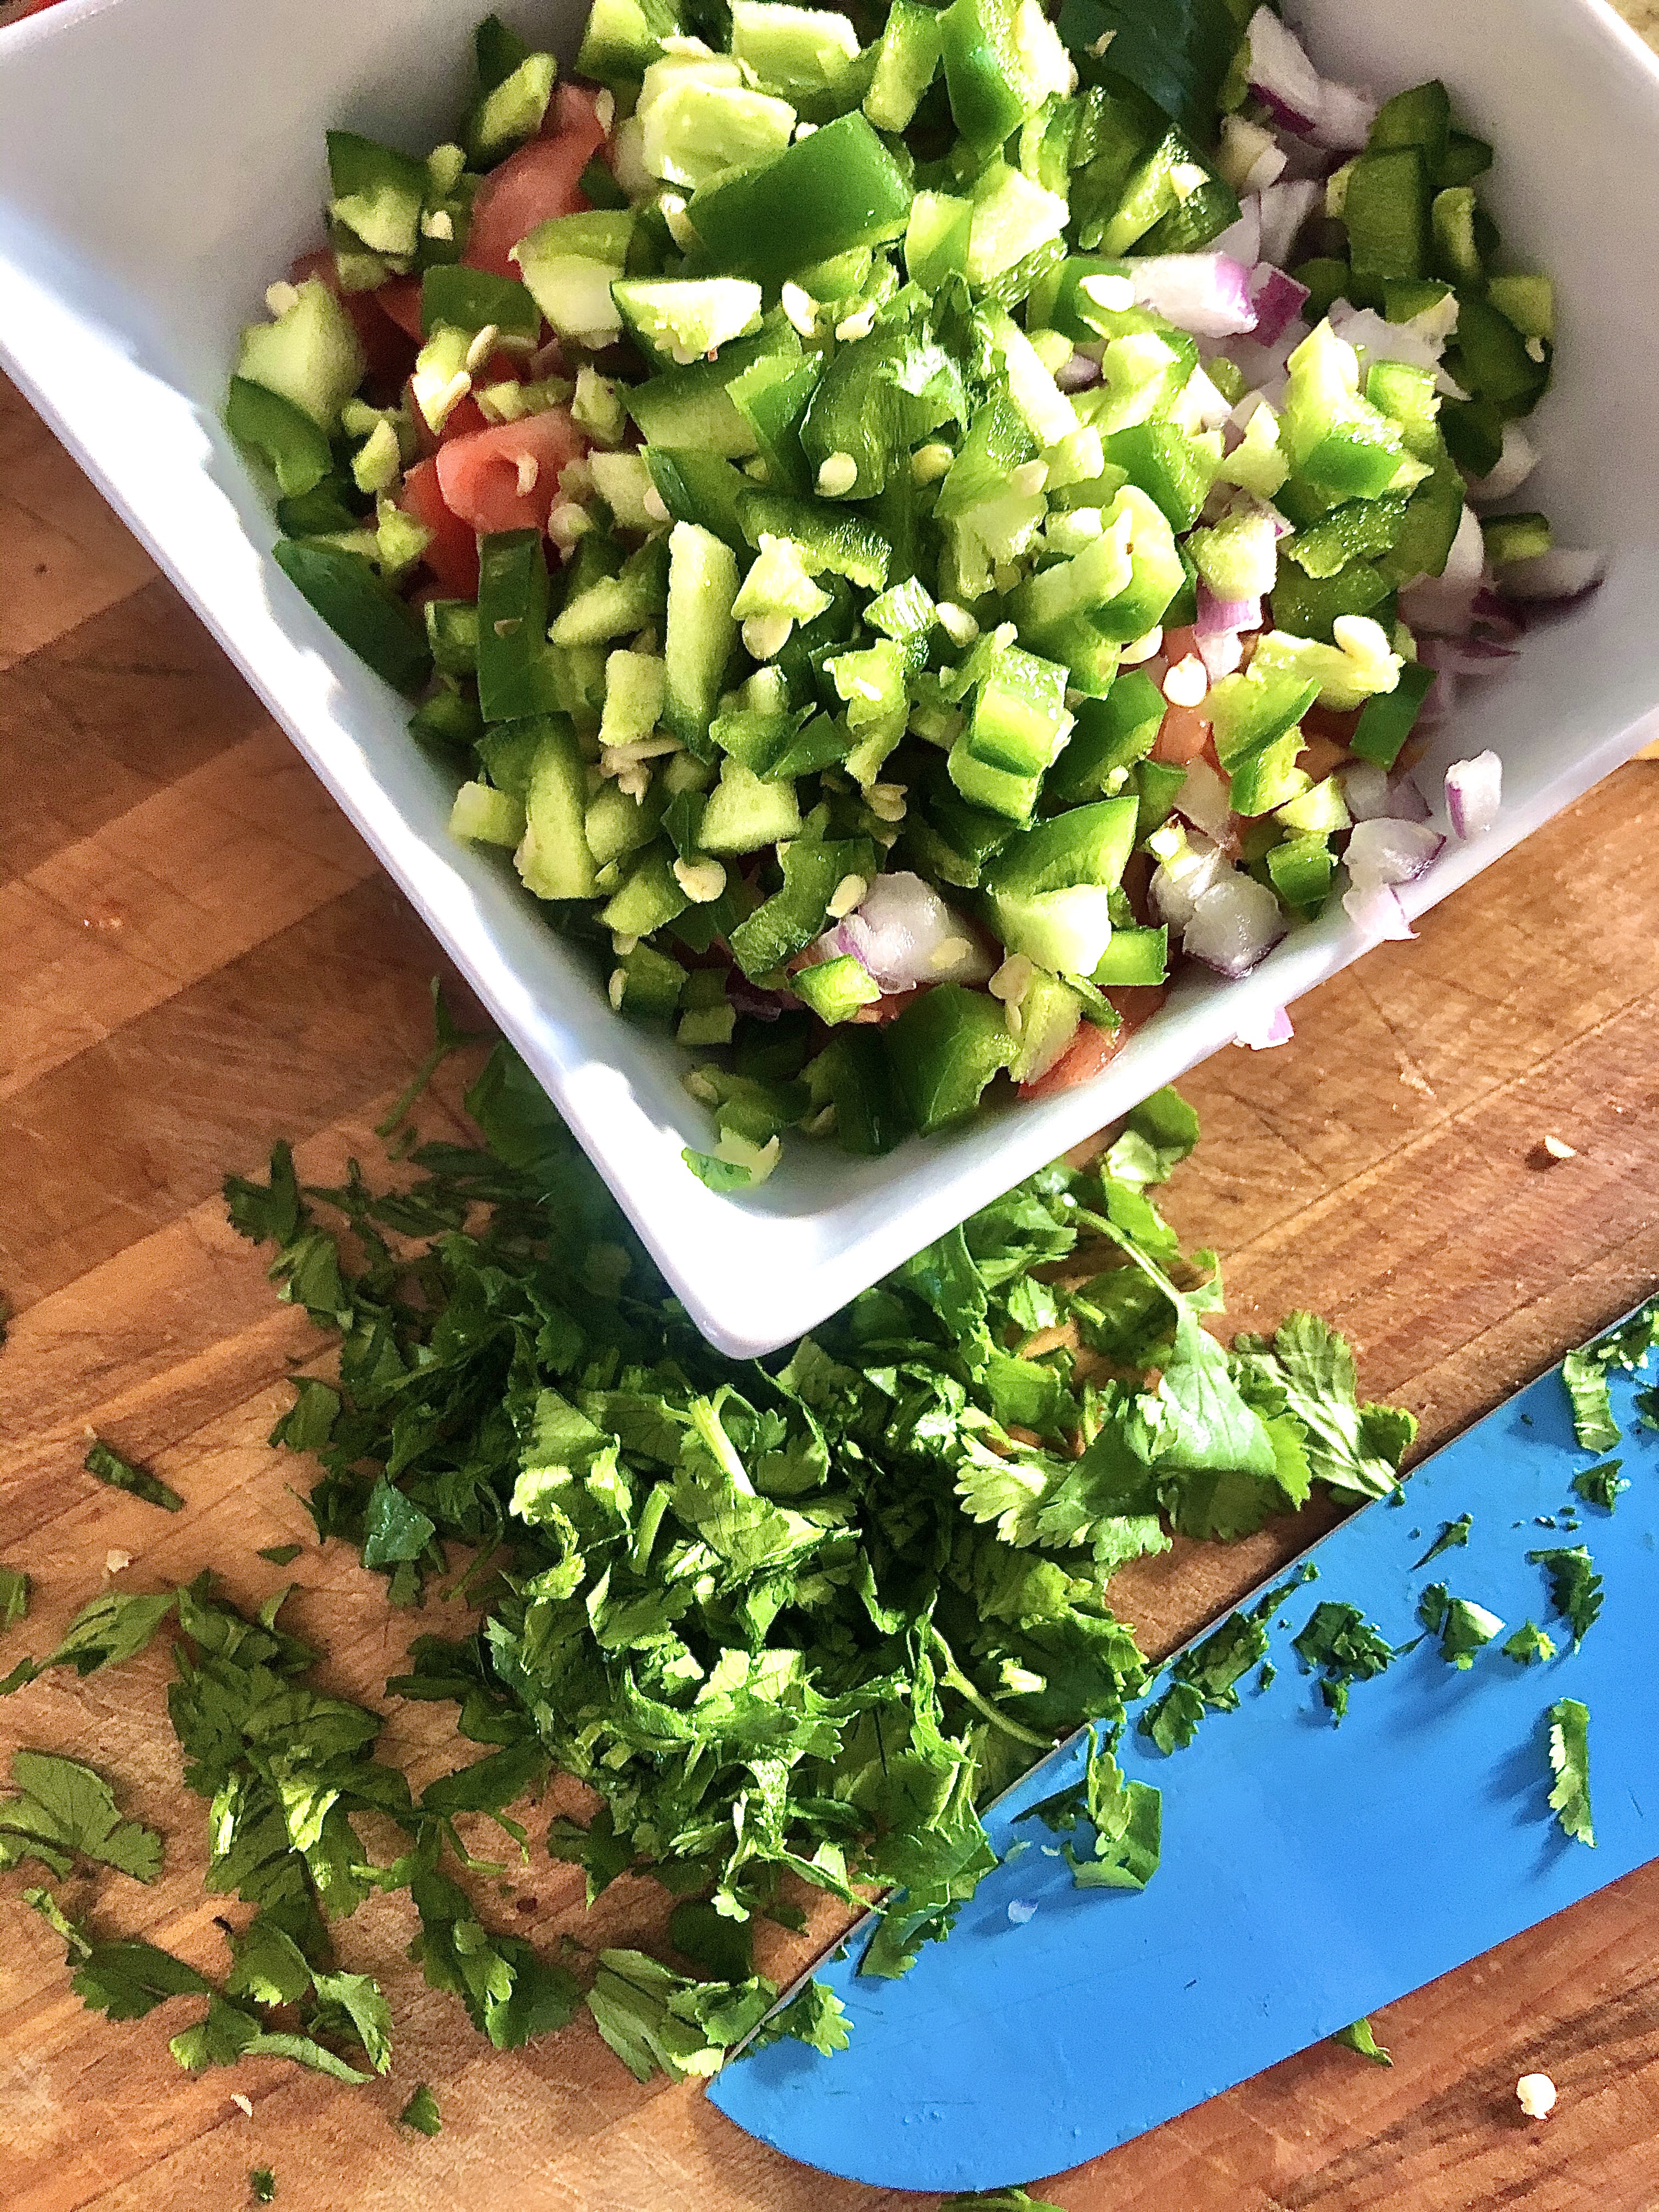
Next, collect all your fresh veggies; cabbage, red onion, avocado, jalapeño, lemon, lime and, ofcourse, the butter lettuce to wrap it all up!
Advertisements
Advertisements
Slice the avocado, jalapeño, red onion, and cabbage into thin slices.
A slightly firmer avocado makes them easier to slice and keep the pieces together, rather than accidentally mashing them in the process.
Prepare the crema sauce by adding 1/4 cup sour cream to a bowl.
Zest 1/4 of the lime, then juice 1/4 of the lime into the same bowl.
Add salt & pepper to taste.
The crema sauce really makes all the flavours pop, so don’t skip this step!
Advertisements
Advertisements
Advertisements
Advertisements
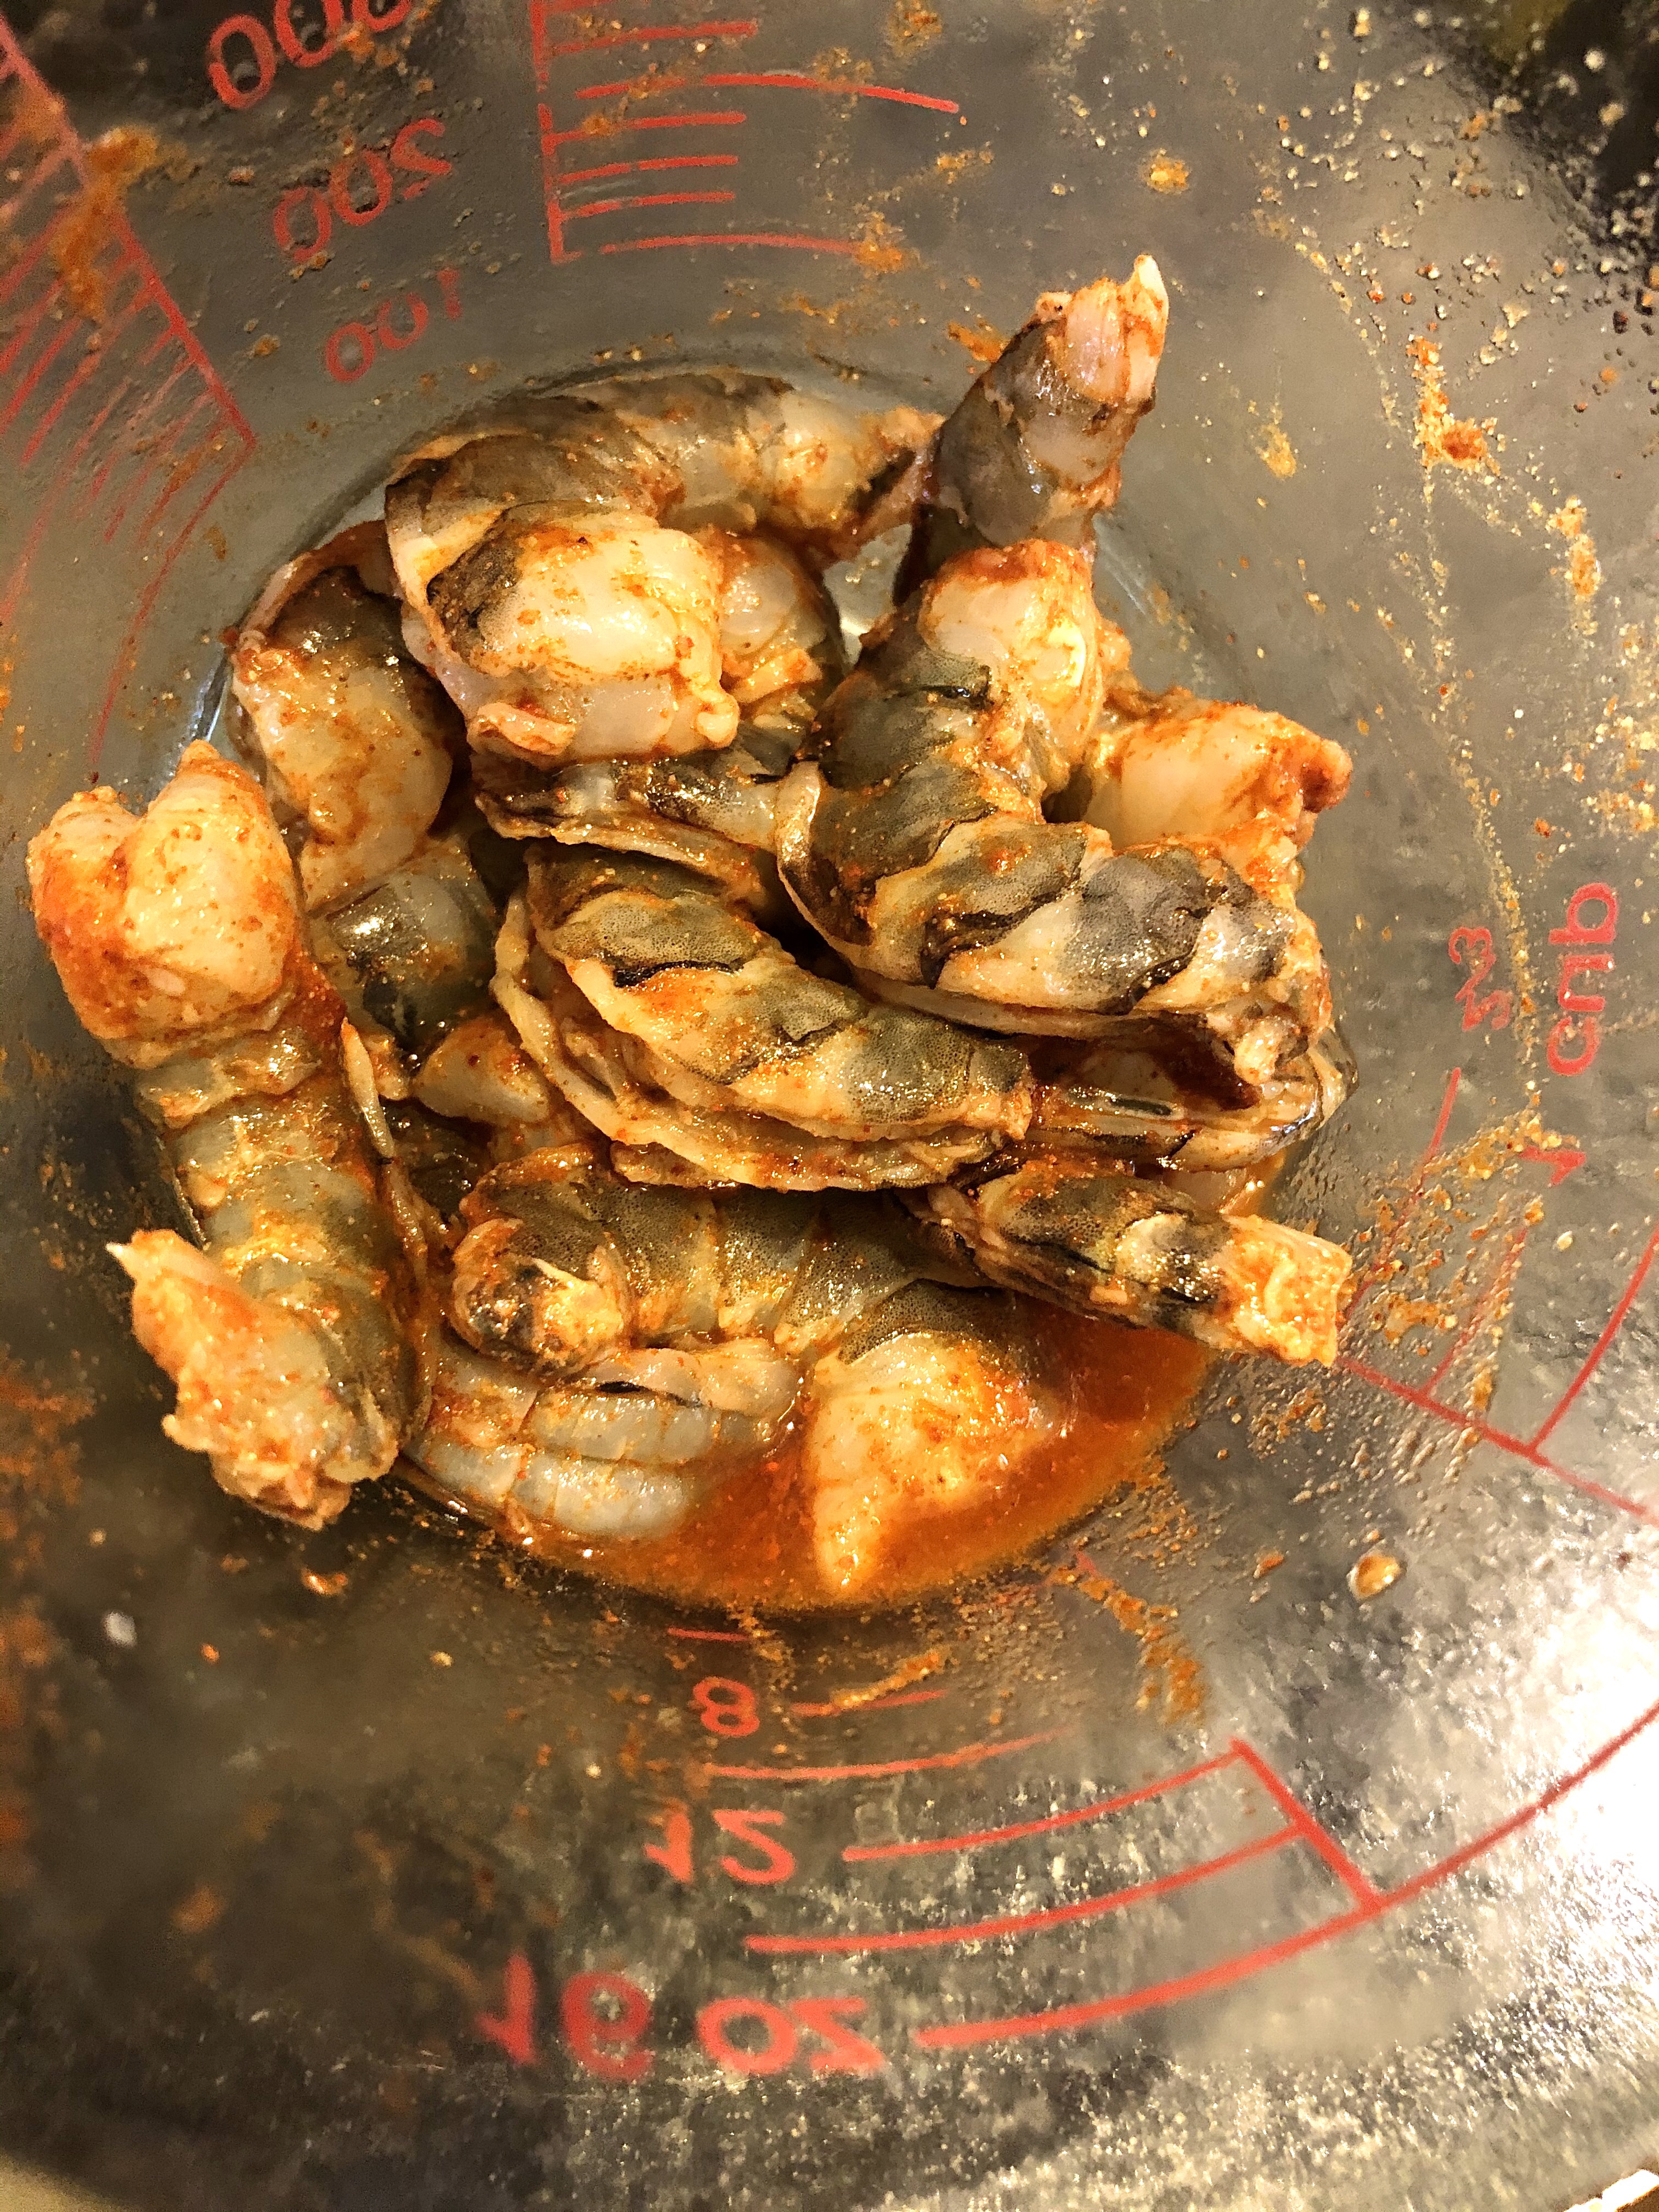
By now your shrimp should be thawed; devein and shell them if they are not already prepared this way.
Place in a bowl and juice 1/4 fresh lemon, then add the cayenne, cumin, and paprika.
Mix well, making sure the spices are rubbed into the shrimp well (I use my hands).
Allow to sit for about 5 minutes so the shrimp absorbs as much flavour as possible.
Advertisements
Advertisements
Advertisements
Advertisements
Fry in a pre-heated pan on high heat with butter until just cooked.
You do not want to overcook shrimp; it makes them chewy.
You can tell they are ready to be flipped when they start turning pink on the bottom.
Once the second side turns pink and the center is white (and not translucent) you know they are ready.
Advertisements
Advertisements
Plate the lettuce, garnishing it with the cabbage, red onion, jalapeño, and sliced avocado.
A little bit goes a long way, so don’t overdo the toppings.
Finally, add the shrimp and drizzle with crema sauce.
If you are a cilantro lover, by all means sprinkle a few leaves on top!
This will be the life of the party next time you host dinner!
And, as the name indicates, this is so simple to make with minimal time and ingredients.
The first step is obviously harvesting your rhubarb.
The leaves are poisonous, so discard them in a safe place where no little ones or critters will be tempted to try nibbling on them.
You want the stalks to be relatively young so they are nice and dense; old woody stalks will not have the peak flavour you are looking for.
Advertisements
Advertisements
Wash well, then chop 4 cups into roughly 1 inch pieces; this part does not need to be anything fancy or precise as they will simmer down into a sauce as you cook the rhubarb.
Bring 4 cups of water to a boil in a large pot (if you live in the city and have chlorinated water, you will want to filter it or used bottled water for the best taste).
Add the rhubarb and 1 cup of white sugar.
For a sugar-free option, you can substitute 1 teaspoon of powdered stevia in place of the sugar.
Advertisements
Advertisements
Return the pot to a boil, then reduce the heat and simmer for 20 minutes.
After 20 minutes, the rhubarb should be very soft and falling apart.
I personally love to add 1/4 teaspoon of vanilla and 1/4 lemon (juiced) at this point for a bit of extra flavour.
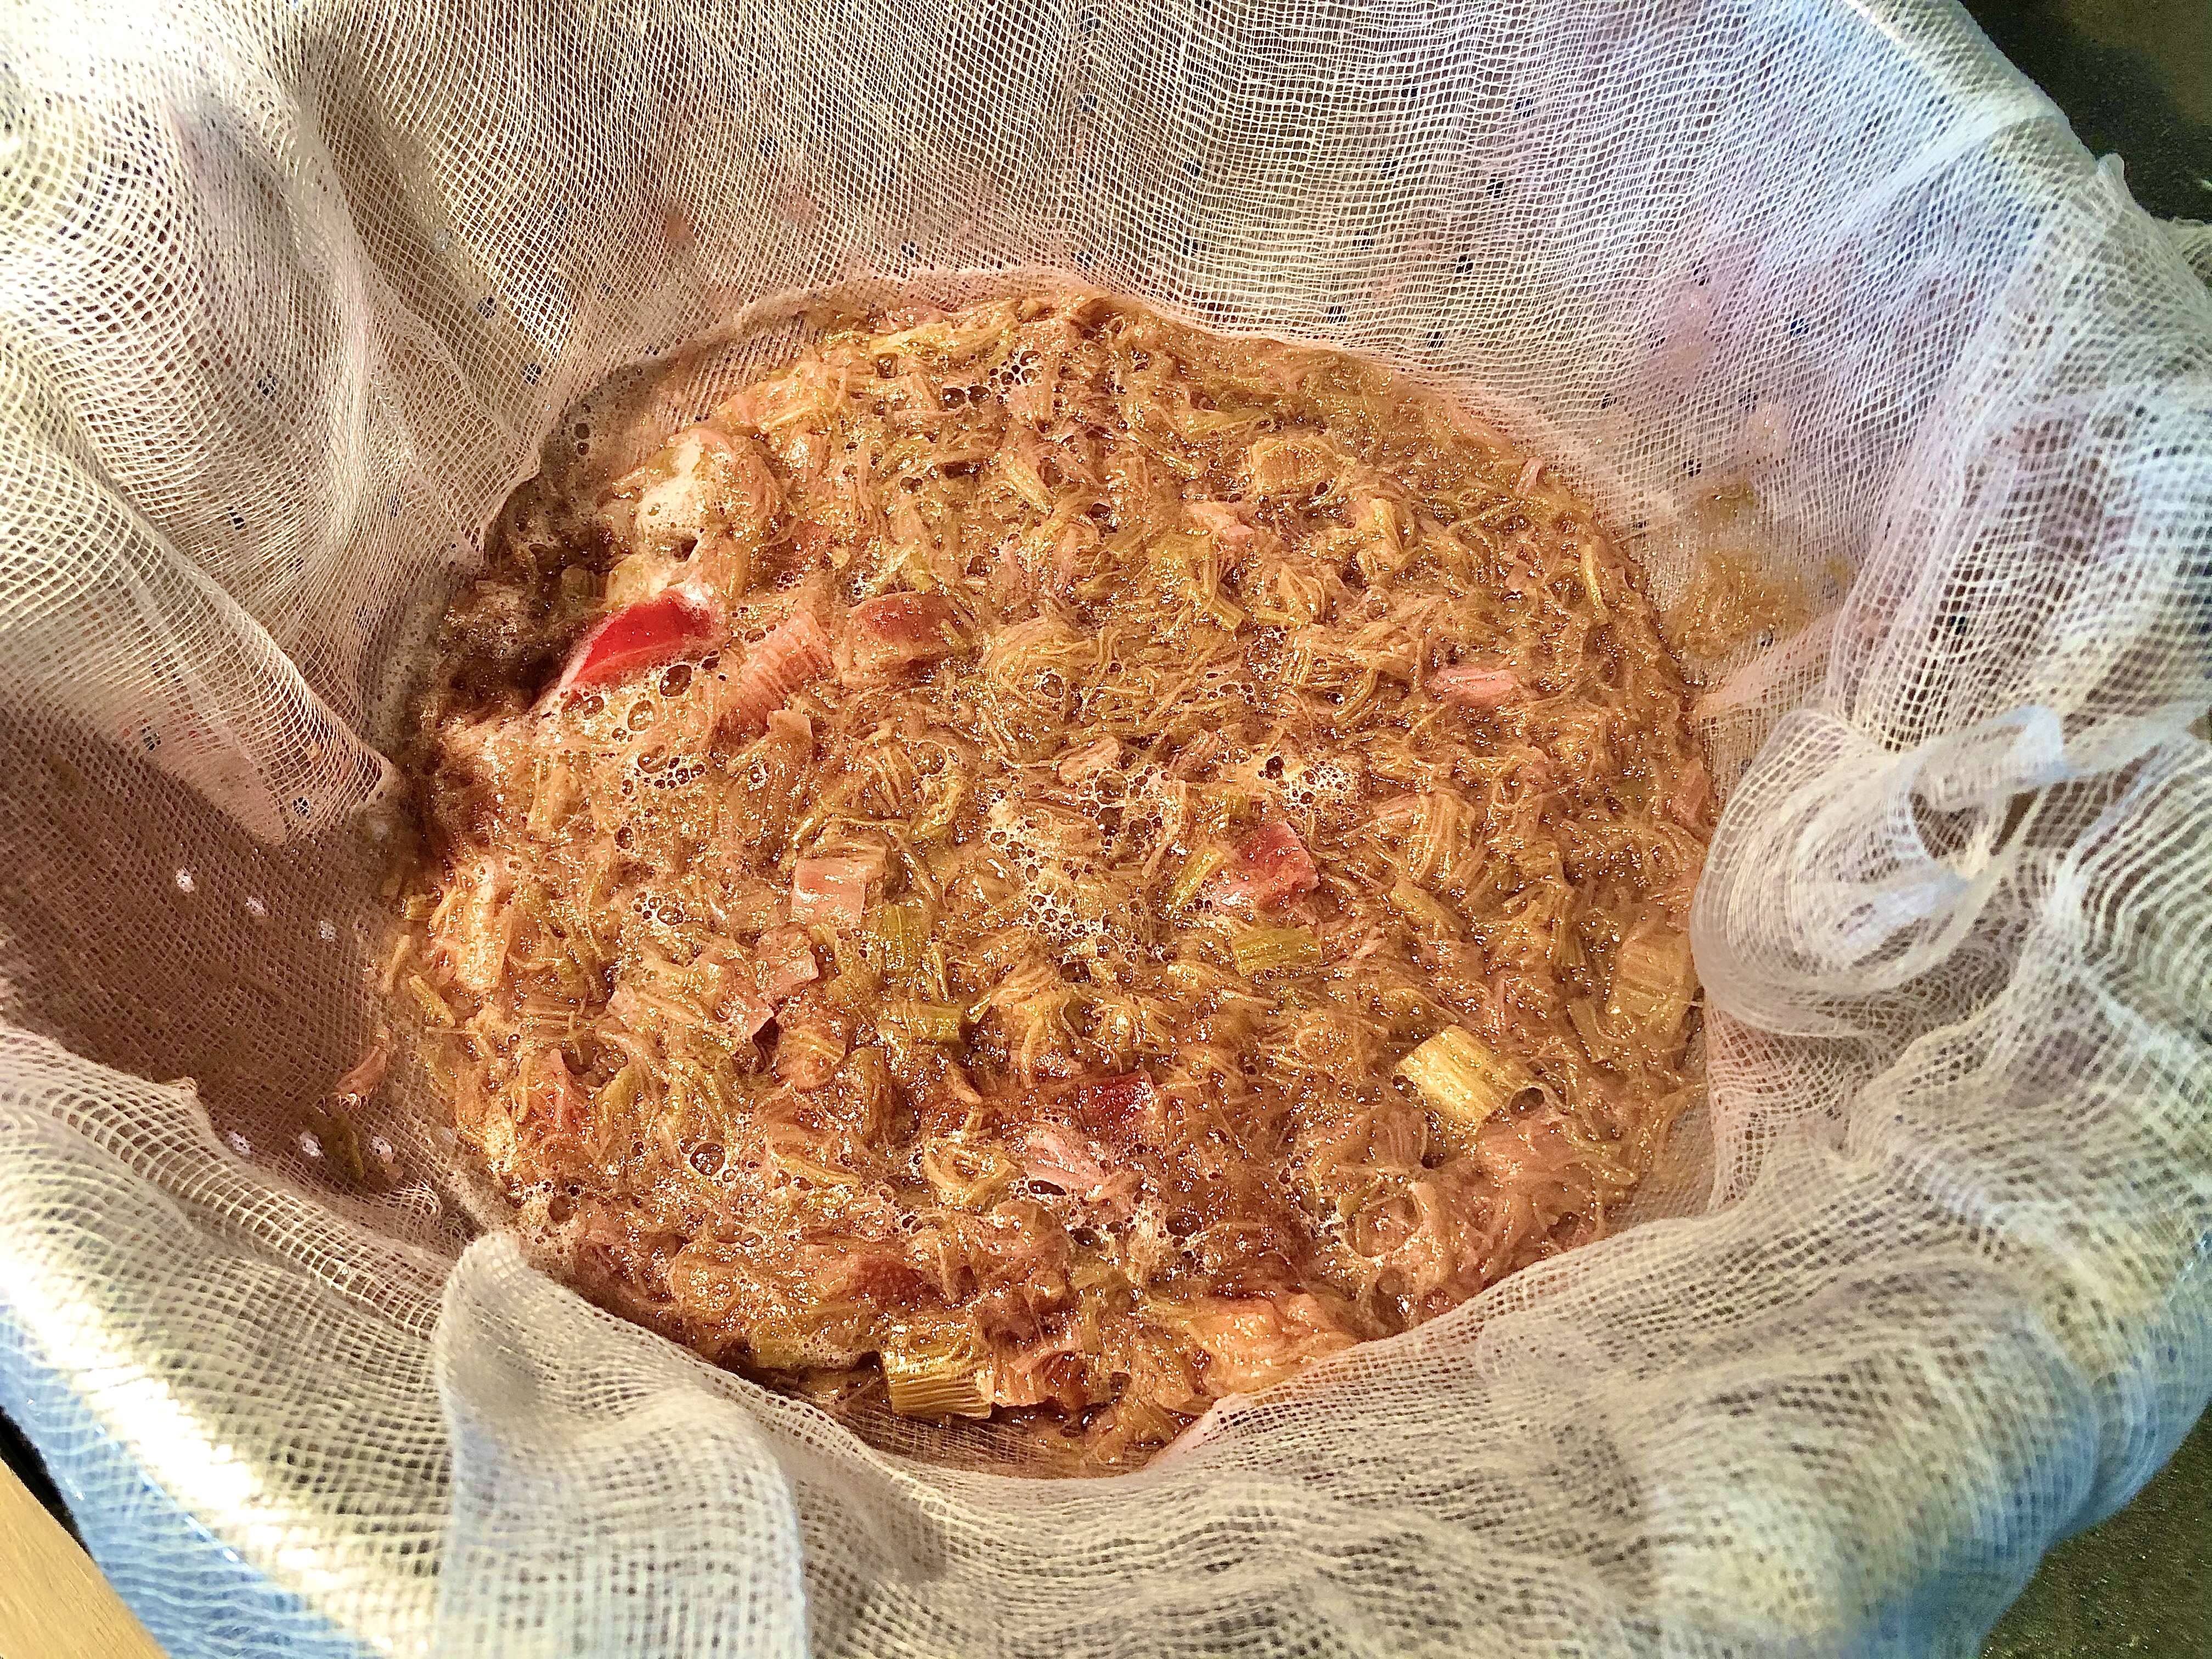
Place a large colander inside a large bowl and line the colander with cheese cloth.
Advertisements
Advertisements
Carefully pour the hot mixture into the colander and allow to drain, then lift the cheese cloth and give it a gentle squeeze to get a bit more of the remaining juice.
NOTE: do not squeeze all of the juice out.
Place the rhubarb pulp back into the original pot to use for rhubarb leather later (this is where the zero-waste comes in!)
Remove the colander; you will be left with beautiful, bright red juice in the bowl!
Advertisements
Advertisements
Using a funnel, ladle the juice into an airtight container and store in the fridge for up to a month.
For a fizzy, refreshing summer drink, try mixing 1 part rhubarb simple syrup with 3 parts sparkling water.
Yum!
Advertisements
Advertisements
Zero Waste
The whole point of pairing rhubarb simple syrup with my rhubarb leather recipe is to make full use of the whole stalk and literally not throw anything away!
Ditch the highly processed and sugar-packed snacks with this tasty homemade recipe!
Who wouldn’t like a healthier option than your standard almost-completely-sugar fruit roll-ups?!
Especially when it is so fast and easy to make homemade rhubarb leather?
While this recipe does call for some sugar, there is a sugar-free option to use stevia powder instead.
(I will, however warn you that the version with stevia isn’t as supple as a fruit “roll-up” and tends to be more brittle. Sugar has certain properties that simply can’t always be replaced)
Advertisements
Advertisements
If you have already made my rhubarb simple syrup recipe and want to skip right to the rhubarb leather go for it!
If you haven’t made my rhubarb simple syrup, check out the recipe here and continue reading for the full directions to make rhubarb leather.
(These two recipes together use all of the rhubarb, thus creating zero waste!)
The first step is obviously harvesting your rhubarb.
Advertisements
Advertisements
The leaves are poisonous, so discard them in a safe place where no little ones or critters will be tempted to try nibbling on them.
You want the stalks to be relatively young so they are nice and dense; old woody stalks will not have the peak flavour you are looking for.
Advertisements
Advertisements
Wash well, then chop 4 cups into roughly 1 inch pieces; this part does not need to be anything fancy or precise as they will simmer down into a sauce as you cook the rhubarb.
Bring 4 cups of water to a boil in a large pot.
Add the rhubarb and 1 cup of white sugar.
For a sugar-free option, you can substitute 1 teaspoon of powdered stevia in place of the sugar.
I haven’t tried this recipe using honey yet, however do plan to try it out since we keep bees and they produce way more honey than I expected!
Using honey would obviously change the flavour a bit, but I imagine it would be in a good way.
Advertisements
Advertisements
Return the pot to a boil, then reduce the heat and simmer for 20 minutes.
After 20 minutes, the rhubarb should be very soft and falling apart.
I personally love to add 1/4 teaspoon of vanilla and 1/4 lemon (juiced) at this point for a bit of extra flavour.
Advertisements
Advertisements
Place a large colander inside a large bowl and line the colander with cheese cloth.
Carefully pour the hot mixture into the colander and allow to drain, then lift the cheese cloth and give it a gentle squeeze to get a bit more of the remaining juice.
NOTE: do not squeeze all of the juice out.
Place the rhubarb pulp back into the original pot.
You will use the juice later to make rhubarb simple syrup(this is where the zero-waste comes in!)
Advertisements
Advertisements
Using an immersion blender, blend the rhubarb into a fine paste.
(If you don’t have an immersion blender, you can use a regular blender; this method just makes for less dishes to wash)
If you left a little juice in the pulp, you shouldn’t have to add any liquids.
The consistency should be a little thicker than apple sauce.
Advertisements
Advertisements
Spread evenly on the dehydrator fruit leather tray and turn onto about 140º F for 4-5 hours.
(Oh! On a side note; remember that juice we saved earlier in this process? Now that the rhubarb paste is in the dehydrator and working on turning into rhubarb leather, we get to start on rhubarb simple syrup!)
The time will vary depending on how thick the paste is spread and how much liquid you left in the mixture.
You will know it is ready when it is no longer gummy feeling.
Pro tip: use the tip of a knife to work the edge of the rhubarb leather up if it gives you trouble removing it from the tray.
Advertisements
Advertisements
Roll the rhubarb leather and cut into pieces.
Store in the fridge for up to a week or in the freezer for a longer shelf life (if it doesn’t get eaten as soon as it comes off the dehydrator!)
Advertisements
Advertisements
Recipe
4 cups rhubarb, chopped
4 cups water
1 cup sugar (or 1 teaspoon powdered stevia)
1/4 teaspoon vanilla extract
1/4 lemon, juiced
Advertisements
Advertisements
Directions
Chop 4 cups rhubarb and add to pot with 4 cups boiling water.
Add 1 cup sugar or 1 teaspoon powdered stevia.
Return to a boil, then reduce heat and simmer for 20 minutes.
Remove from heat and add vanilla and lemon juice.
Strain well, leaving a little juice in the pulp.
Return to the original pot and blend with an immersion blender until it turns into a paste a little thicker than the consistency of apple sauce.
Spread evenly on a dehydrator fruit leather tray and place in dehydrator at 140º F for 4-5 hours or until thoroughly dry.
Roll and cut into pieces.
Enjoy!
Advertisements
Advertisements
Advertisements
Processing…
Success! You're on the list.
Whoops! There was an error and we couldn't process your subscription. Please reload the page and try again.
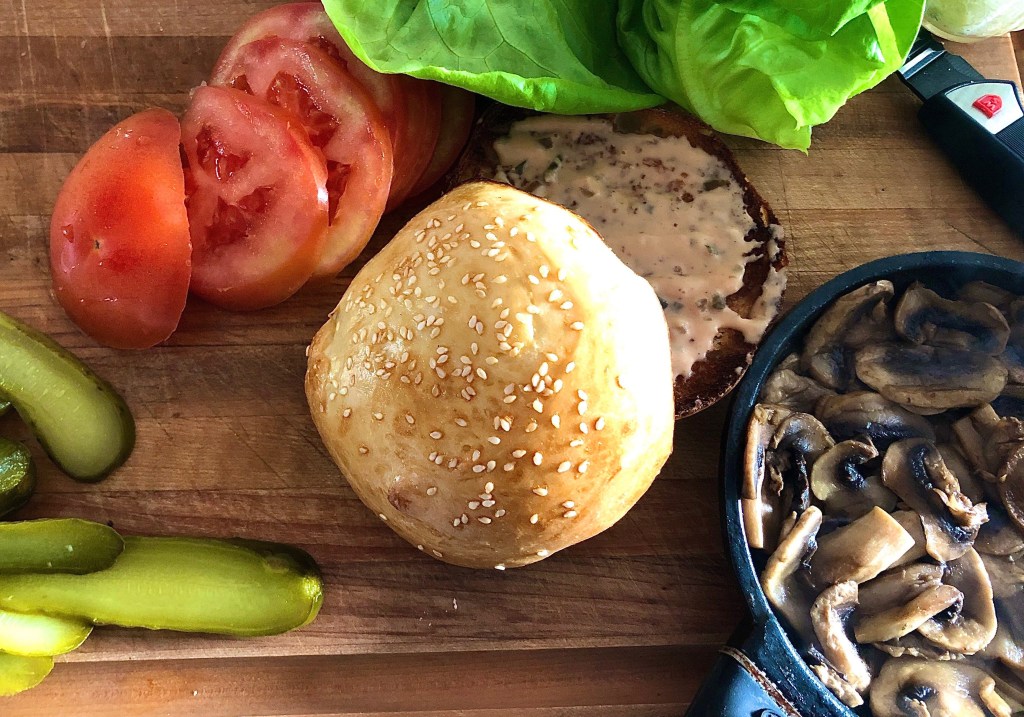
Who doesn’t love a classic hamburger with chips, fries or potato salad on a hot summer day?
Advertisements
Advertisements
Of course you can go with the quick-and-easy store-bought option for the buns and patties, but the homemade version is definitely the gourmet choice!
Sourdough hamburger buns quickly became a favourite when I started on my baking journey… They have so much more flavour, wonderful texture, and I know exactly what ingredients have gone into the food I am eating!
As with all sourdough recipes, it does take a little more planning ahead to make sure they have sufficient time to rise (and develop that nice, tangy sourdough flavour).
Advertisements
Advertisements
But, as I often say, it is all worth it for the superior quality you get by making it yourself!
The first step in this sourdough hamburger bun recipe is to combine the sourdough starter, water, and 1/2 cup of the flour.
Advertisements
Advertisements
Cover with plastic wrap and allow to rise for 30-60 minutes.
Next, melt the butter and slightly heat the milk to about room temperature and add to the bowl.
Add the sugar, salt, and egg. Combine well.
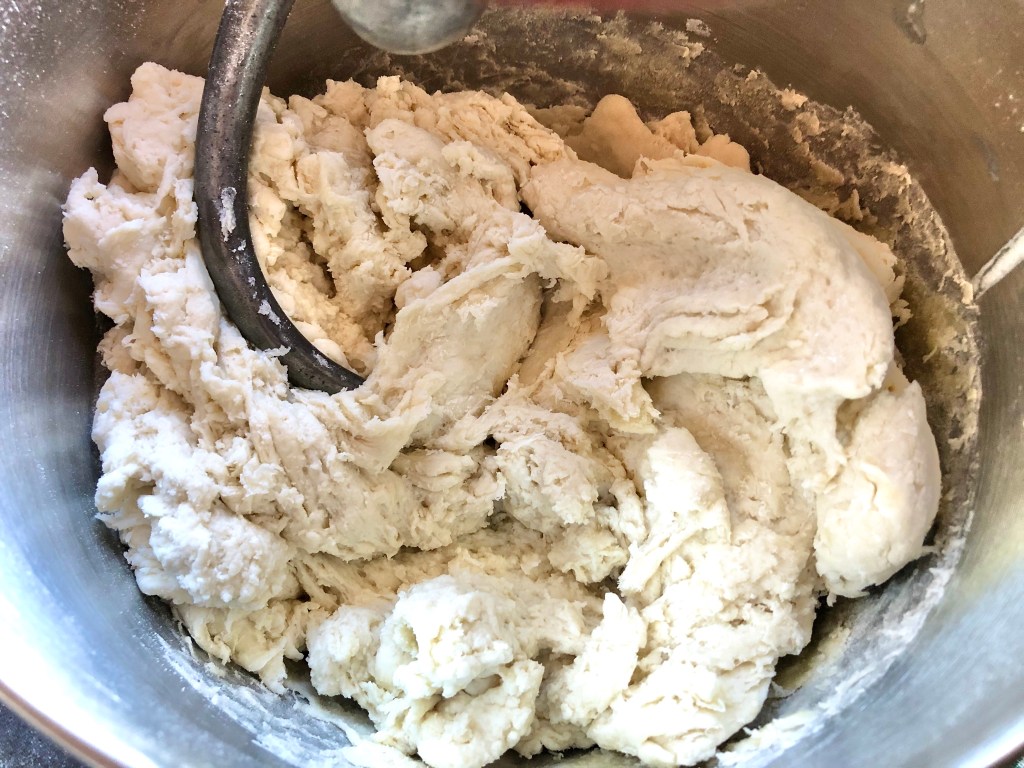
Mix the remaining flour a little at a time; if you are using a mixer, the dough should begin to clear the bowl when it is the right consistency.
Place in a well oiled bowl and turn over so the dough is oiled on both sides, then cover with plastic wrap and allow to rise in a warm place for 30 minutes.
Advertisements
Advertisements
When the timer goes off, fold the dough into the centre from one side, then repeat with the remaining 3 sides.
Turn the dough upside down, cover it again, and allow to rise in a warm area for another 30 minutes.
Repeat this process and leave for 60 minutes.
Advertisements
Advertisements
Finally, the process is repeated one more time and another 60 minute rise time.
The dough should be a very elastic consistency at this point and smell nice and tangy.
Cut the dough into 8 equal sized pieces and roll into rounds, then squish them into roughly the diameter you would like for your hamburger buns.
Place on a baking tray lined with parchment paper, leaving enough room between the bun dough to allow them to rise without sticking to each other.
At this point, I add my sesame seeds and slightly press them into the bun; I find this helps them stick better than if they are added on top of the egg wash after the buns have risen.
Cover with a tea towel and allow to rise for 60 minutes or until they have doubled in size.
Brush with egg wash; this gives the hamburger buns a beautiful, golden color when they have finished baking.
Place into the pre-heated oven at 400º F for 10-15 minutes or until golden brown.
Advertisements
Advertisements
Advertisements
Advertisements
Place on a cooling rack and cover with a tea towel until cool.
Advertisements
Advertisements
I personally love to toast my hamburger buns in the oven before serving; to do this, I butter them well, then place on a baking sheet open side up – and stand and watch them the entire time they broil!
There have been too many times in my life that multi-tasking has caused burned buns… or garlic toast…
Trust me on this! The few minutes it takes them to broil is well worth keeping a diligent eye on them.
I find that broiling them, rather than grilling or placing them into a frying pan gives more even browning and retains more of the butter (because they are face up, rather than face down).
Advertisements
Advertisements
Next, add your topping of choice and enjoy!
Advertisements
Advertisements
Recipe
1 cup sourdough starter
1/4 cup warm water
3 cups white flour, divided
3/4 cup warm milk
2 tablespoons butter, melted
2 tablespoons white sugar
1 1/2 teaspoons salt
1 egg
Egg wash (1 egg + 1/4 teaspoon water, beaten)
Sesame seeds
Advertisements
Advertisements
Directions
Combine sourdough starter, 1/2 cup flour, and water.
Cover and let sit in a warm location for 30-60 minutes.
Melt butter and warm the milk to room temperature. Add to bowl with the sourdough mixture along with egg, sugar, and salt and mix well.
Add remaining flour a little at a time, mixing until the dough develops an elastic consistency. If you are using a mixer, the dough should begin to clear the bowl.
Place dough in a well-oiled bowl and flip, so the dough is oiled on all sides.
Cover with plastic wrap and allow to rise for 30 minutes.
Fold the dough into itself from 4 sides, turn over the dough over, and cover again.
Allow to rise for another 30 minutes.
Repeat the folding process and allow to rise for 60 minutes.
Finally, fold once more and allow to rise for another 60 minutes.
Place dough onto lightly floured surface and cut into 8 equal sized pieces.
Roll each piece into a ball with your hand, then squish into approximately the diameter you would like for your hamburger buns.
Place onto a baking sheet lined with parchment paper.
Sprinkle sesame seeds on top, then cover with a tea towel and allow to rise for 60 minutes or until doubled in size.
Brush with egg wash.
Place in pre-heated oven at 400º F for 10-15 minutes or until golden brown.
Move to cooling rack, cover with a tea towel, and allow to cool.
Enjoy!
Advertisements
Advertisements
Advertisements
Advertisements
Advertisements
Advertisements
Processing…
Success! You're on the list.
Whoops! There was an error and we couldn't process your subscription. Please reload the page and try again.
Growing up in Alaska, our small town was known more for the many coffee shops than it was for fresh bagels.
Really, I had only ever had store-bought bagels for the most part (which are made for mass production and long shelf life) up until I decided to make my own.
This long-shelf-life-concept sacrifices so much flavour and texture to make a buck.
As always, homemade is sooo much better if one is willing to take the time to bake!
Add the water, oil, salt, and flour and mix until all the ingredients are combined.
NOTE: if you are making blueberry or cinnamon raisin bagels, this is the stage you will add the sweet ingredients!
Knead the dough until it develops an elastic consistency; if you are using a mixer this will be about 3-4 minutes on medium speed with a dough hook.
It should not stick to the bowl while being kneaded at this point.
Advertisements
Advertisements
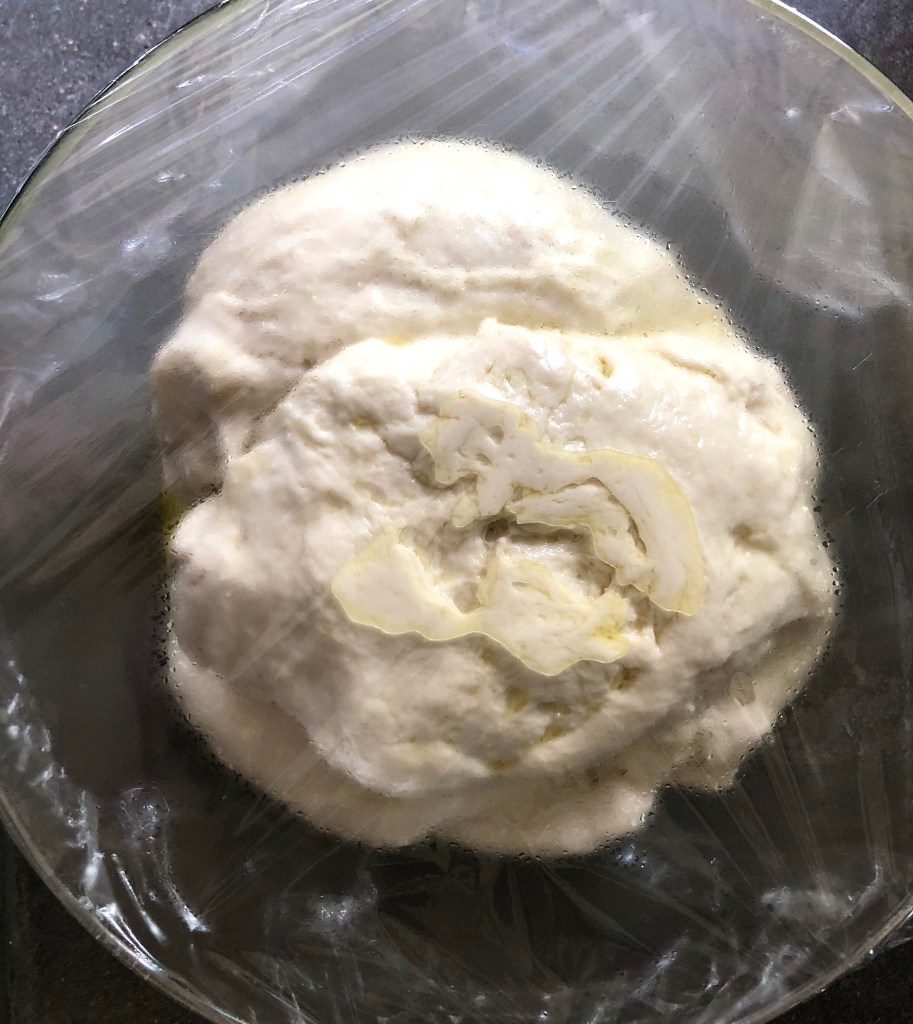
Place dough in an oiled bowl and cover with plastic wrap; let it sit in a warm place for 4 hours.
Sourdough recipes need longer rise time than yeast recipes; this is not only for the leavening effect, but also to develop that tangy sourdough flavour.
Once the 4 hours are up, divide the dough into 12 equal sized pieces.
The easiest way to get them all the same size is to cut the dough in half, then cut those balls into 6 pieces.
In the past, I had pinched off chunks of dough, trying to get similar sizing but inevitably getting varying results.
Advertisements
Advertisements
This method of cutting the dough is much faster, easier, and consistent.
If you want to get REALLY particular, you can go so far as weighing each ball of dough and adjusting the amount they have until each of the 12 balls weigh exactly the same.
Advertisements
Advertisements
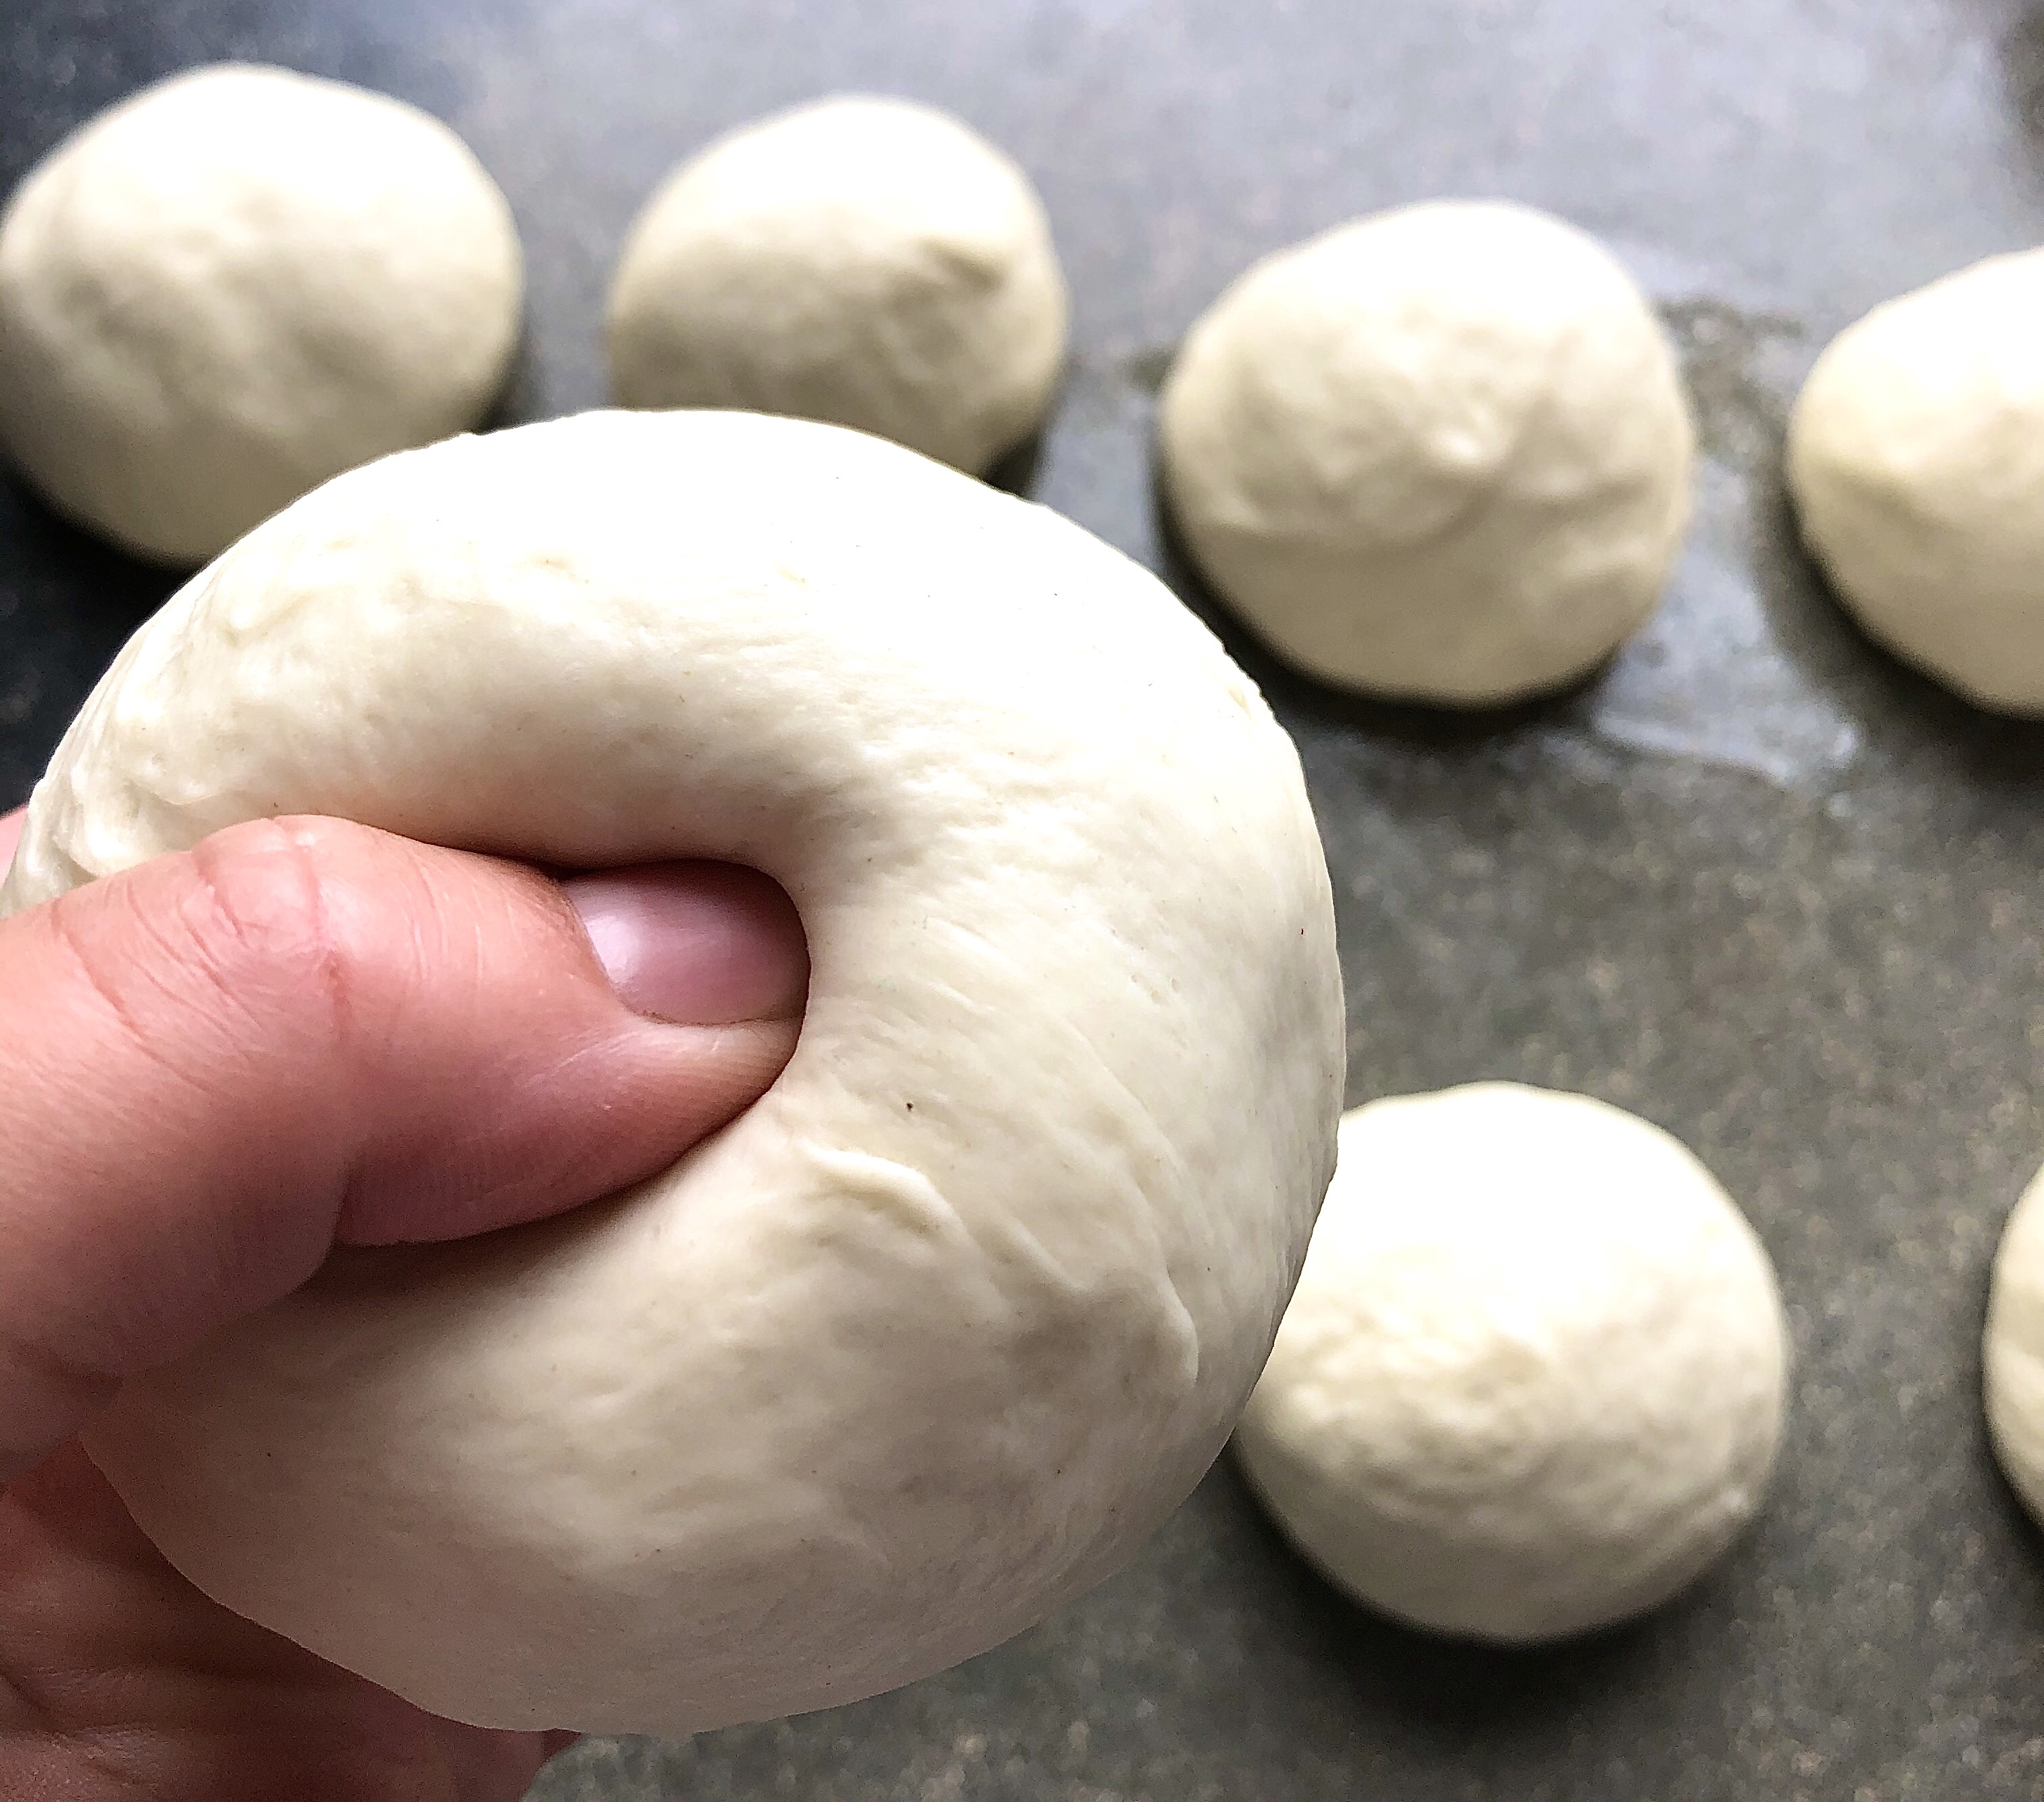
On an unfloured surface, roll each of the balls into perfect rounds.
Next, pinch a hole through the centre and use two fingers to “twirl” that gap into a nice round hole.
Advertisements
Advertisements
You want the hole to be about the size of a golf ball (the hole will shrink as the bagel rises) and the dough to be as even as possible all the way around, but some imperfections will be eliminated during the next rise.
Advertisements
Advertisements
Place the rounds on a baking sheet with either parchment paper or a silicone baking mat.
Make sure you leave plenty of room between them so they do not stick together as they rise.
Cover with a tea towel and allow to rise for 1 hour.
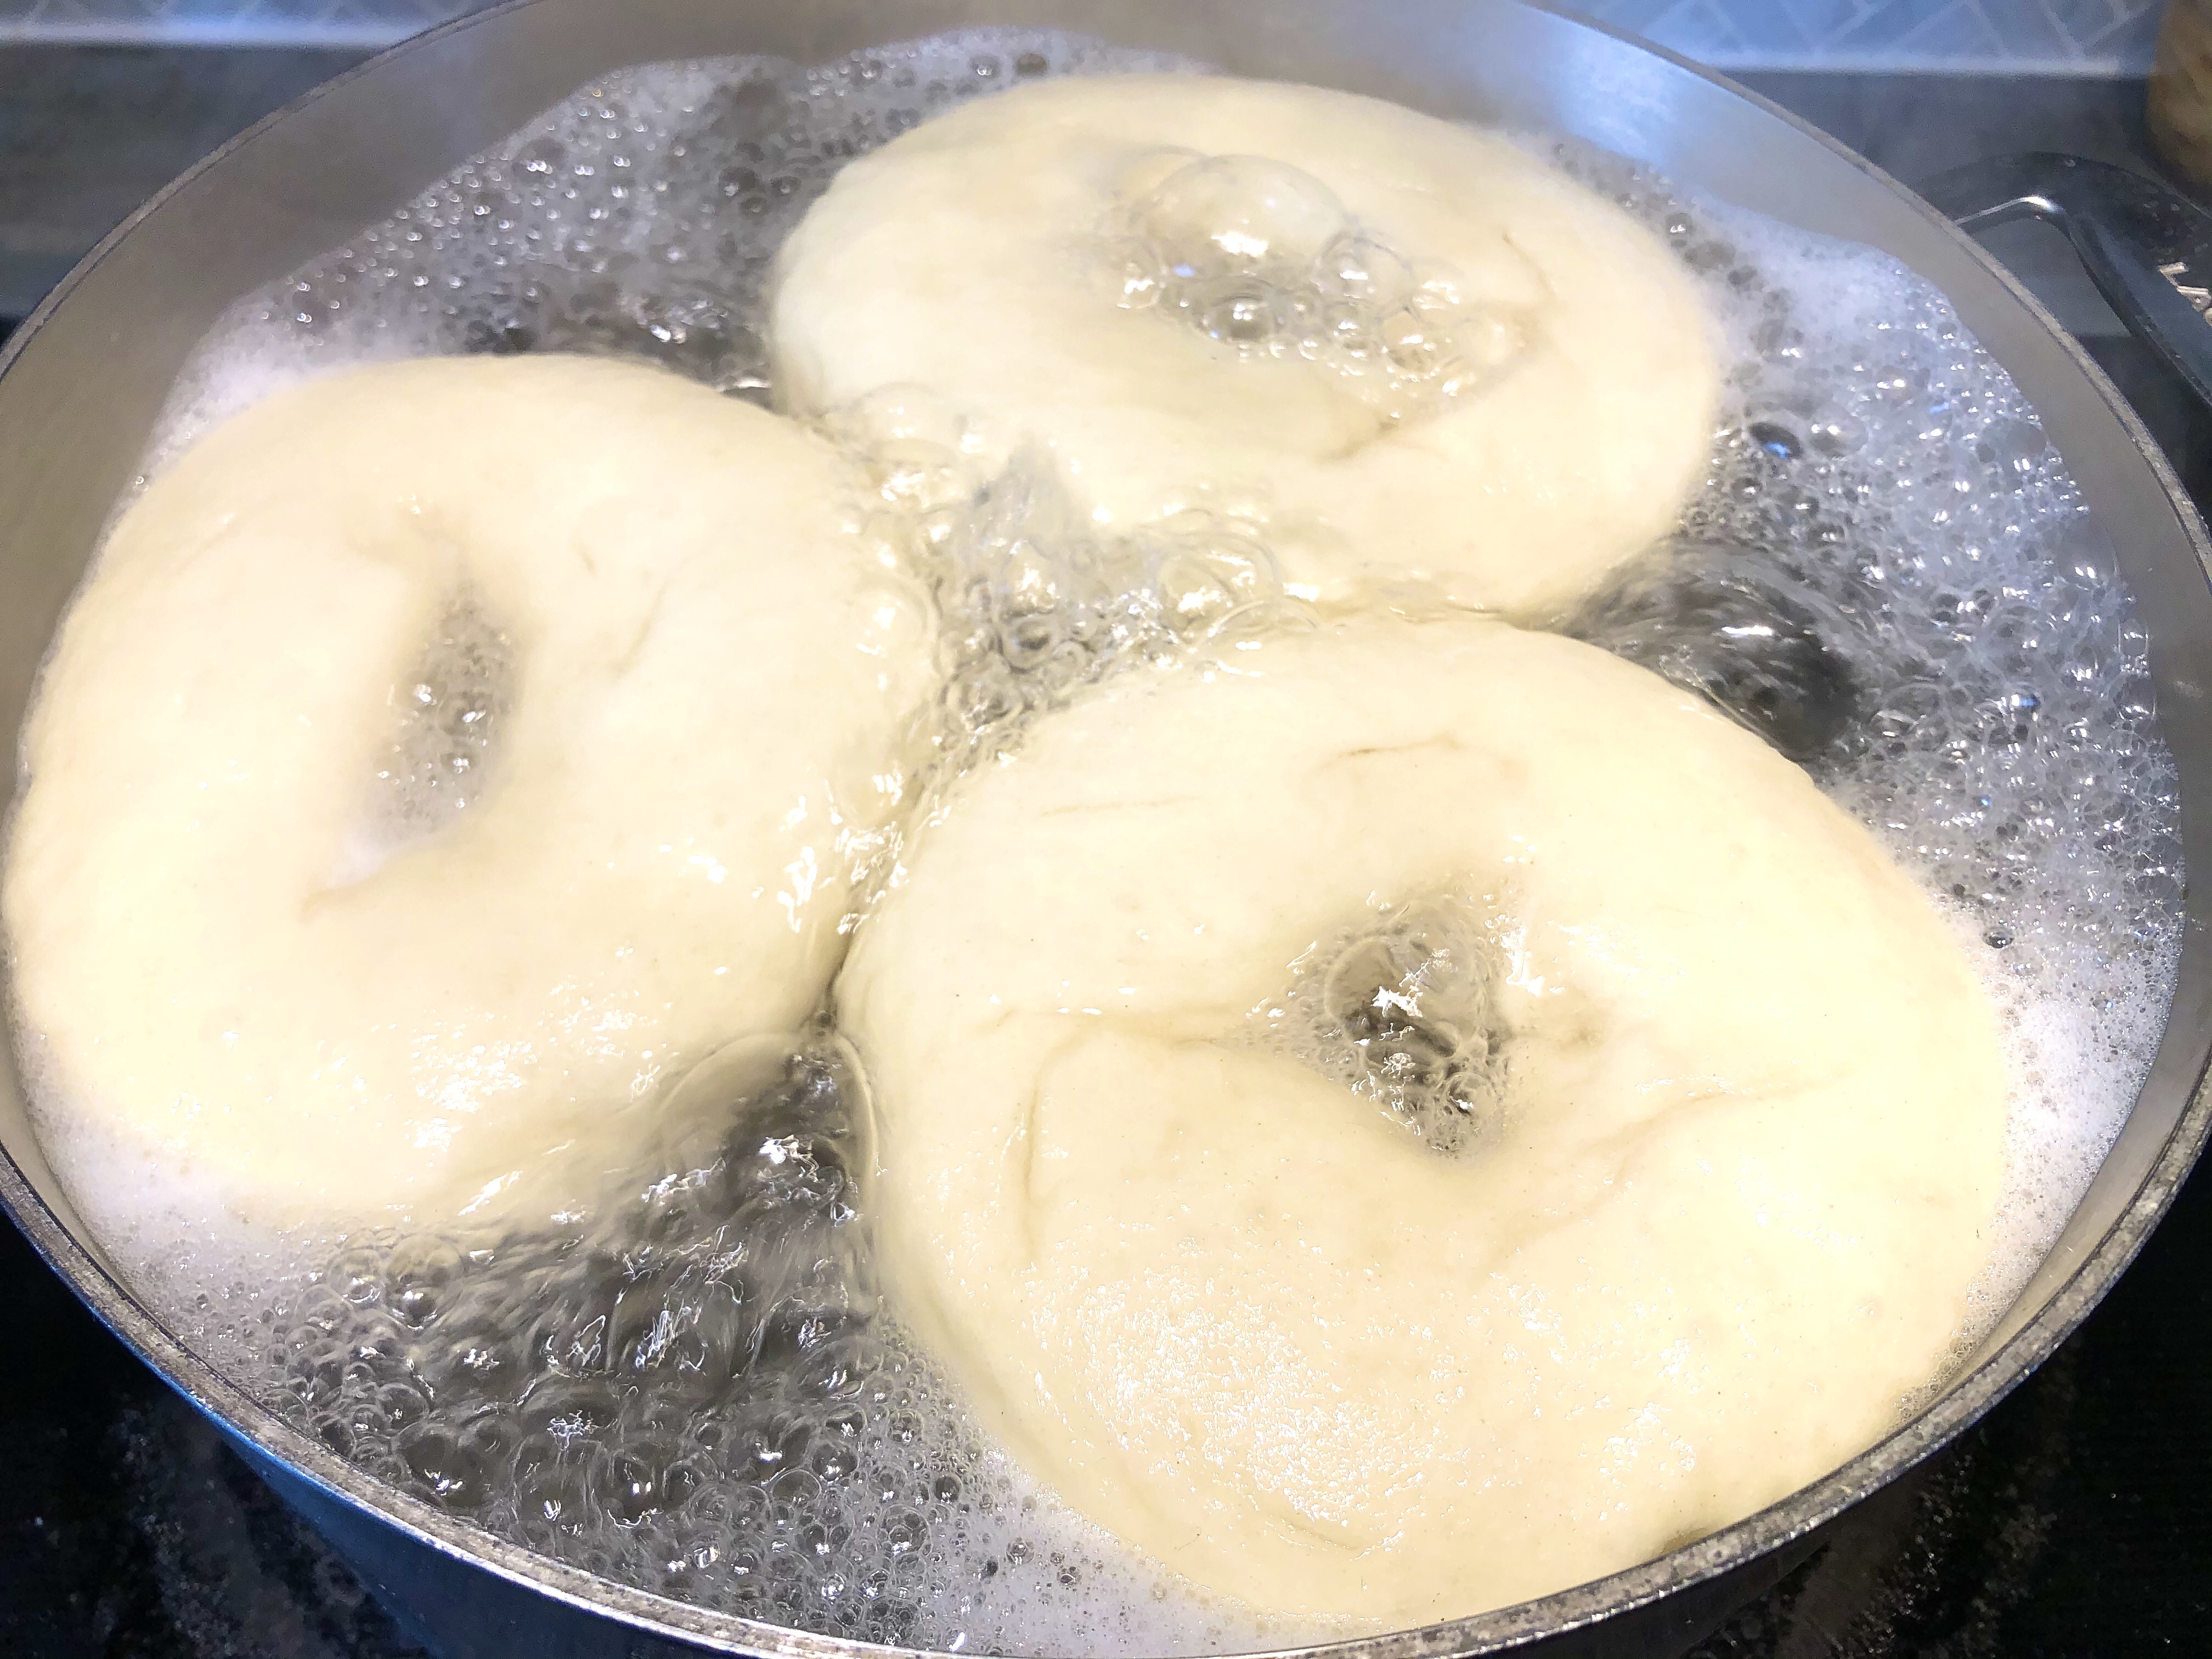
Bring a large pot of water to a boil and add the baking soda.
Next, add the bagels to the boiling water and cook for 2 minutes on either side.
This part of the process is what gives the bagels their signature chewiness.
If you prefer your bagels less chewy, simply reduce the amount of time you boil on each side.
Advertisements
Advertisements
Of course this means that if you prefer your bagels chewier, you can boil them longer to achieve the desired texture.
NOTE: you want a single layer of bagels; do not stack them in the water. You will need to cook them in batches.
Drain well when you remove them from the water and place them onto the lined baking sheet you used earlier.
A “SPIDER” cooking utensil (basically a large wire spoon) works well for scooping and draining the bagels at the same time.
Advertisements
Advertisements
The next step is to brush the bagels with egg wash to give them the beautiful golden color once they are baked.
This also helps the toppings stick to the bagels!
Once you have added the egg wash, you get to choose from many varieties of toppings; you can go with the jalapeño cheddar bagels, simple sesame, the famous “Everything Bagel” or of course you can just leave them plain.
As I noted earlier in this post, the sweet bagel varieties will already have those ingredients added during the kneading stage.
Advertisements
Advertisements
I am a huge fan of all things jalapeño, so the jalapeño cheddar bagels are a solid favourite.
Once you have finished adding the egg wash and toppings, place the baking sheets into the oven, pre-heated to 450º F.
Bake for 15-20 minutes or until golden brown.
I have a convection oven, so I did not rotate the baking sheets, however if you have a conventional oven you likely will want to switch them halfway through to ensure even baking.
Advertisements
Advertisements
Once they have turned that beautiful golden brown color, remove the bagels from the oven and place on a cooling rack and cover with a tea towel.
Now let’s be honest; I would say to allow them to cool fully, but what is better than a homemade bagel fresh out of the oven?!
Treat yourself and “sample” one while it is hot – you know, to make sure they turned out okay! *wink*
Advertisements
Advertisements
This recipe makes a dozen LARGE bagels.
One Bagel BLT makes an entire meal for me because they are so big!
The texture and flavour is absolutely unparalleled by those dry, store-bought imitations.
If you have never had a homemade bagel, you truly do not know what you are missing out on!
Pro Tip: if you plan to freeze your bagels, cut them first so you can pop them directly into the toaster from frozen!
(If you are making a sweet bagel, add those ingredients now as well)
Knead dough until it develops an elastic texture (3-4 minutes with a dough hook if you are using a mixer).
Place in an oiled bowl, cover with plastic wrap, and allow to rest in a warm area for 4 hours.
Divide dough into 12 equal sized pieces and roll into balls on an unfloured surface.
Pinch a hole through each ball and widen the hole using two fingers until it is the size of a golf ball and the dough is fairly even throughout the ring.
Advertisements
Advertisements
Place on a baking sheet, lined with parchment paper or a silicone baking mat (leave enough room between them so they do not stick to each other while rising).
Cover with a tea towel and allow to rise in a warm area for 1 hour.
Bring a large pot of water to a boil and add the baking soda.
Gently place the bagels into the water in batches and cook for 2 minutes on either side (do not stack the bagels; you want a singlelayer)
Drain well and place back onto the lined baking sheet.
Brush with the egg wash and add toppings of choice (see below for topping options).
Place into oven, pre-heated to 450º F and bake for 15-20 minutes or until golden brown. (You may need to rotate baking sheets half way through if you do not have a convection oven to ensure even baking)
Place on cooling rack and cover with a tea towel.
Enjoy!
Advertisements
Advertisements
Bagel Toppings
For the savoury bagels, the toppings are added to plain bagels just after they have been boiled and brushed with egg wash.
The sweet bagels have the ingredients added while kneading the dough at the beginning on the process.
Jalapeño Cheddar
Place jalapeños as desired, then sprinkle generously with cheddar cheese.
(The cheese helps the jalapeños stick to the bagel)
Advertisements
Advertisements
Sesame
Sprinkle generously with sesame seeds.
Blueberry
1 cup blueberries
2 tablespoons white sugar
1 teaspoon cinnamon
NOTE: these ingredients are added while kneading the dough.
Advertisements
Advertisements
Cinnamon Raisin
1 cup raisins
2 tablespoons white sugar
1 teaspoon cinnamon
NOTE: these ingredients are added while kneading the dough.
More topping options to come!
Advertisements
Advertisements
So what do you think? Do you feel inspired to make this tasty treat?
Drop a comment below!
And don’t forget to subscribe to my email list to see new recipes, renovation projects, and gardening tips first!
Advertisements
Processing…
Success! You're on the list.
Whoops! There was an error and we couldn't process your subscription. Please reload the page and try again.
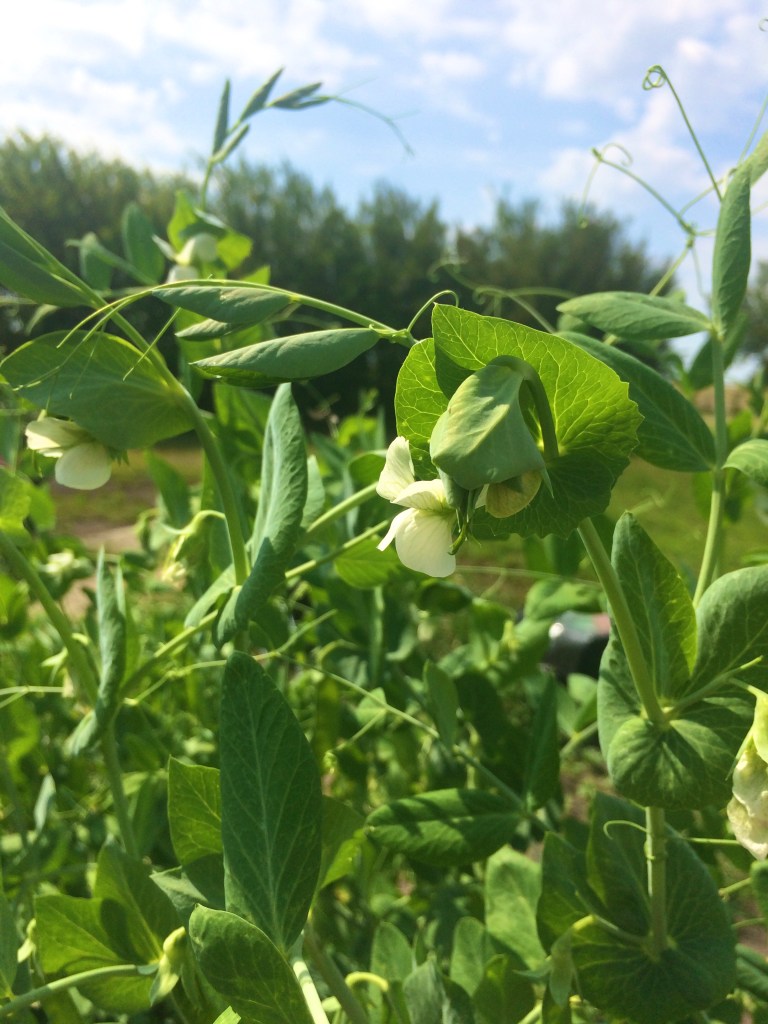
Cold-hardy crops in Canada are a staple because of their resilience in frosty temperatures – and even snow!
Aside from radishes, lettuce, and spinach, peas are my next favourite thing to plant in early spring (long before other plants would germinate in the chilly weather).
Some years I have volunteers coming up before I have even planted, sprouting from pods I missed during harvest the year before!
Advertisements
Advertisements
Advertisements
Advertisements
Peas are a diverse vegetable that can be used in a number of ways.
You can eat the sprouts and young shoots fresh on salads (or as a garnish on hot dishes), munch on the pods raw or throw them into a stir fry – or even save the dried pea seeds to add to a hearty soup or stew during the winter months.
Advertisements
Advertisements
There are also some fun varieties to choose from; anything from a standard green shelling pea to a tender edible pod variety to a vibrant purple option!
The fact that they are not only hardy, but also prolific producers and easy to grow make them a solid winner in my book!
Oh, and did I mention incredibly nutritious? Because we’re supposed to get our green veggies and all, right?!
Advertisements
Advertisements
Seeding and Germination
Part of the what makes a plant easy to grow is how simple it is to get them started without transplanting – and their fast germination that will tolerate cool temperatures is a plus.
Advertisements
Peas do best direct seeded…
… or even just tossed onto good soil (I have done this with extra seeds a number of times with great success).
Advertisements
Advertisements
Being sewn outdoors is actually a must in our windy area as the plants get used to the wind from the time they come up versus a tender, pampered plant from a greenhouse that quickly withers or breaks in the strong gusts.
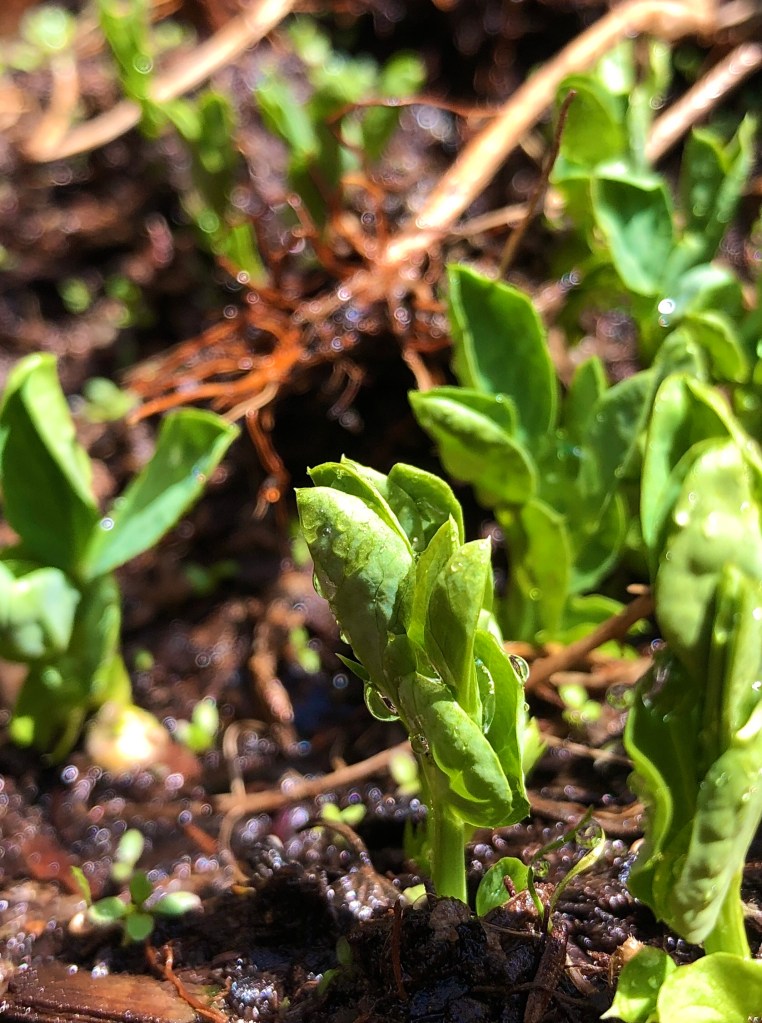
I soak my peas in lukewarm water overnight or up to 24 hours to help speed up their germination.
Within a week or two of planting, my peas are typically poking above the ground.
Remember how I said they are frost (and even snow) tolerant?
This year, we have had -6º C (21º F) temperatures at night – with light snow!
That would kill most plants, but didn’t touch my peas!
Advertisements
Advertisements
Spacing
I find that a very close grouping does well for me as the plants will vine together and hold themselves up fairly well without a trellis.
If you would prefer a trellis, they can be a beautiful accent piece to your garden or yard – so go for it! (Don’t forget to follow my blog for the upcoming addition of our Garden Arbor and Trellis Archway DIY builds!)
Processing…
Success! You're on the list.
Whoops! There was an error and we couldn't process your subscription. Please reload the page and try again.
Advertisements
Advertisements
Advertisements
Advertisements
Harvesting
Time to harvest the peas will depend on which variety you chose and what you are harvesting them for.
If you would like to use the tender, young shoots on salads you can start harvesting them within a couple weeks of the sprouts emerging from the ground – just make sure you don’t take too much and kill the plant.
If you are planning to harvest edible pods, make sure you pick them before they become tough and stringy.
You can start harvesting pods within a couple days of the blossom dying back; they don’t take long to mature and the younger the pod, the more tender they will be.
Advertisements
Advertisements
Pea blossoms
Advertisements
Advertisements
Saving seeds for split pea soup..? Well, you’ll have to wait a little longer for that!
As with all seeds, you need to wait until they have fully dried before storing them.
I typically allow the pods to mature and dry right on the plant, harvesting before they become so brittle the pods will split open when I am picking them.
Pea ready for harvest to eat with the pod
Advertisements
Advertisements
I allow them to dry in the house until they hit that ready-to-split-on-their-own stage; this makes shelling the peas easy (plus exploding pea pods makes it fun, too)!
On that note… It takes a LOT of pea pods to save for food.
I typically save the peas for seed to use the next spring with the small amount I keep each year.
Advertisements
Advertisements
What is my favourite recipe with peas?
Well, that is a tough question…
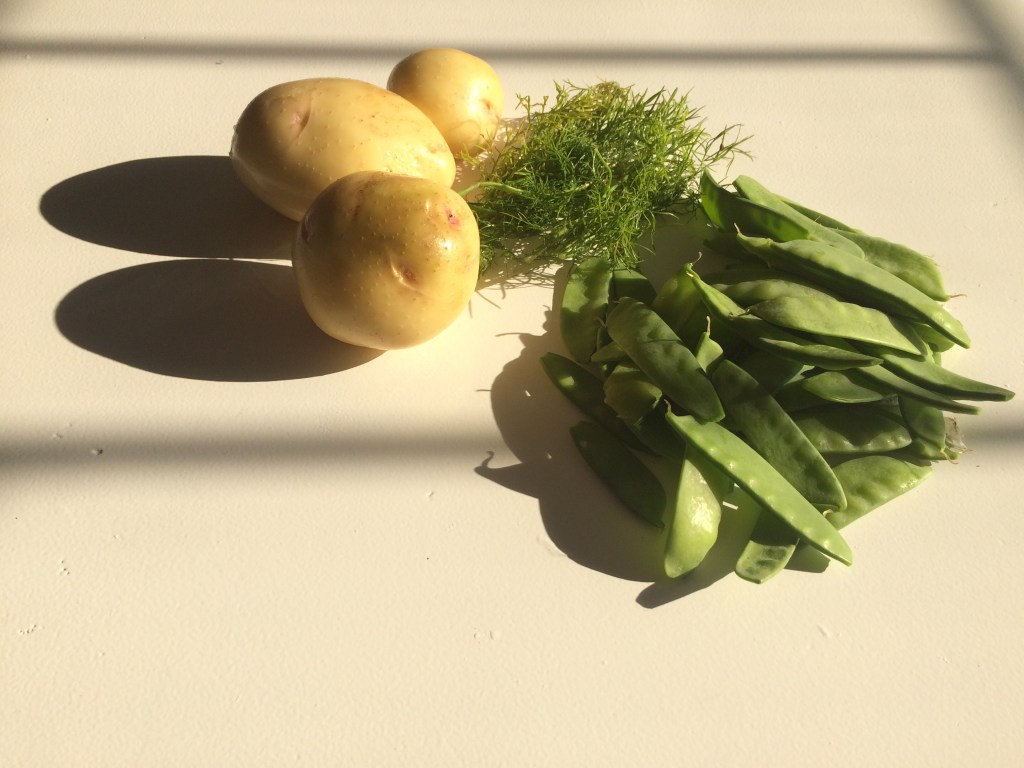
I grew up with Creamed Peas and Potatoes fresh out of the garden and will ALWAYS love that dish.
BUT only with fresh, homegrown veggies! Store-bought vegetables don’t taste the same, which is a big part of why those childhood recipes only work with the right ingredients.
(FOLLOW MY BLOG FOR THAT RECIPE TO BE POSTED LATER THIS YEAR!)
Processing…
Success! You're on the list.
Whoops! There was an error and we couldn't process your subscription. Please reload the page and try again.
Advertisements
Advertisements
My second favourite recipe with peas..?
I would have to say an easy side dish of tender pea pods sautéd in butter with salt and pepper, then finished off with parmesan cheese is a close second!
Advertisements
What is your favourite recipe with peas? Drop a comment below!
Advertisements
Processing…
Success! You're on the list.
Whoops! There was an error and we couldn't process your subscription. Please reload the page and try again.
This isn’t your typical “mystery meatloaf” with the bad rap – no random left-overs here!
I find that meatloaf is an under-appreciated dish and can be so tasty when done right!
The rare times that I make meatloaf, we have little-to-no leftovers (which is always a good sign).
Advertisements
Advertisements
Advertisements
Advertisements
While I still think taste is the #1 goal here, getting the right texture is a close second.
You don’t want mushy meatloaf – just as much as you don’t want it to be tough and overworked.
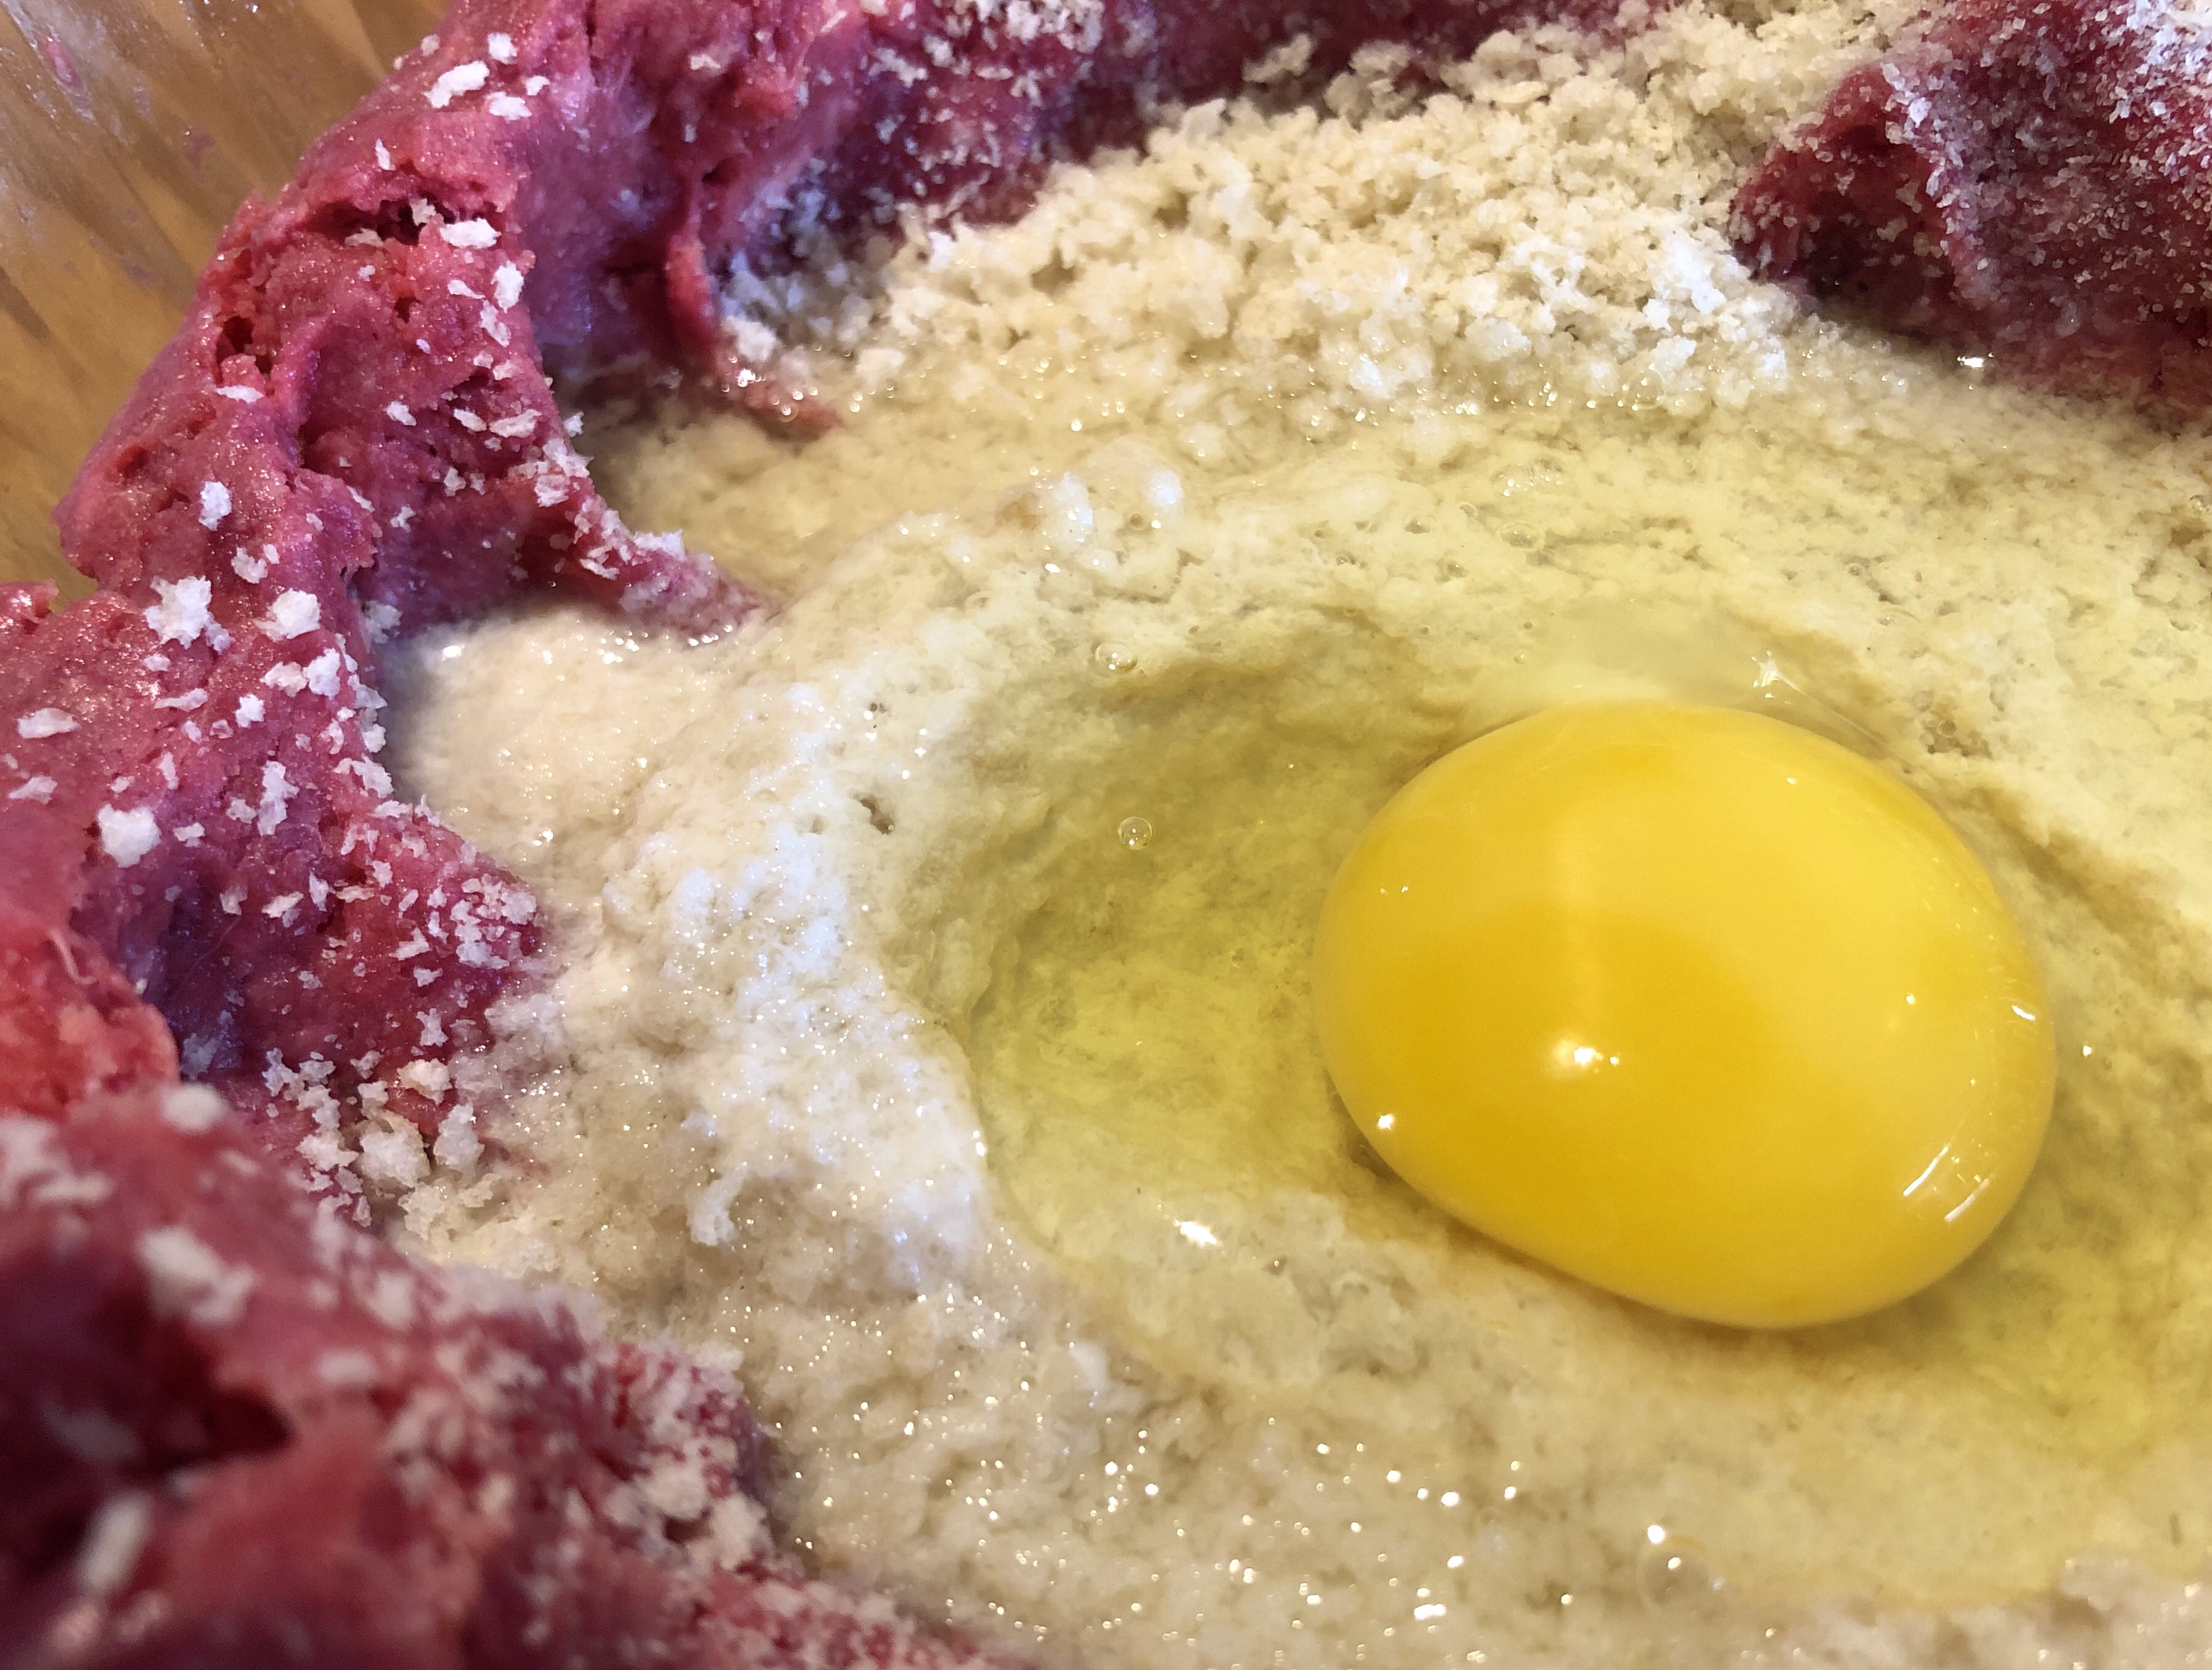
I add the ground beef to my mixing bowl and make a well in the middle, then add the bread crumbs and milk and let them sit until the bread crumbs have absorbed all the milk.
Advertisements
Advertisements
This helps keep everything tender.
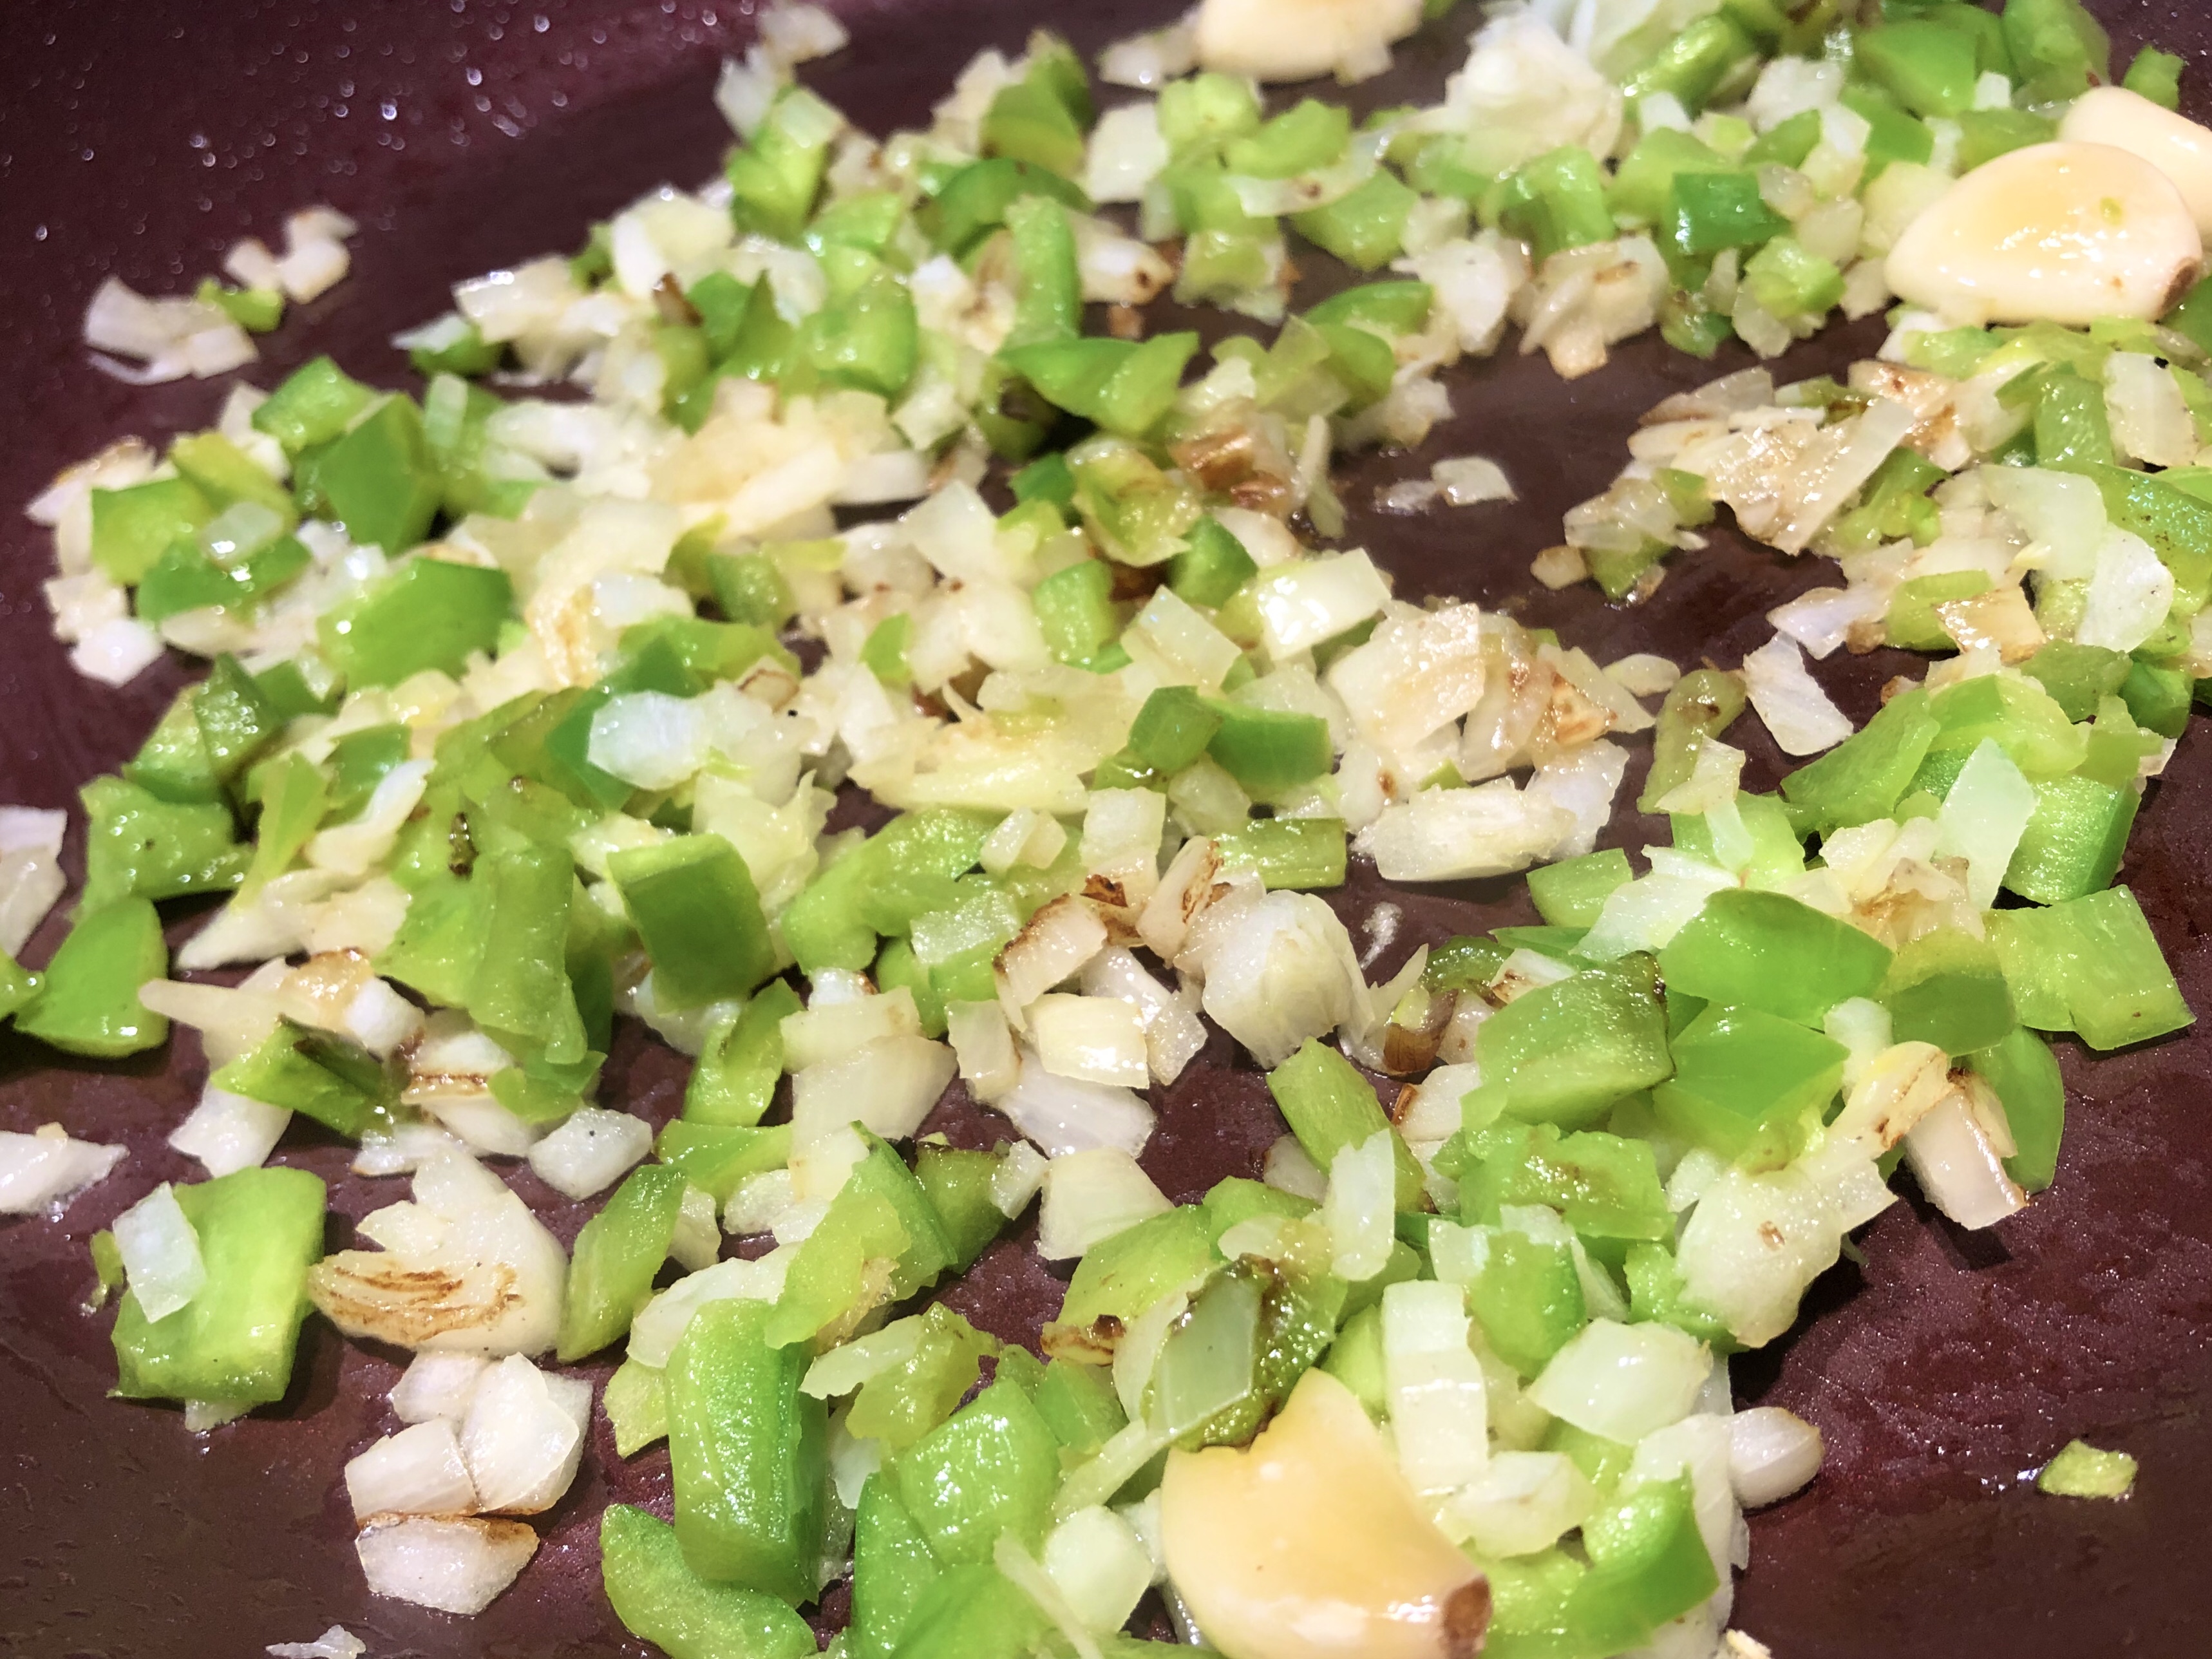
Next, I add the egg to the bowl while I sauté the finely chopped onion, bell pepper, and garlic until soft.
(Allow to cool before adding to the mixing bowl)
Advertisements
Advertisements
I love food with a bit of heat, so I add red pepper flakes for that extra kick.
Oregano, Worcestershire sauce, salt, and pepper season it nicely and a bit of Miracle Whip (or Hellmans Mayo for you die hard mayo fans out there) helps keep the meatloaf moist.
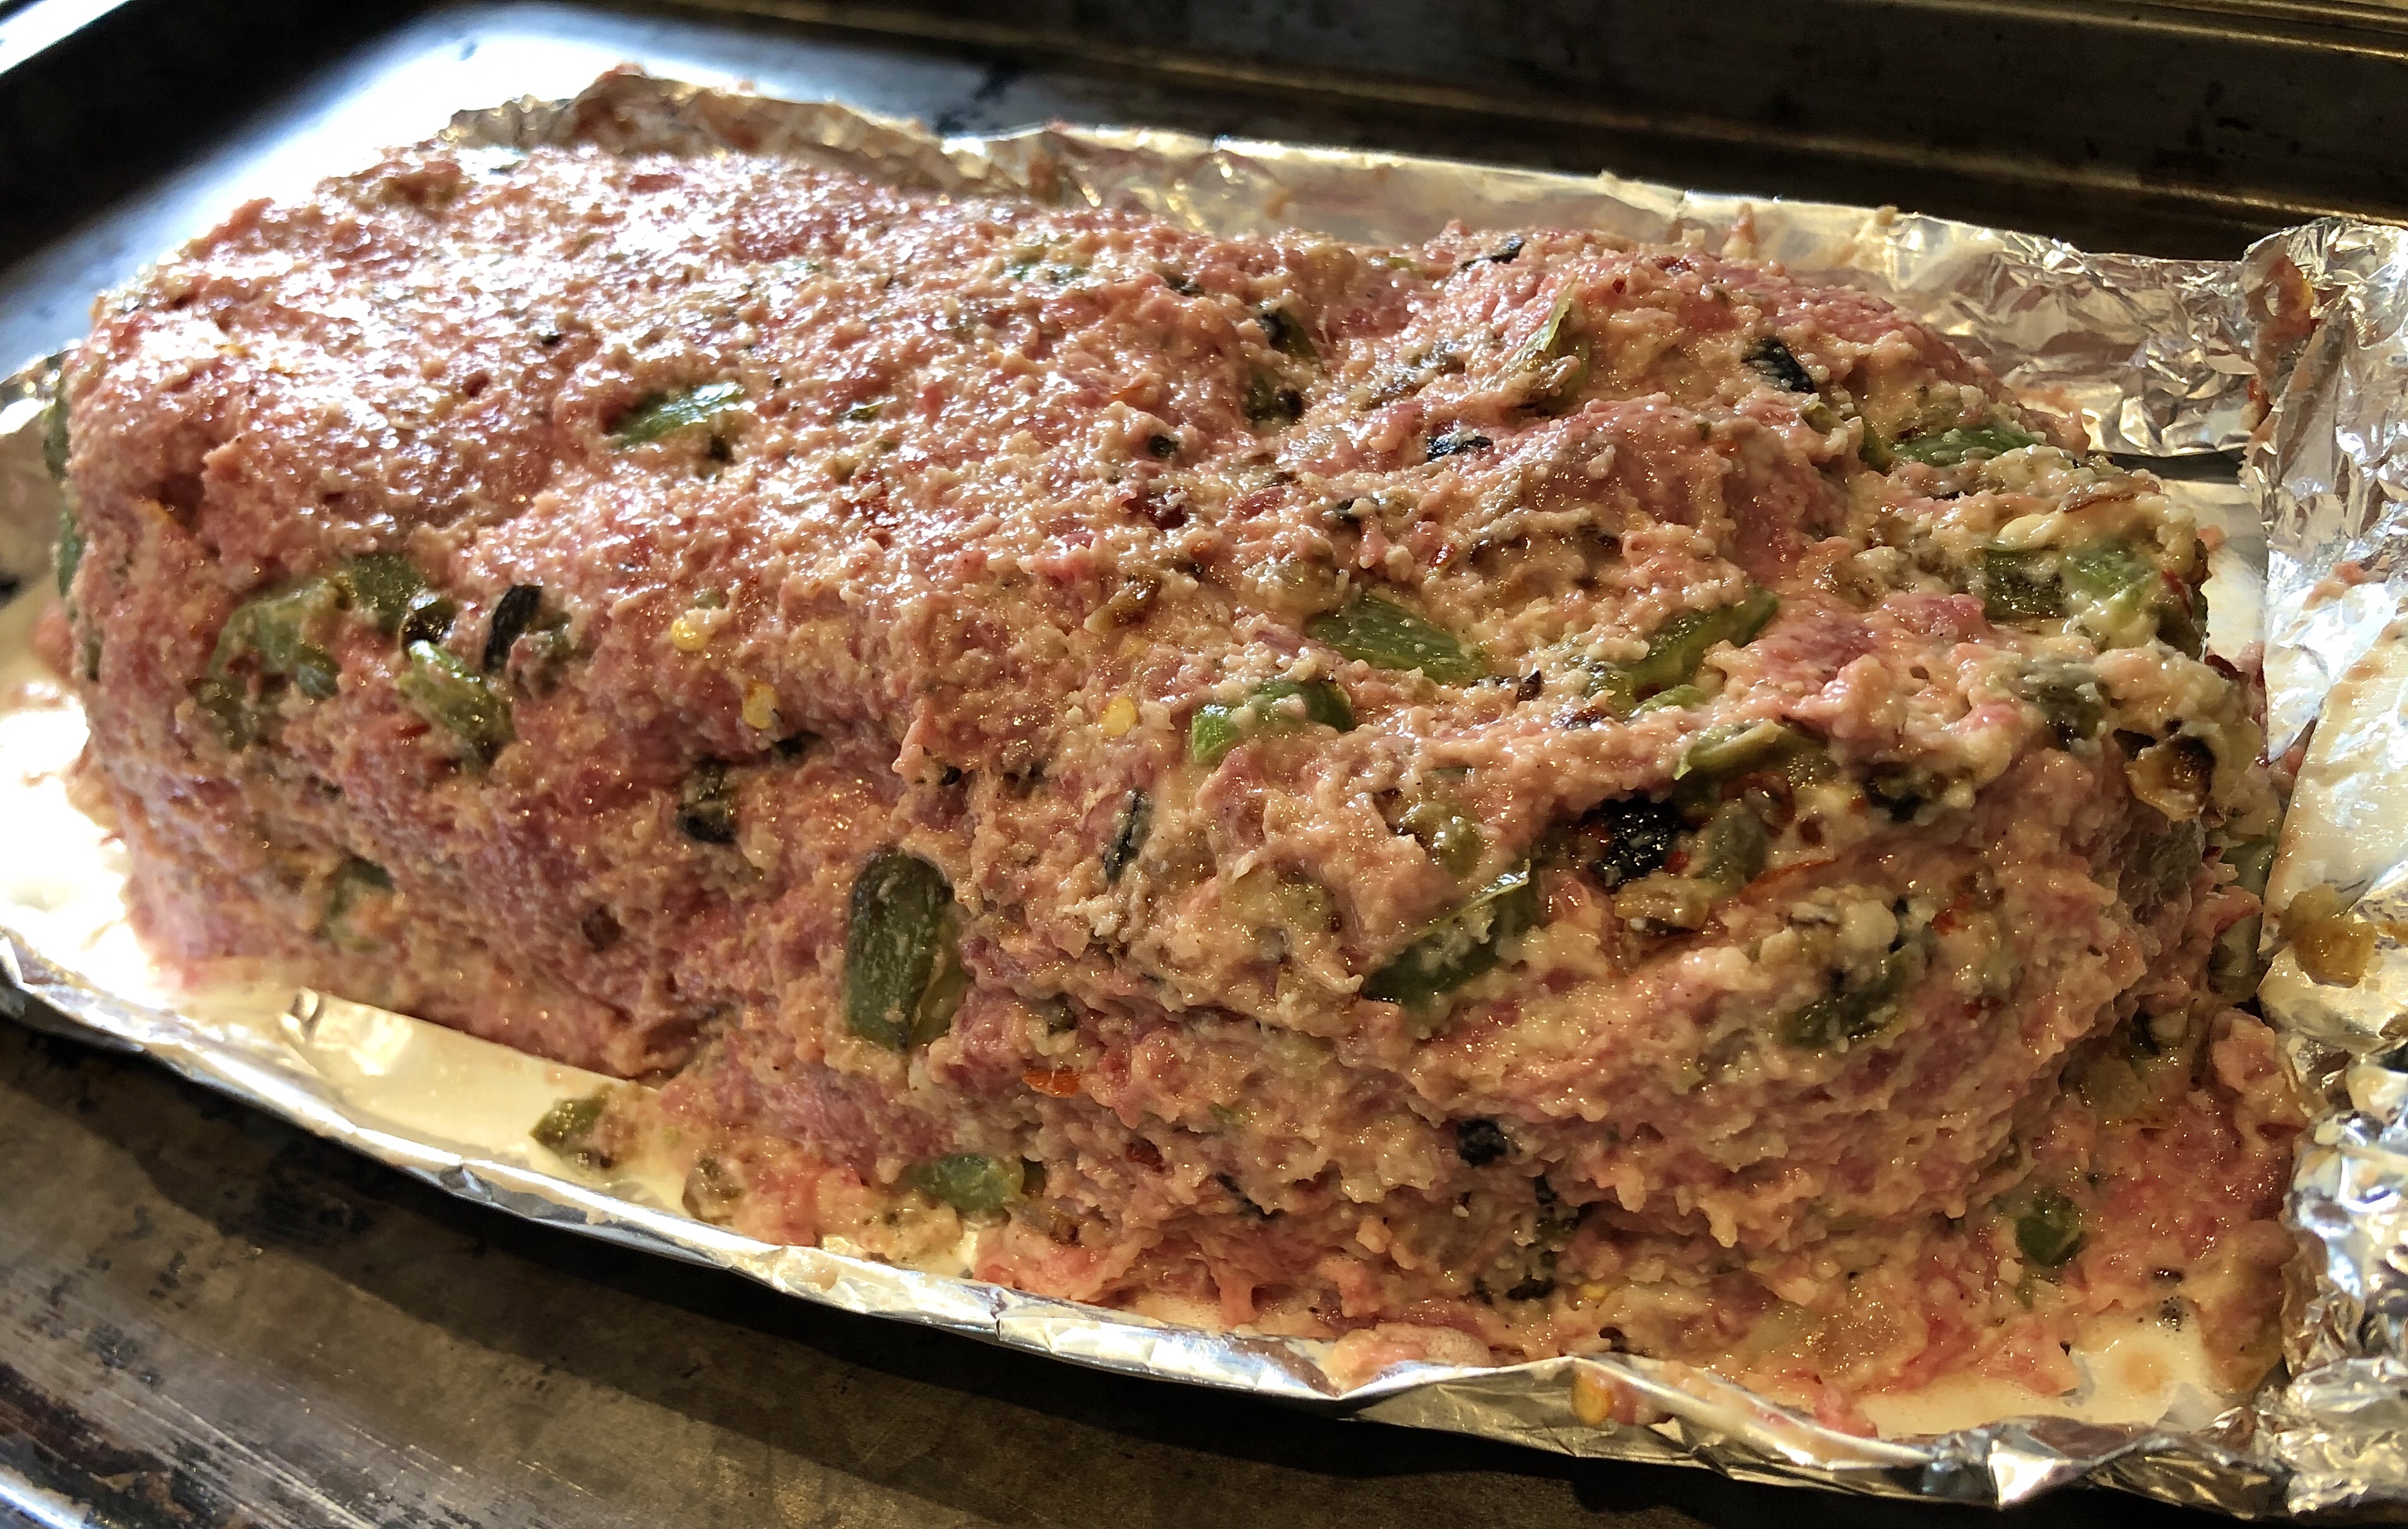
Combine all ingredients gently, making sure not to overwork the mixture (overworking will make it tough).
Advertisements
Advertisements
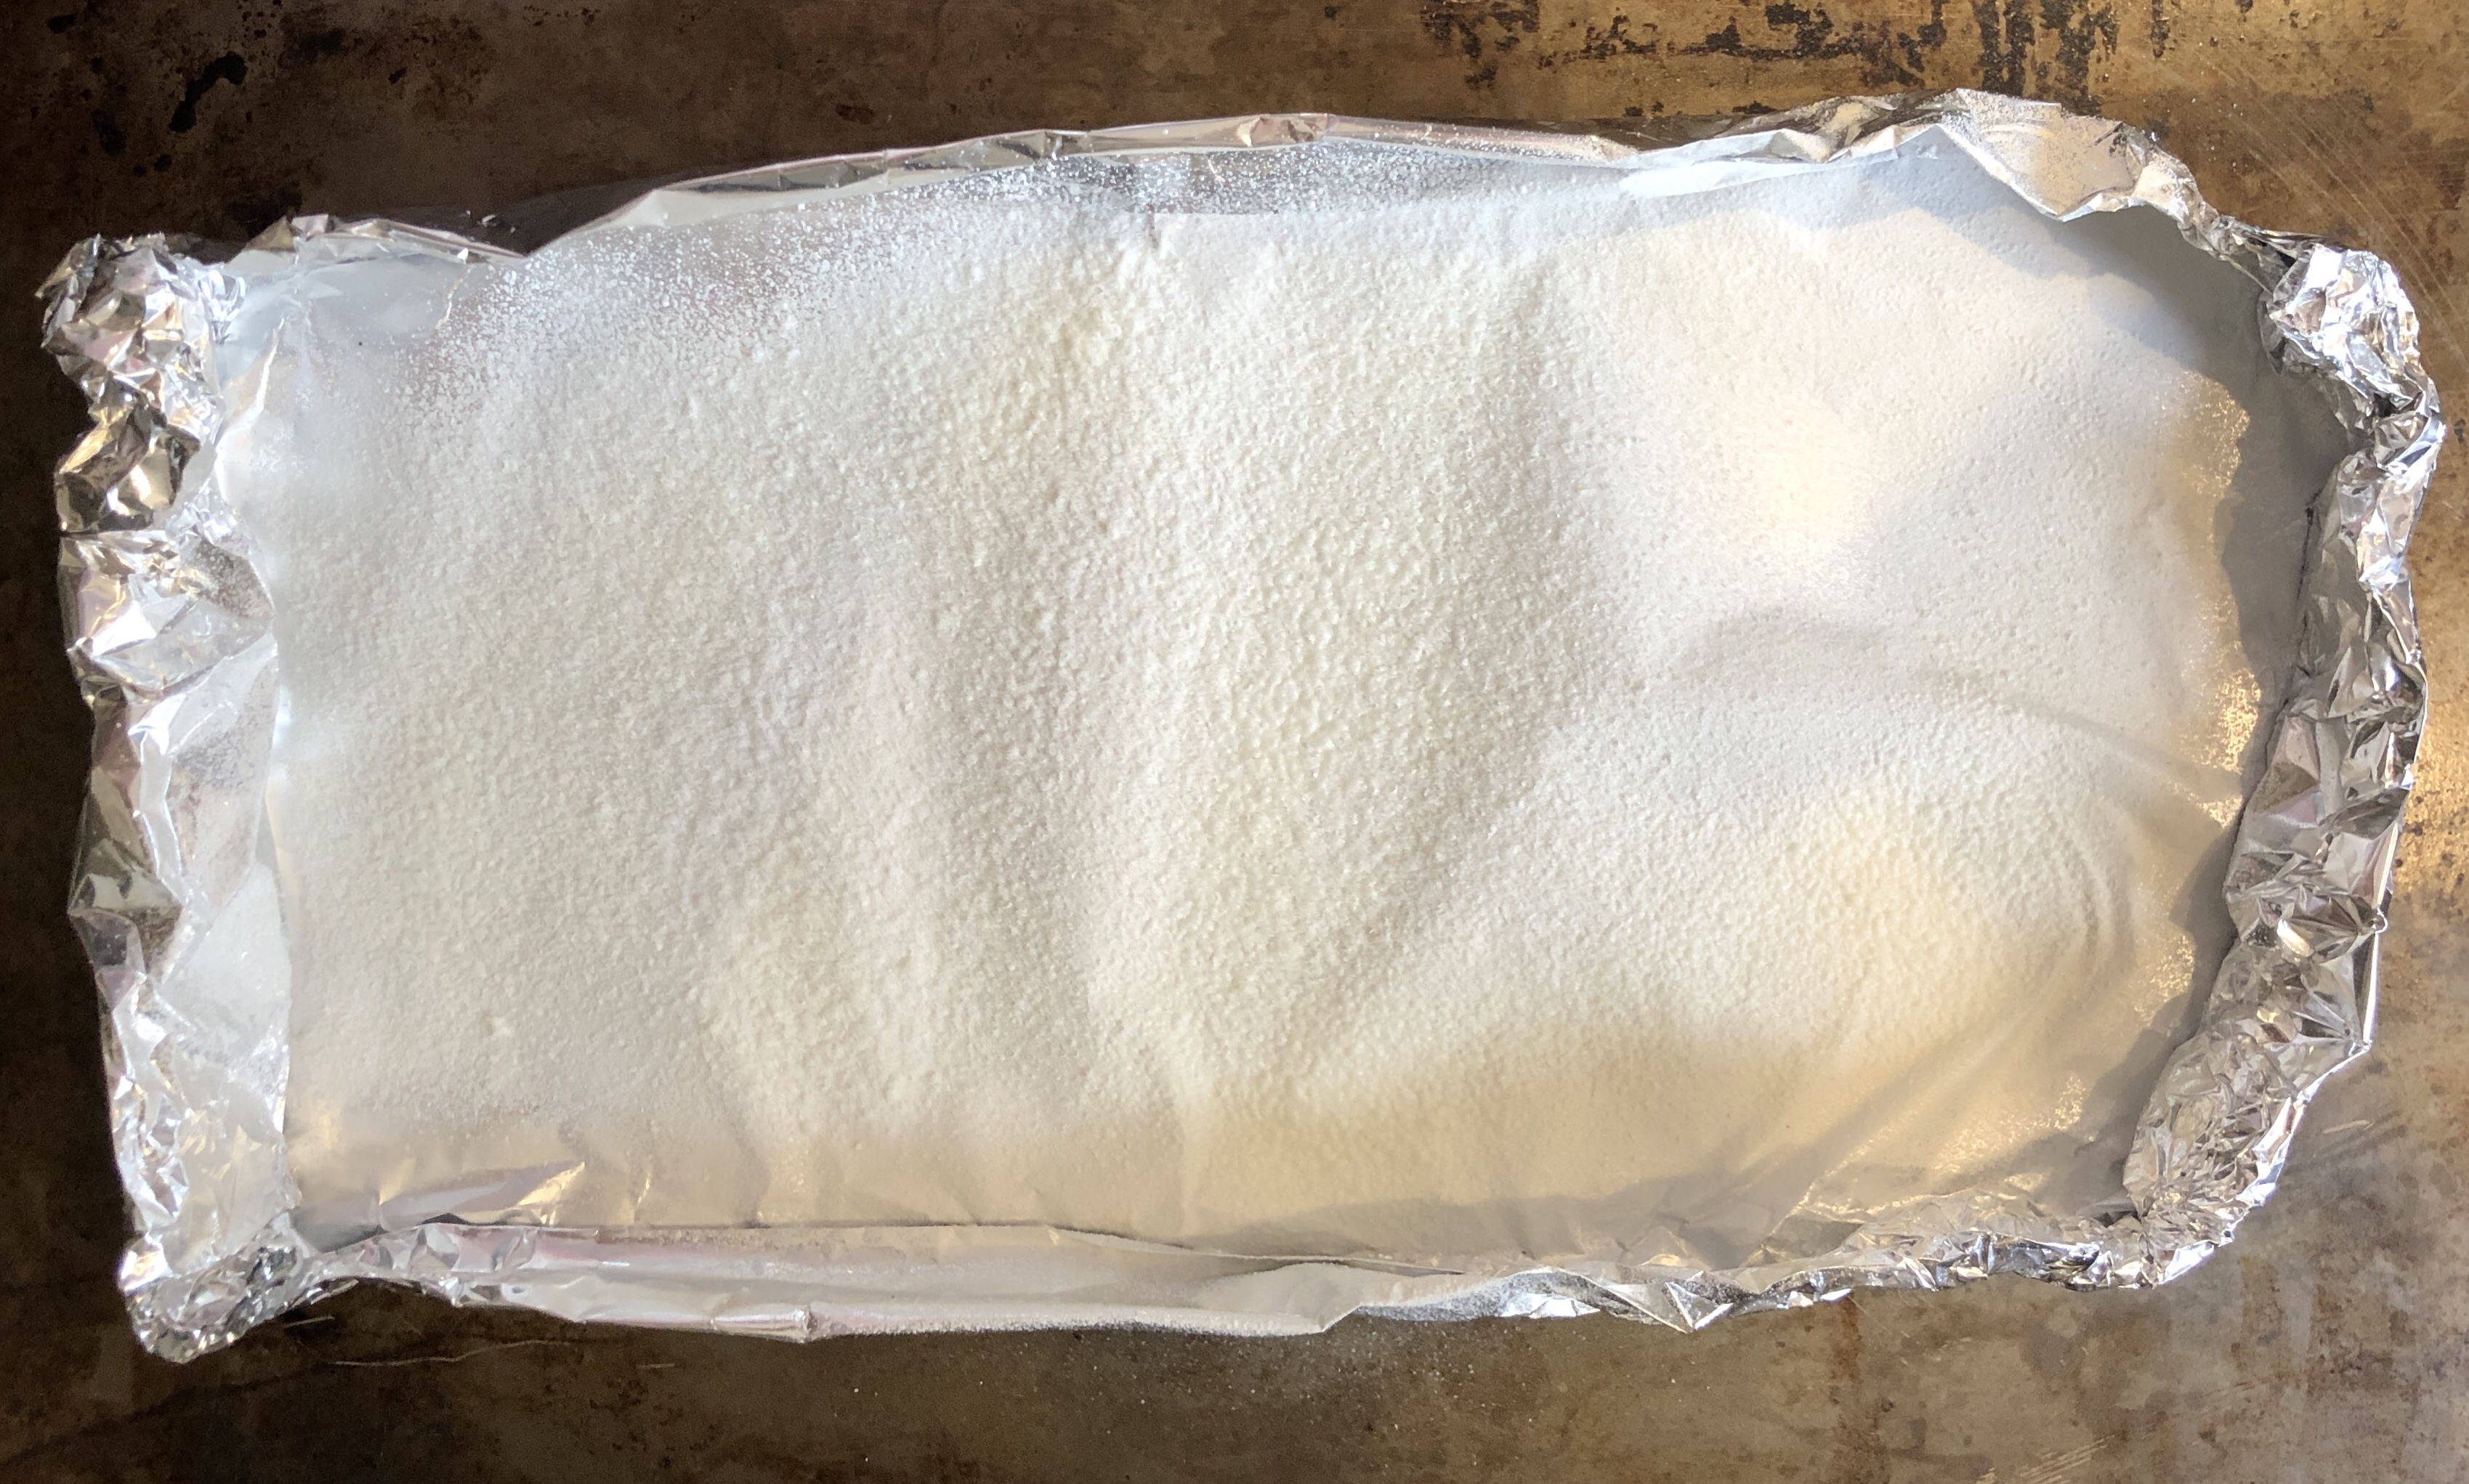
Make a raised edge in some tin foil so any drippings will be contained on the foil.
This makes clean-up afterward so much easier!
Oil the tin foil to avoid sticking.
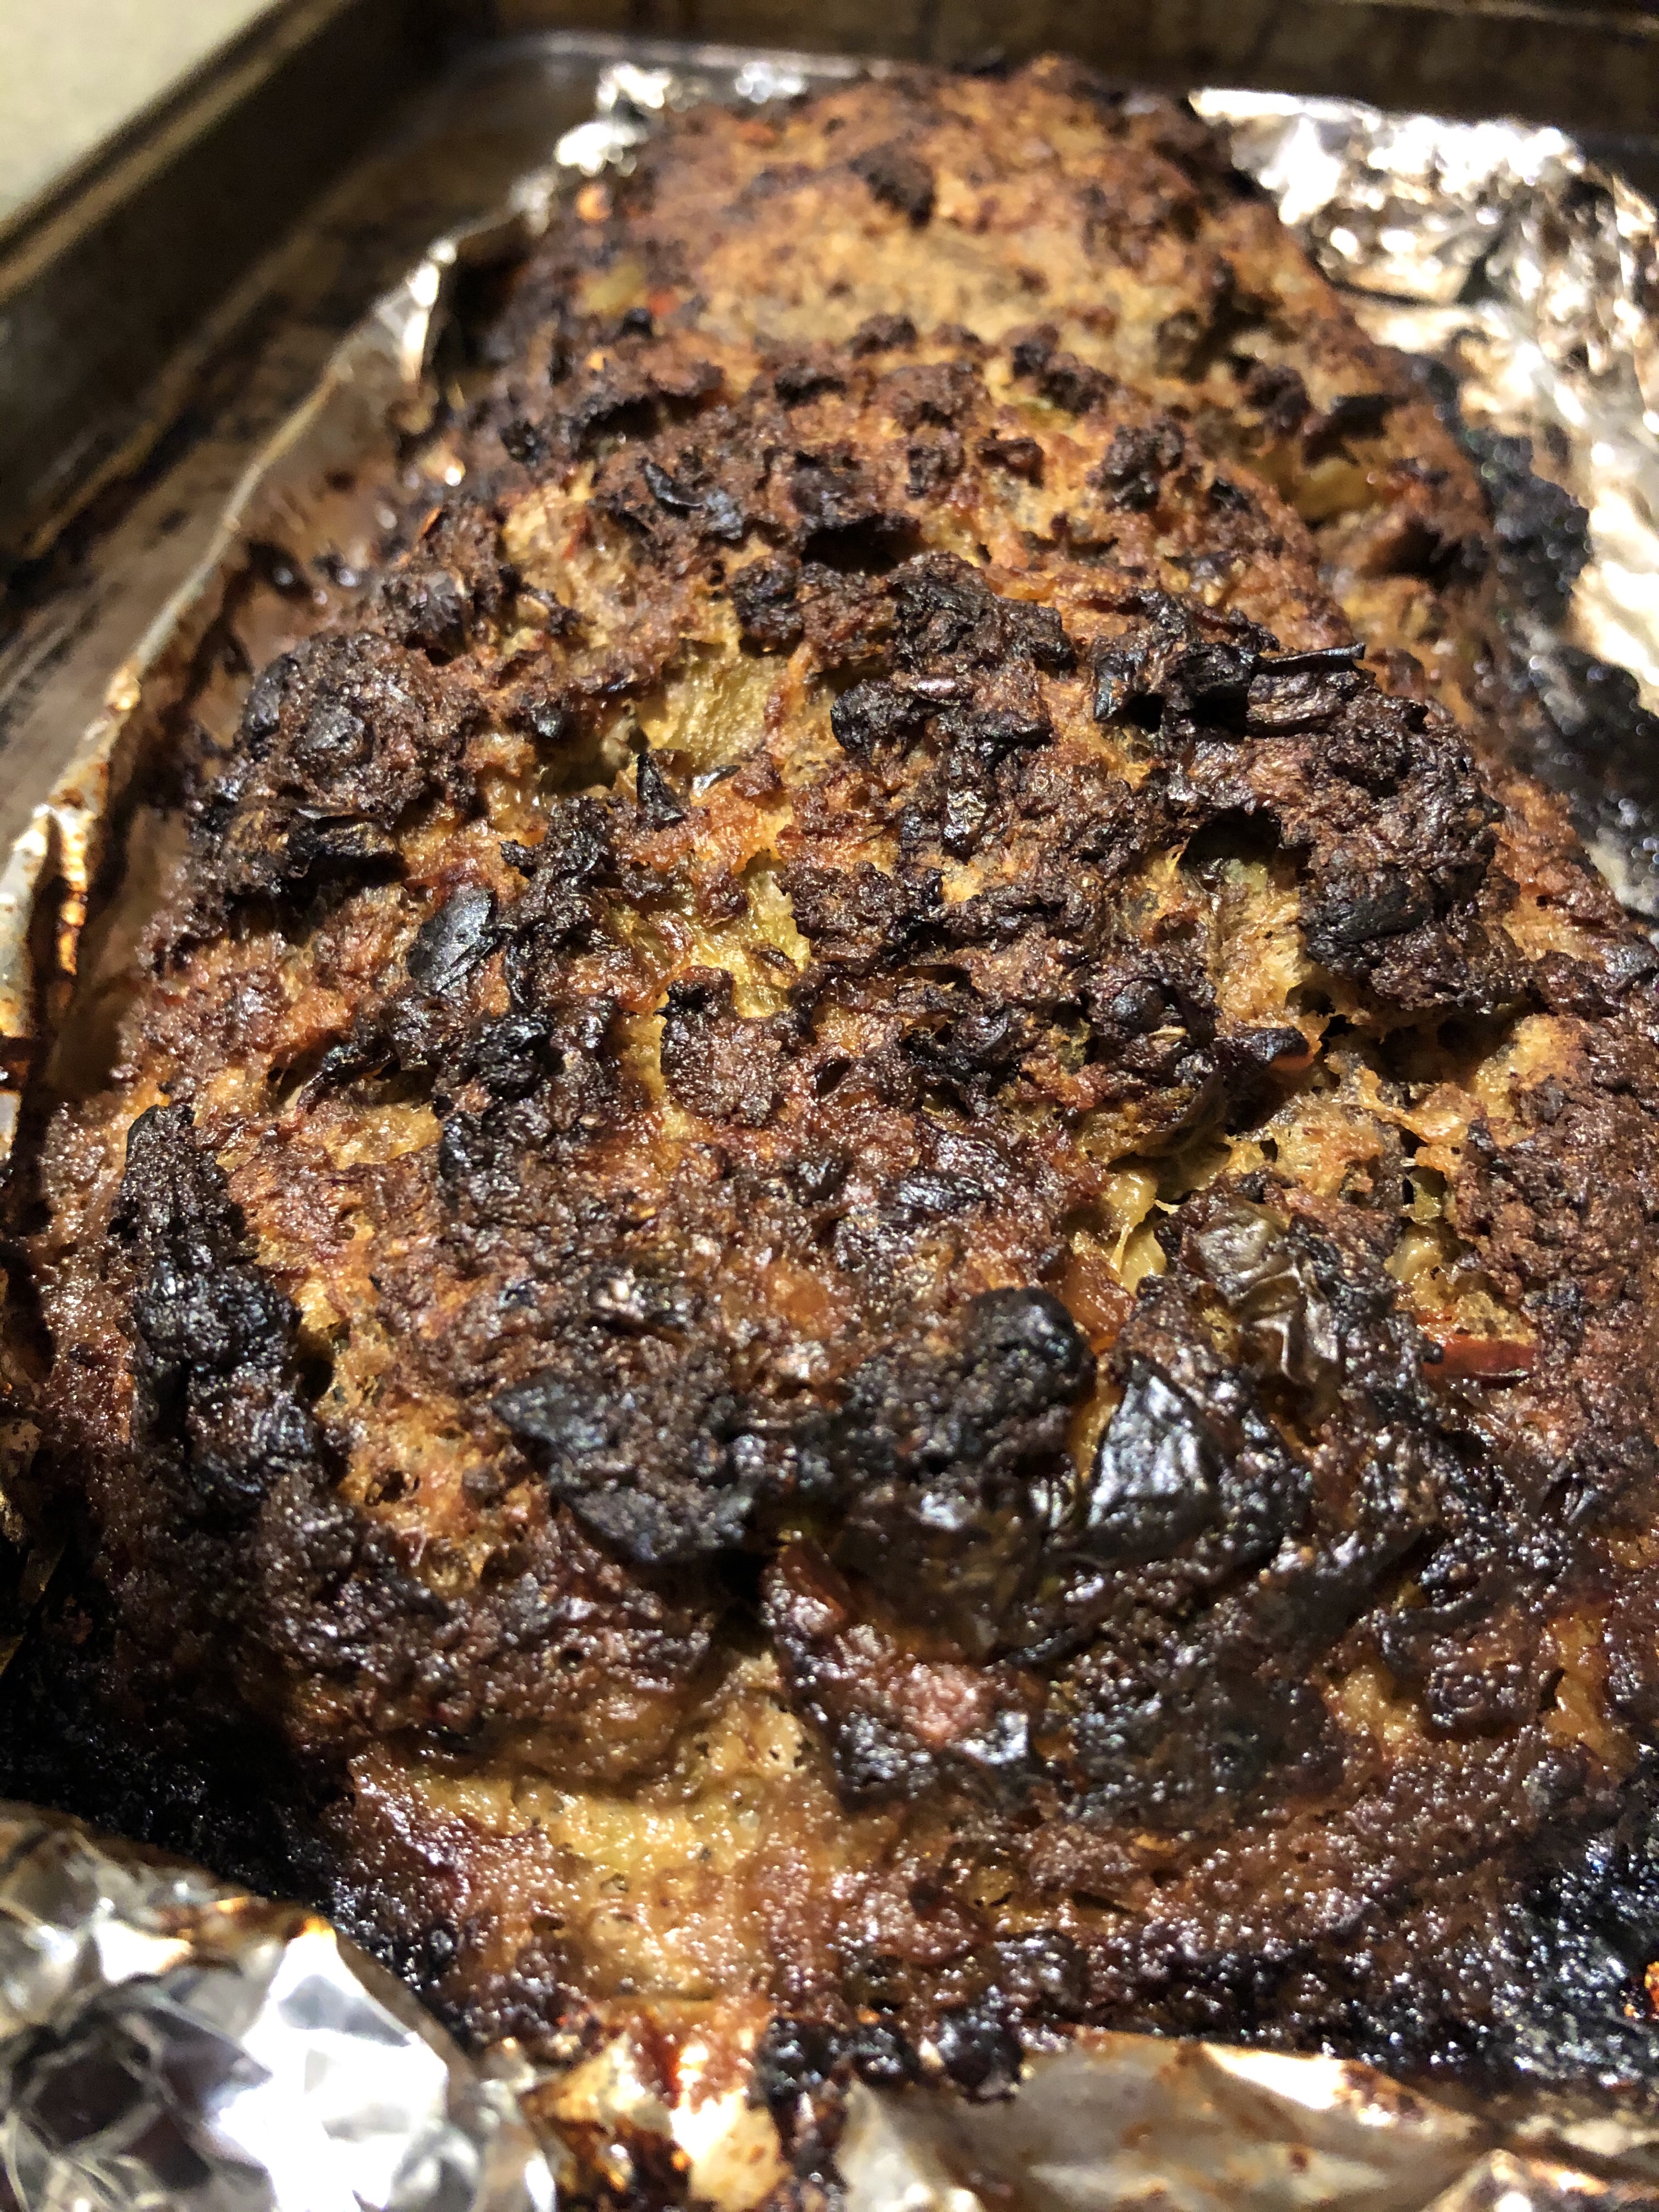
Shape the mixture into a loaf and place in the pre-heated oven at 375º for 45 minutes or until internal temperature reaches 160º and is golden brown (I often bake until it is a bit crispier than that).
Many people like topping their meatloaf with ketchup and brown sugar, allowing it to cook until set up.
I personally skip this step as I find my recipe is loaded with flavour and doesn’t need the extra boost.
Scalloped potatoes are a rare treat in our home, simply because I get into a rut and end up making the same 5 or 6 meals on repeat.
Who else has been there?
It can be so frustrating trying to break out of that cycle and think up something new and exciting to make for dinner!
And that is where scalloped potatoes come in to save the day!
Advertisements
Advertisements
Advertisements
Advertisements
Yes, they take a little longer to make than those easy meals-on-repeat, but it is so worth it for a fabulous dish that the whole family loves.
I tend to triple or even quadruple this recipe so I can freeze extra trays for an easy side dish with the prep time already out of the way.
Scalloped potatoes go well with so many meals, but meatloaf has been my go-to dish to serve it with (no, my recipe is not the notorious “MYSTERY” meatloaf!).
Advertisements
Advertisements
Advertisements
Advertisements
So let’s get down to it!
First, chop the onions, mushrooms, and garlic and sauté in butter until soft.
Add salt and pepper to taste.
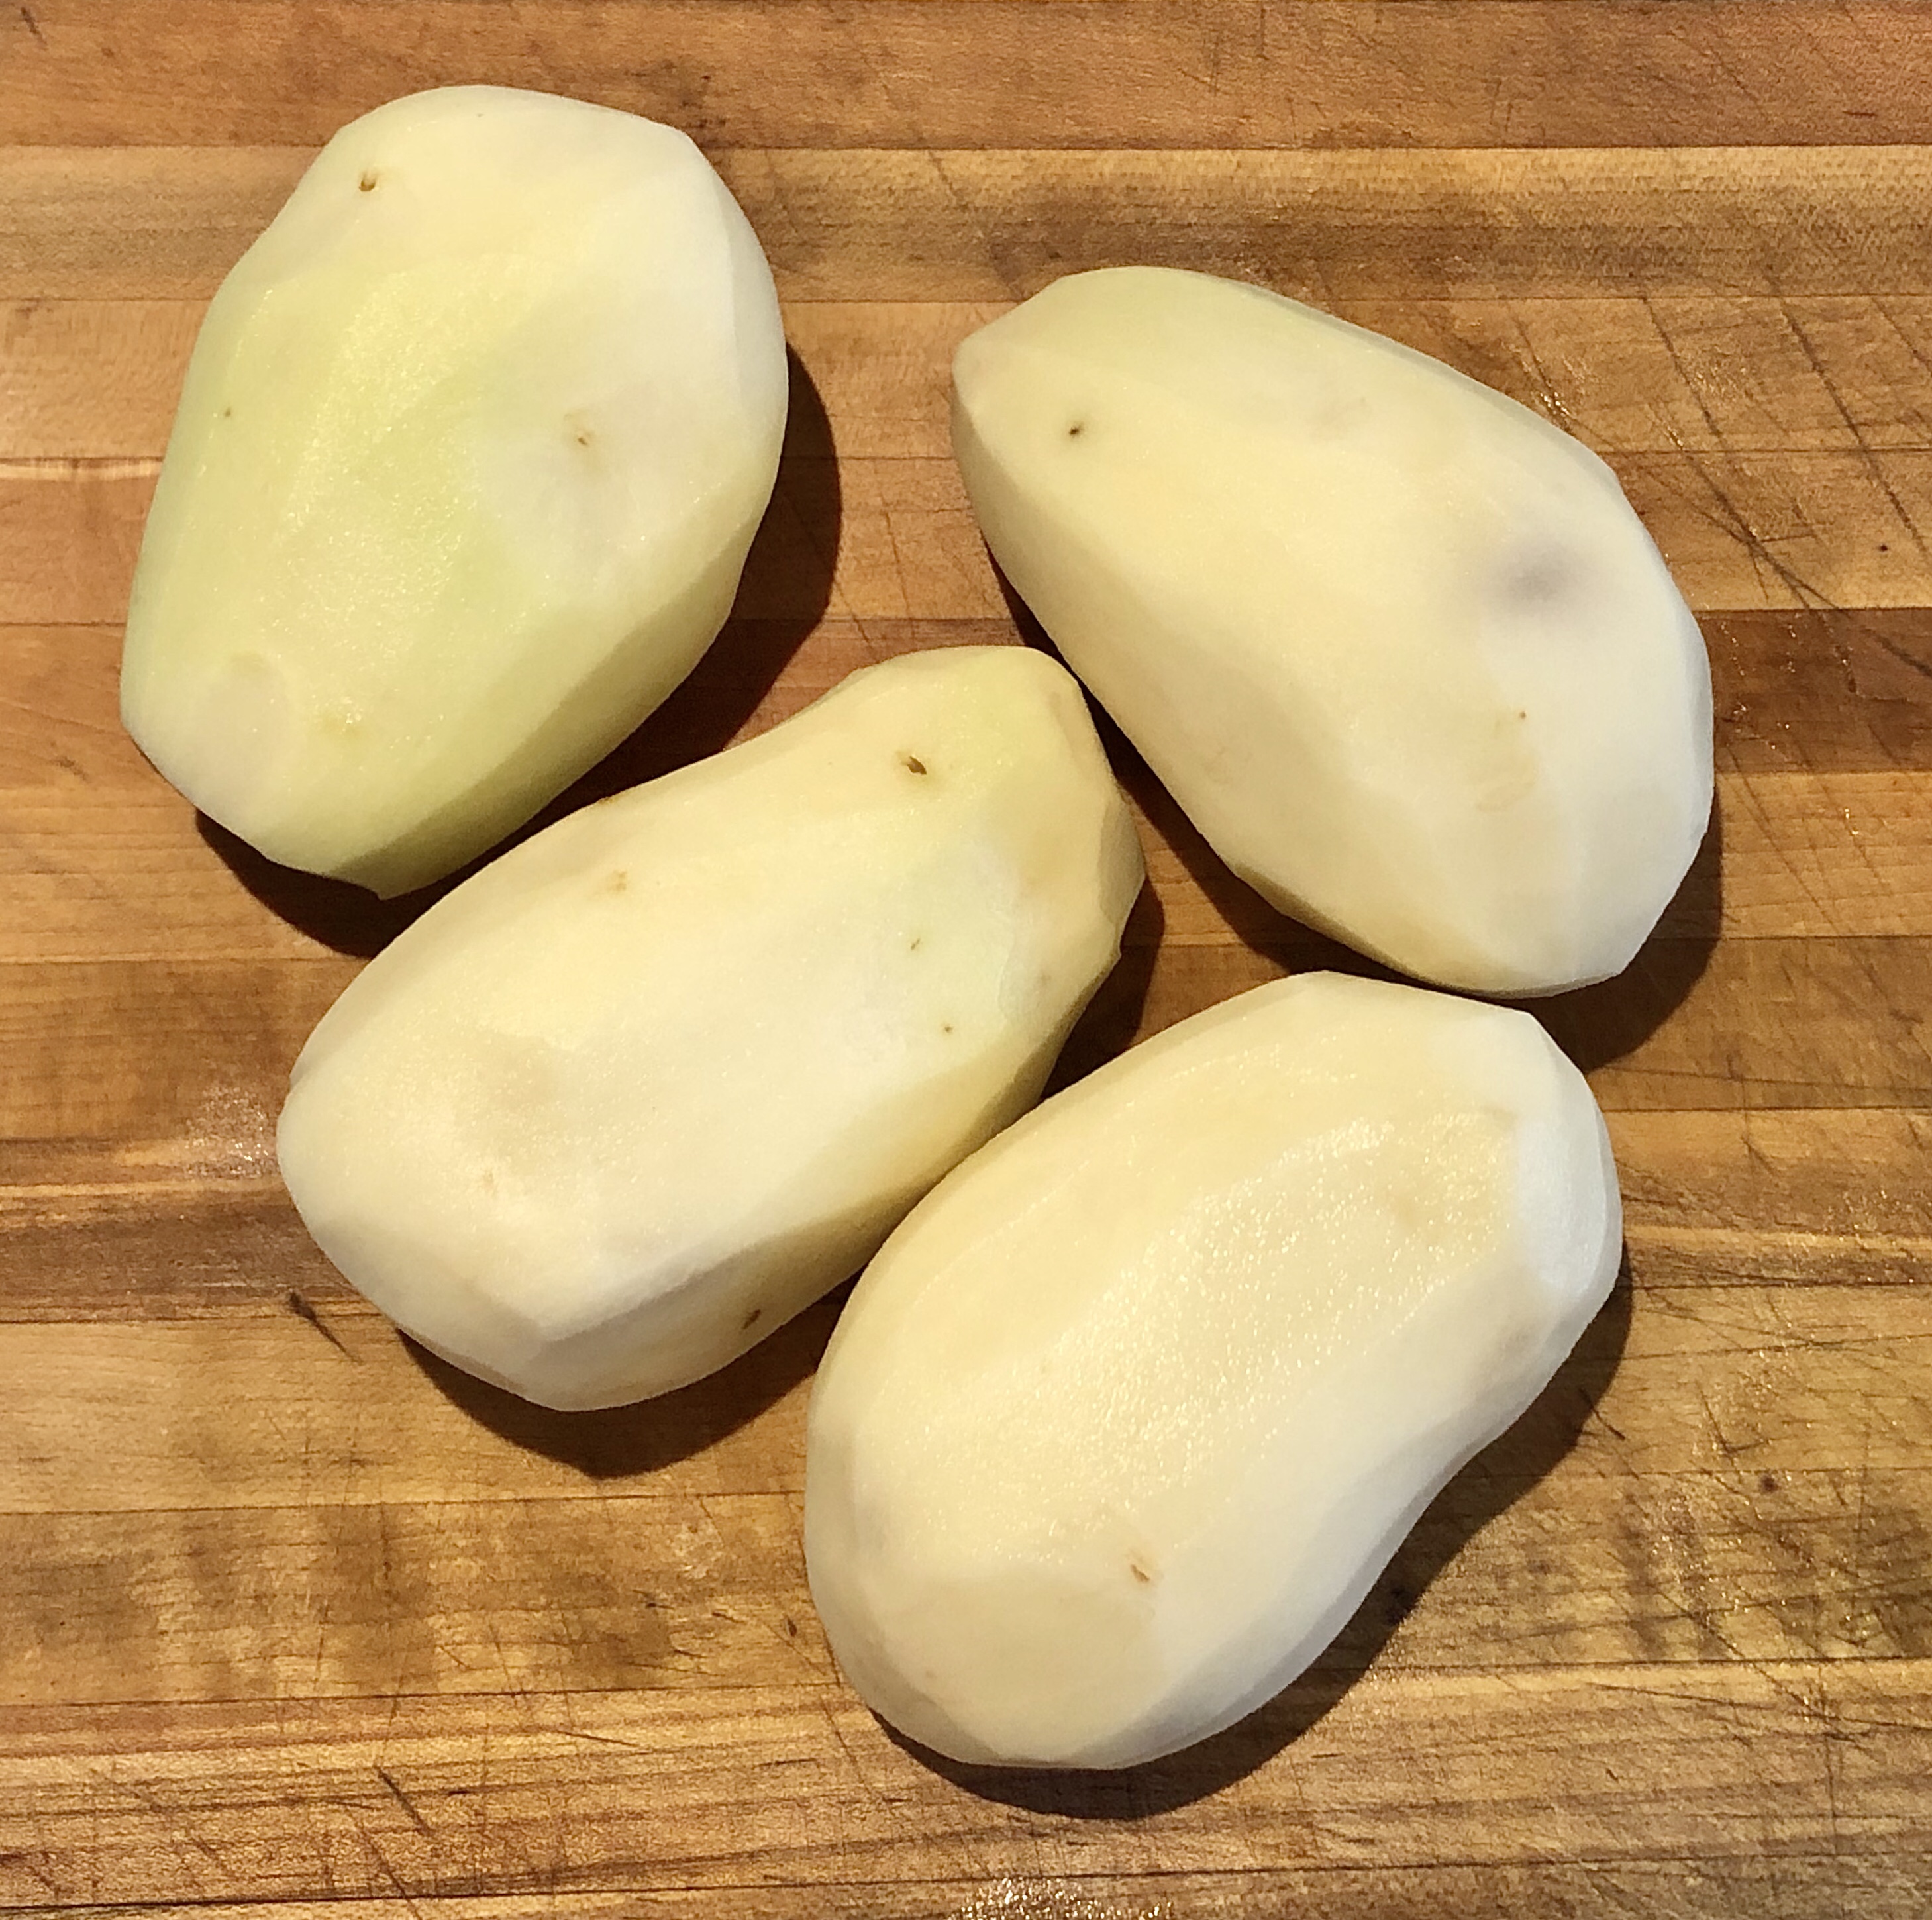
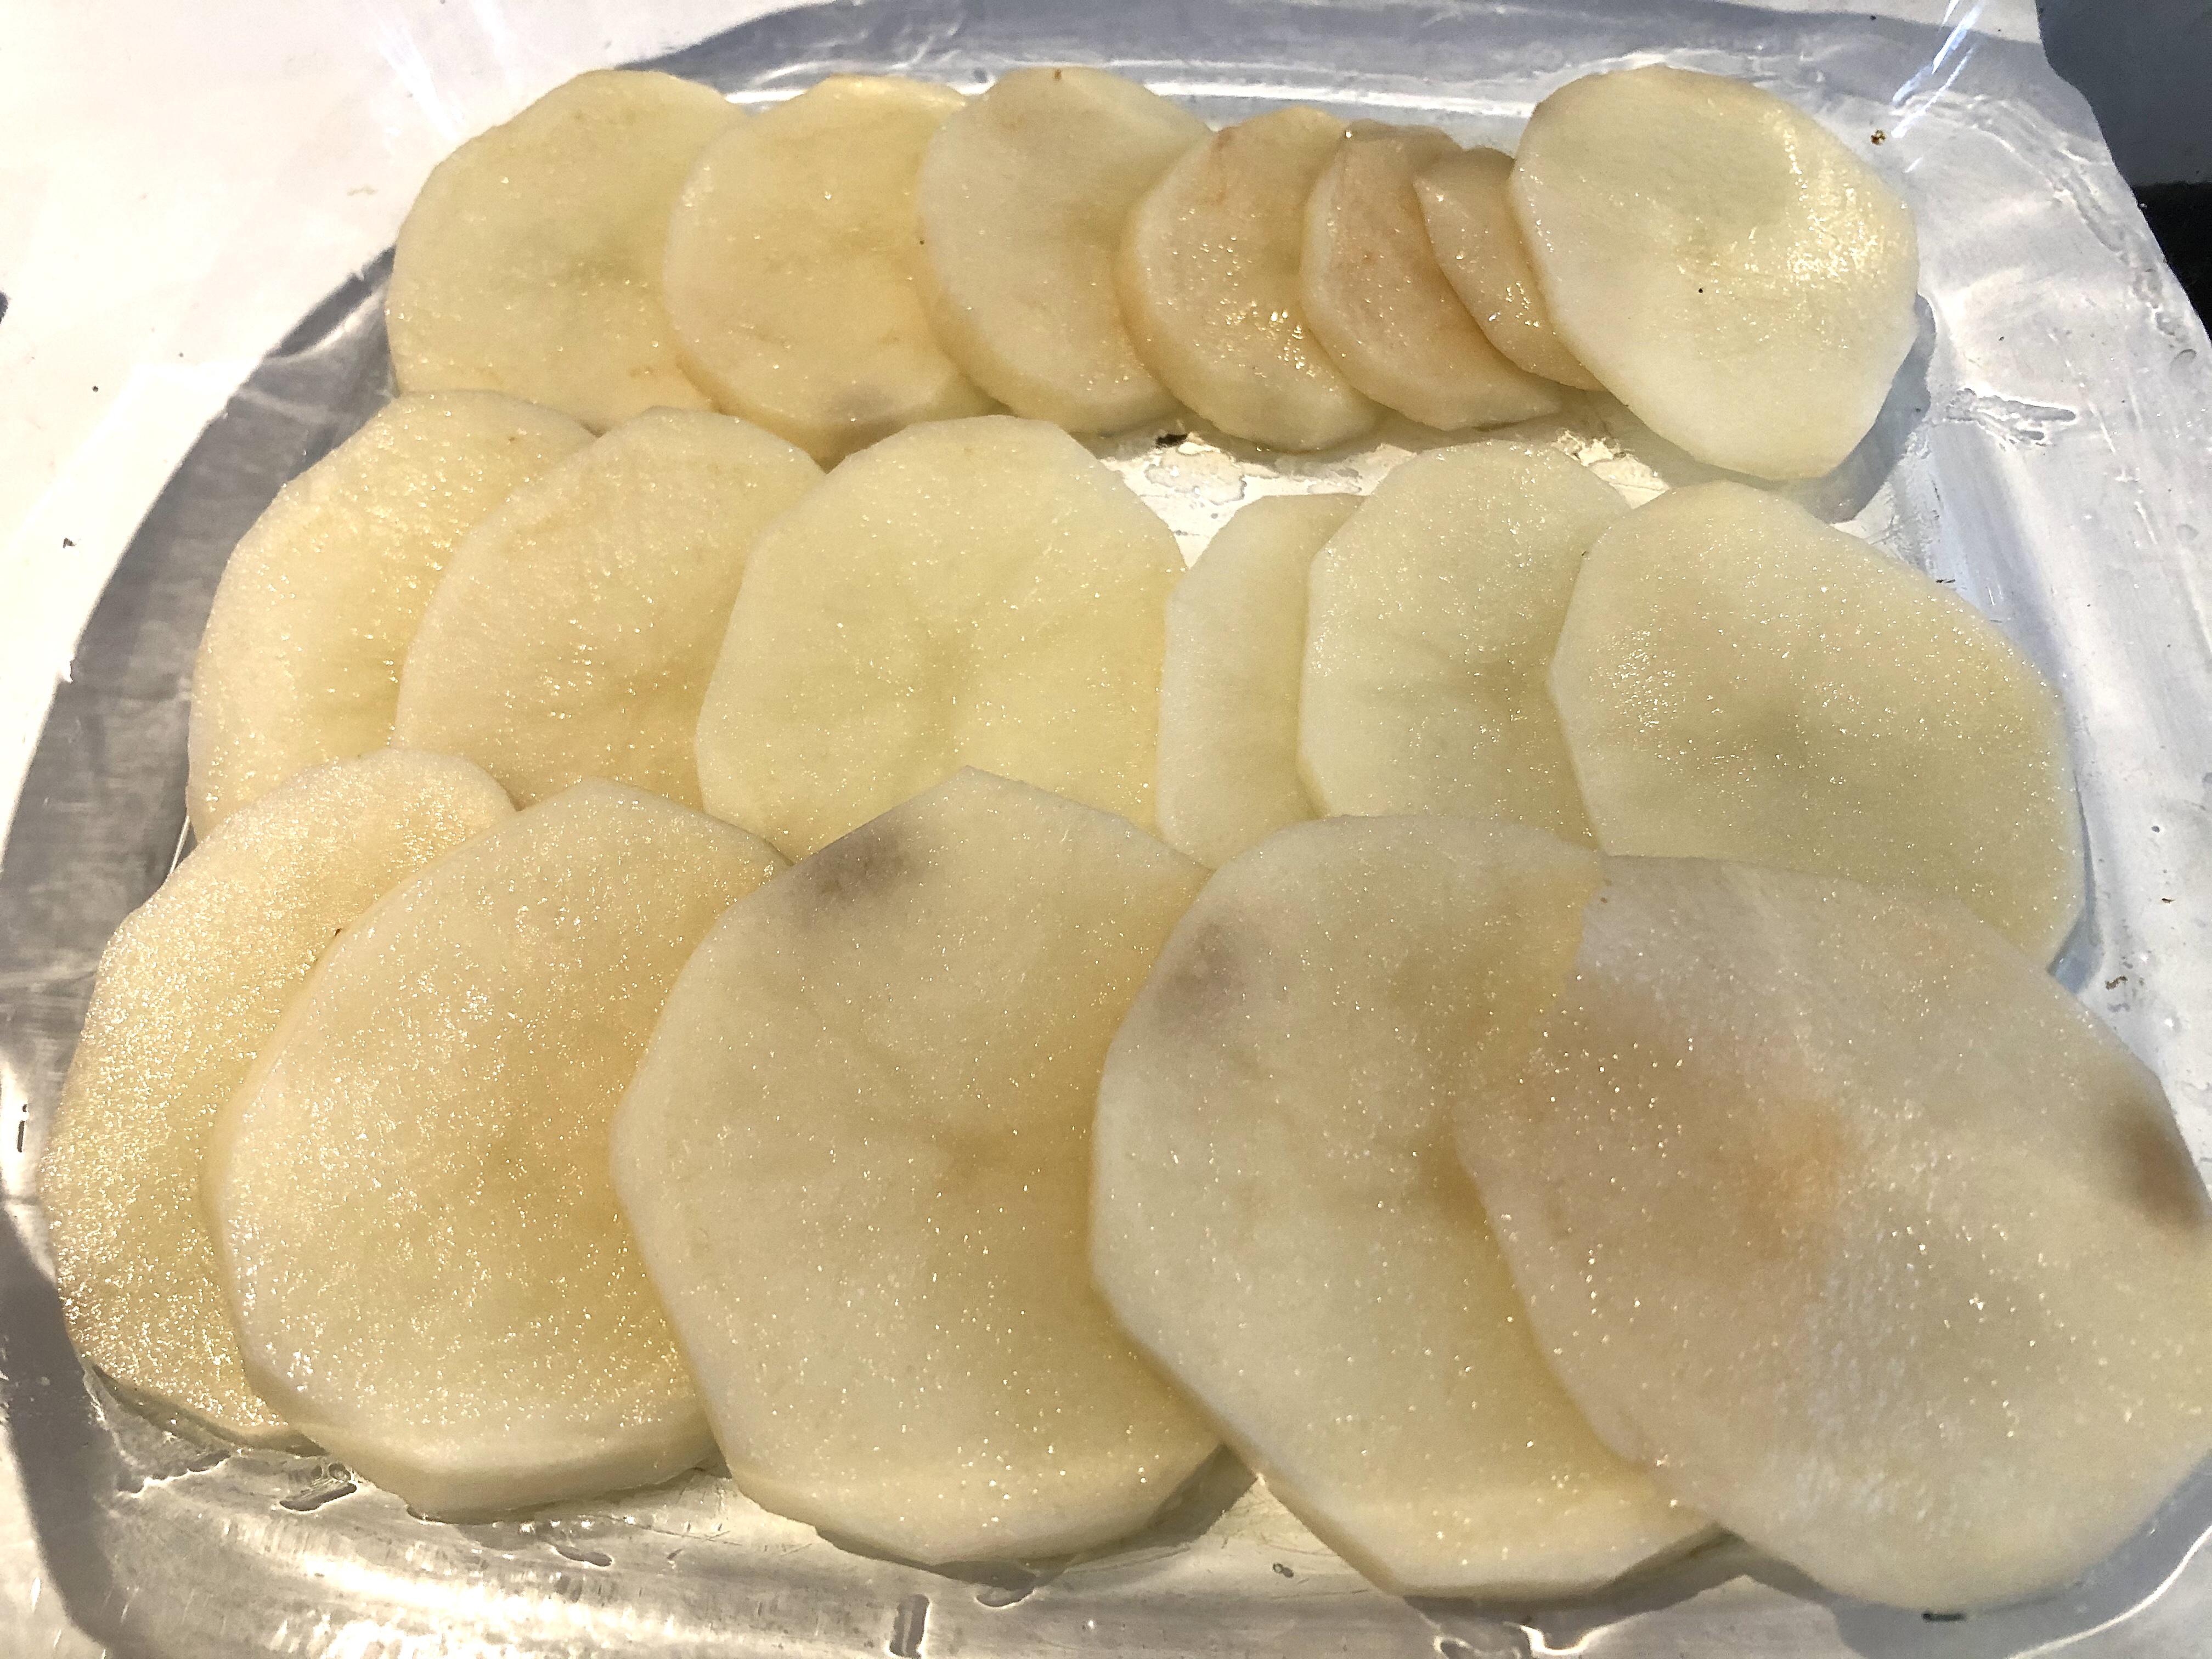
Meanwhile, slice the potatoes into thin rounds of equal thickness.
Advertisements
Advertisements
Once the onions are soft and translucent, add the flour to the pot and mix well with the buttery mixture.
Allow it to brown, stirring occasionally so it doesn’t burn.
This step adds so much flavour and is the “secrete” to good sauces and gravy.
(I remember a family friend being impressed that I knew to brown my flour when I was only 14 years old)
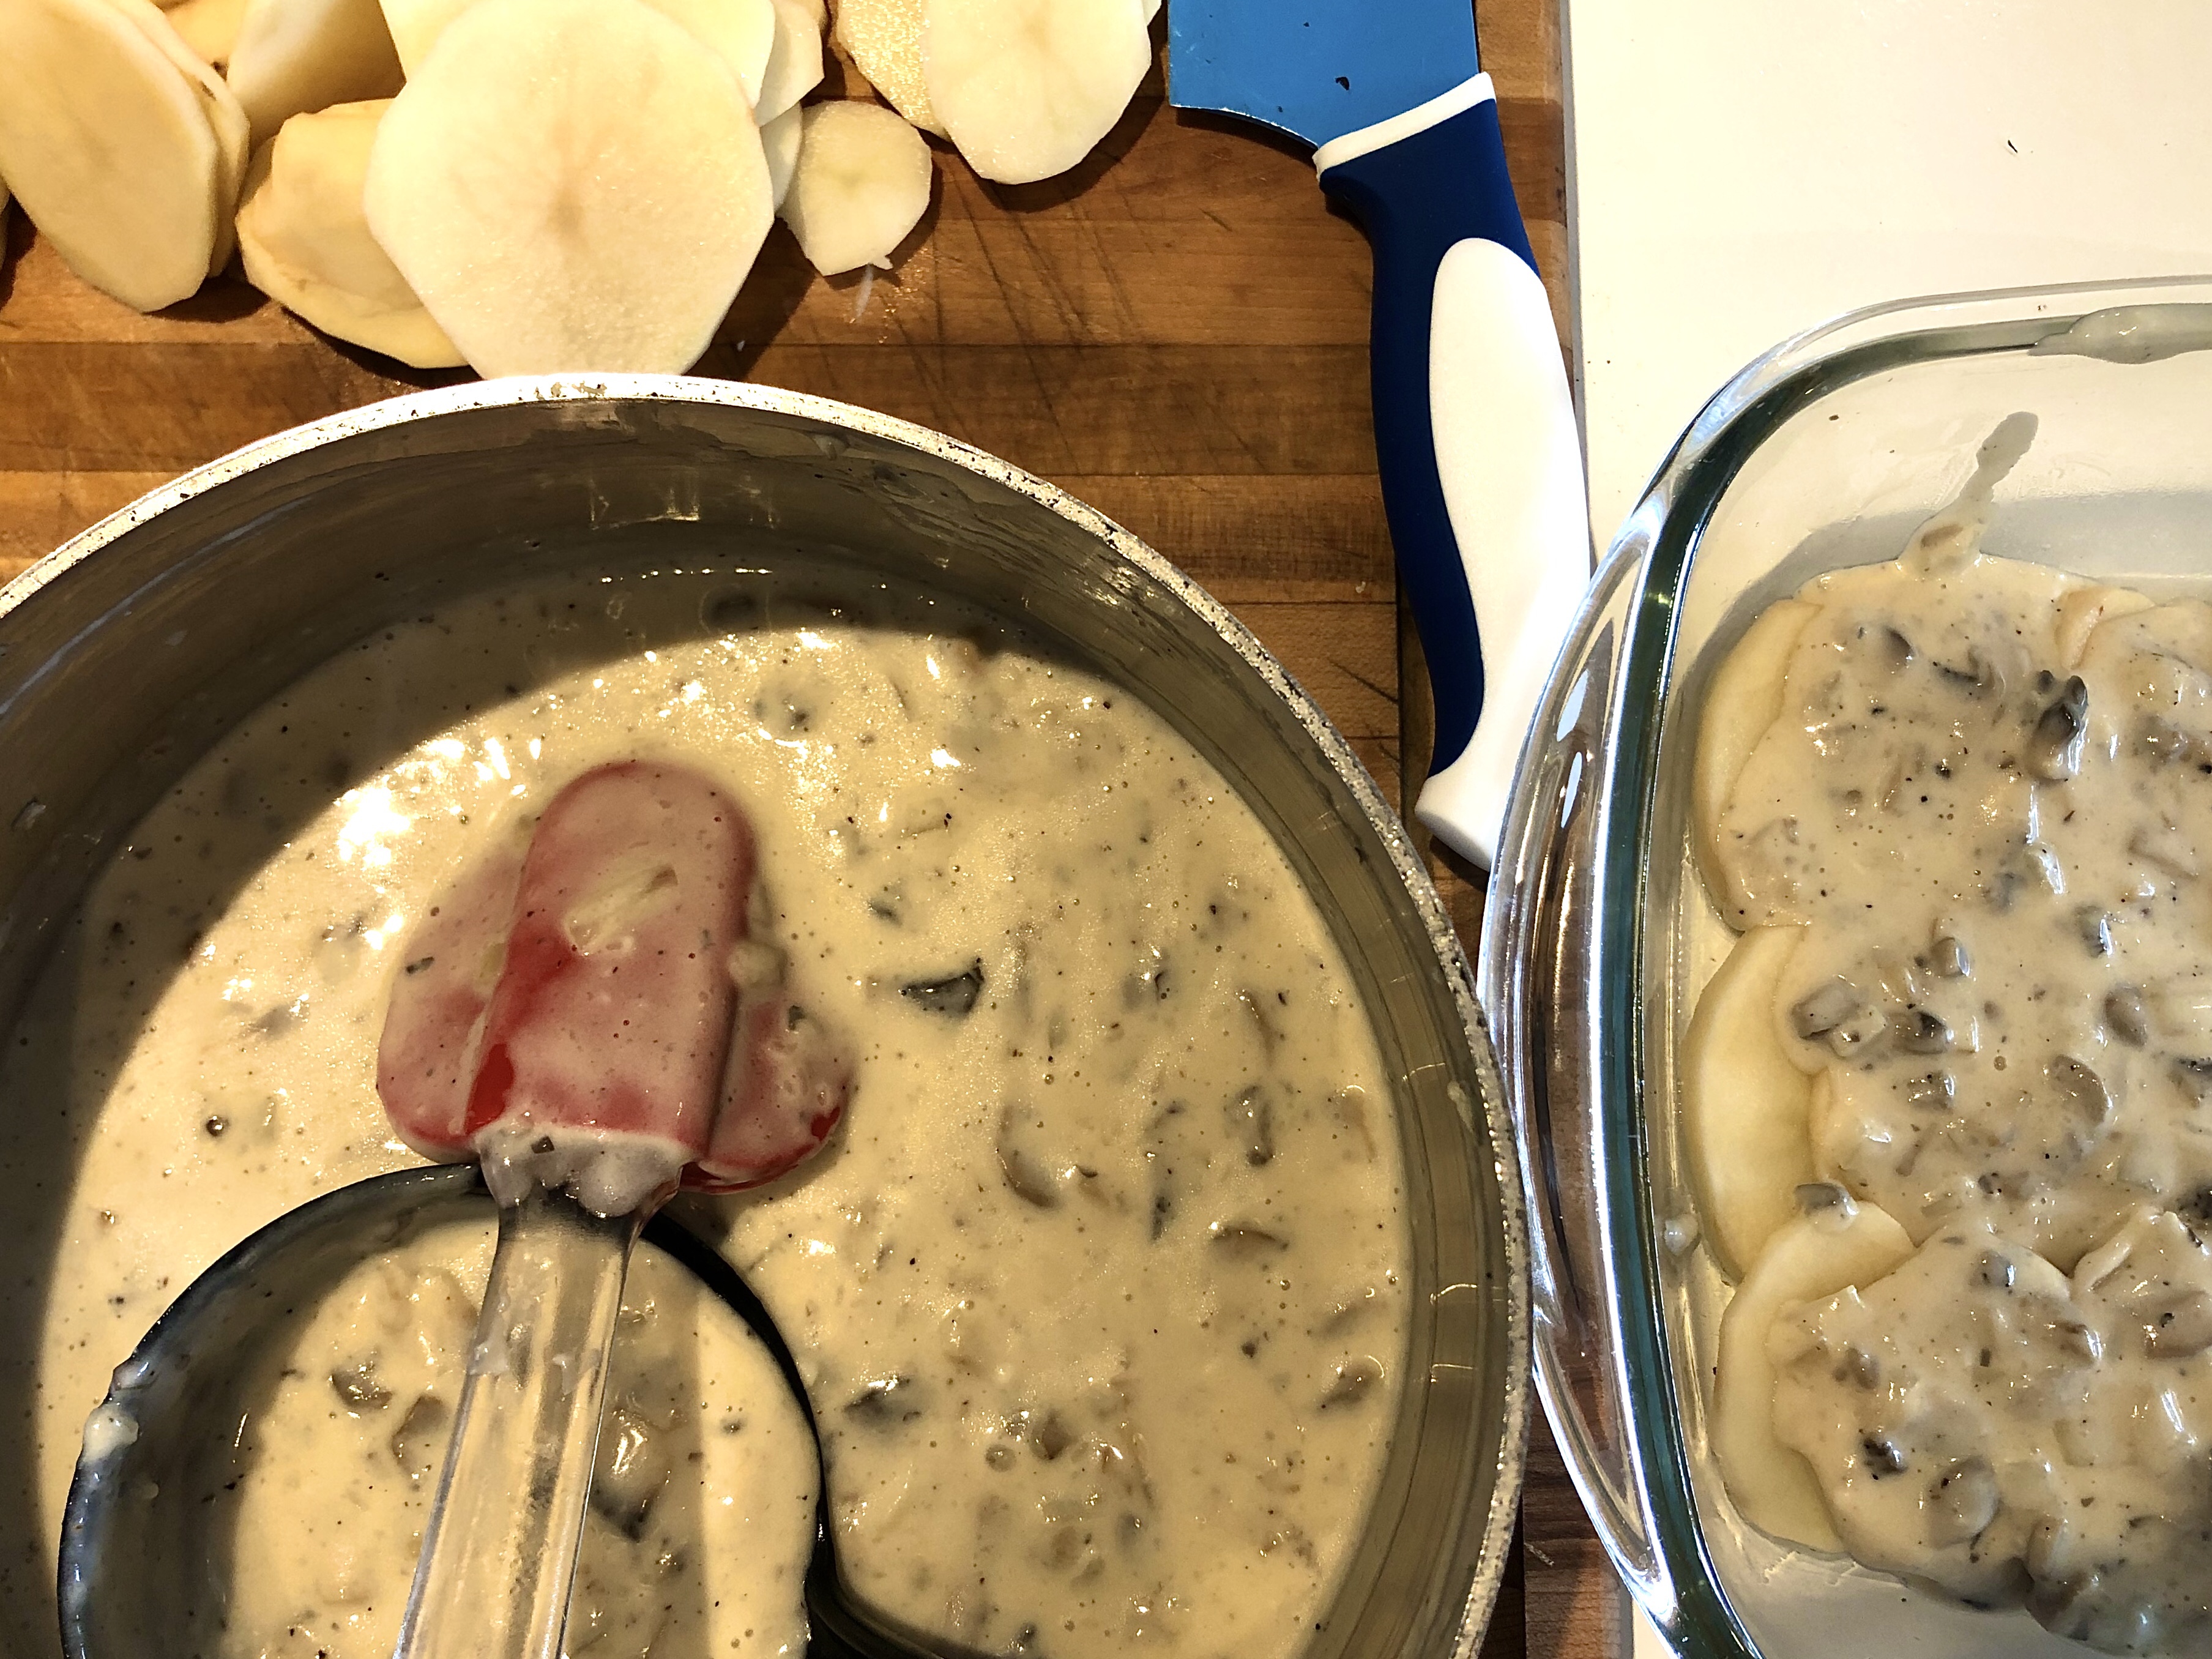
Next, add the cream of mushroom soup and milk, stirring out any lumps.
Bring to a boil and remove from heat.
Advertisements
Advertisements
Advertisements
Advertisements
Layer the sliced potatoes in a greased pan and spoon the cream sauce over the potatoes, one layer at a time.
Typically this will take 4-5 layers in a standard 9×9 pan.
If you want a faster, easier option you can cube the potatoes rather than slice them and simply mix everything together in the baking pan.
I find that I am much faster at cubing potatoes than slicing them and then I can skip the layering step, however it does not get the traditional scalloped potatoes look.
Advertisements
Advertisements
Advertisements
Advertisements
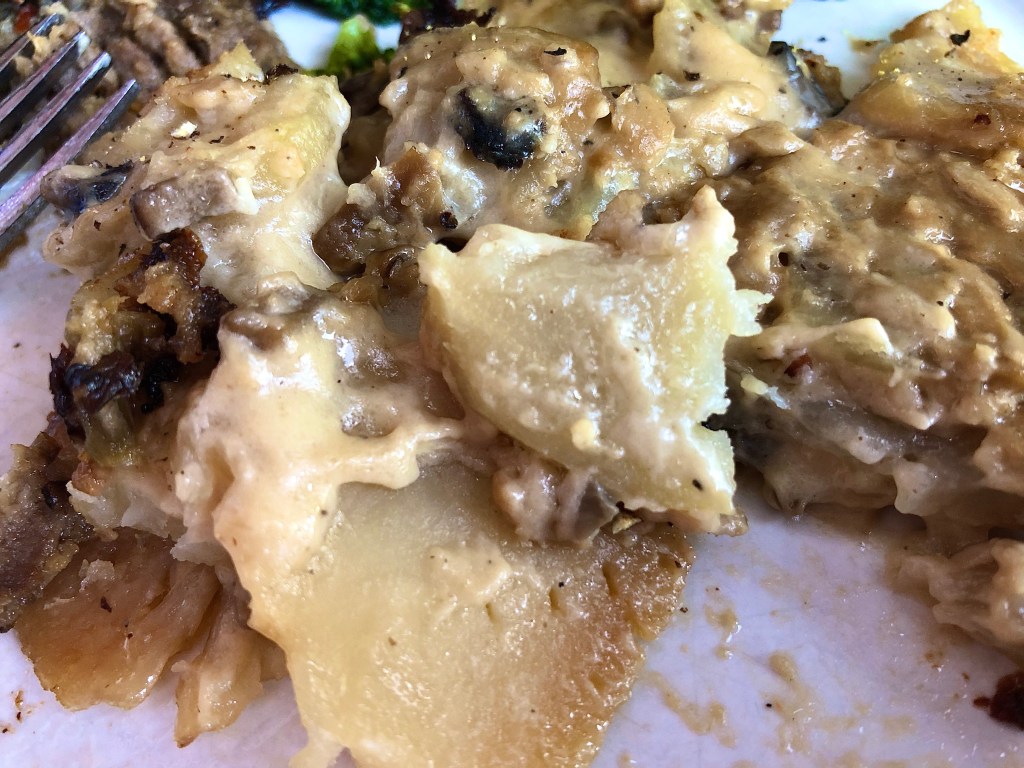
Once you have layered all the ingredients, cover with tin foil and place in the pre-heated oven for an hour at 350º or until fork tender.
Remove the foil and allow to bake for another 5-10 minutes to brown the top.
Serve with your favourite main dish and veggies – and enjoy!
Some optional ingredients you can add are cheese on top, bacon bits mixed into the cream sauce or garnishing with green onions.
Advertisements
Advertisements
Advertisements
Advertisements
Recipe
4 medium potatoes, sliced
2 cups milk
1 large onion, finely chopped
2 cups mushrooms, chopped
3 cloves garlic, minced
3 tablespoons butter
2 tablespoons flour
1 teaspoon salt
1/4 teaspoon pepper
1 can cream of mushroom soup
Advertisements
Advertisements
Optional Ingredients
Cheddar cheese
Bacon bits
Green onions
Advertisements
Advertisements
Instructions
Slice potatoes into thin rounds of even thickness.
Sauté onions, mushrooms, and garlic in a large sauce pan with butter until soft.
Add salt, pepper, and flour and allow to brown before adding the cream of mushroom soup and milk, stirring out any lumps.
Bring to a boil and remove from heat.
Advertisements
Advertisements
Layer potatoes in a 9×9 greased baking pan and cover with sauce, then layer again and cover with sauce.
Repeat until all potatoes have been added and cover with a final layer of sauce.
Cover with tin foil and bake at 350º for 1 hour or until fork tender.
Remove foil and bake for another 5-10 minutes or until golden brown.
Enjoy!
Advertisements
Advertisements
Advertisements
Processing…
Success! You're on the list.
Whoops! There was an error and we couldn't process your subscription. Please reload the page and try again.
Round Steak and Gravy has been a family favourite my whole life.
In fact, this was actually the very first meal I made from start to finish, all by myself at 12 years of age!
It was also our “featured special” for Kid’s Café when we would put on a date night for Mom and Dad, complete with candles and piano music from our recent lessons.
Advertisements
Advertisements
Advertisements
Advertisements
As with so many of my recipes, I have added or changed some of the ingredients over the years.
This recipe is hearty, packed with flavour, and is a “set it and forget it” crockpot champ!
Using cubed round steak, flour and brown the meat on high heat in a pan with oil.
Add salt and pepper as it cooks.
Advertisements
Advertisements
Note: you only want to brown the outside, not thoroughly cook the meat at this point; this helps add flavour while retaining the tenderness.
Once the cubes are golden brown on all sides, add to the crockpot with cream of mushroom soup and turn to low heat.
In the same frying pan, cook the chopped onion, mushrooms, and minced garlic until tender.
Advertisements
Advertisements
Advertisements
Advertisements
Add to the crock pot and mix well.
Leave on low heat for 3-4 hours.
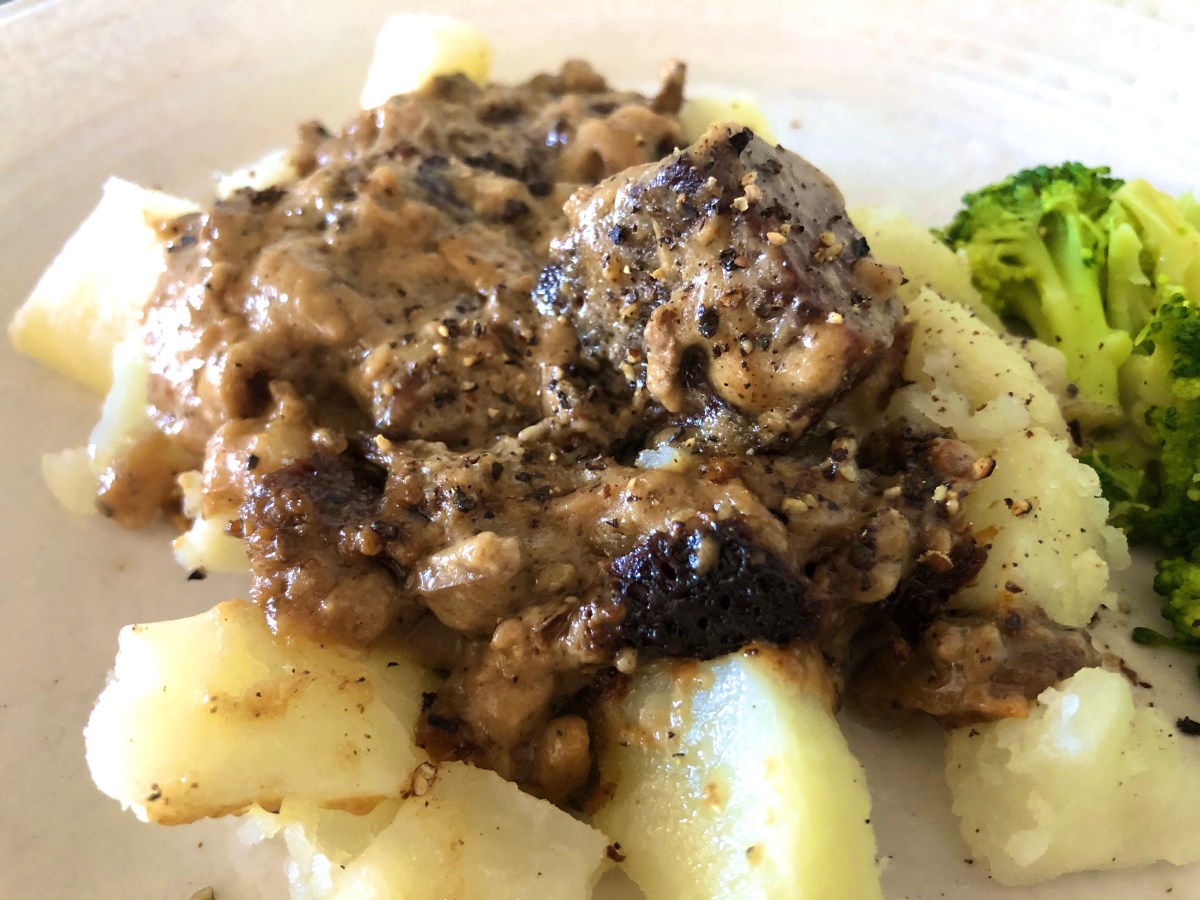
At this point, the meat should be tender and flake apart.
Serve on top of boiled potatoes with a side of greens and you’re set!
Advertisements
Advertisements
Advertisements
Advertisements
Recipe
1 pound round steak, cubed
1/4 cup flour (or as needed to coat meat)
1 can cream of mushroom soup
1/2 large onion, chopped
2 cups mushrooms, chopped
3 cloves garlic, diced
Salt
Pepper
Advertisements
Advertisements
Instructions:
Coat cubed round steak in flour and fry in a pan with oil on high heat until golden brown on all sides.
Sprinkle with salt and pepper.
Place in crock pot with cream of mushroom soup on low heat.
In the same pan, cook onions, mushrooms, and garlic until soft.
Add to crock pot and mix well.
Cook on low for 3-4 hours.
Serve on boiled potatoes.
Enjoy!
(Serves 2)
Advertisements
Processing…
Success! You're on the list.
Whoops! There was an error and we couldn't process your subscription. Please reload the page and try again.