Cinco De Mayo was just last week and I decided a taco salad for lunch seemed like a tasty way to celebrate Mexican inspired cuisine!
I have a special appreciation for authentic Mexican food, but also enjoy our North American version of this style of cooking.
Sure, taco salad has a heavy dressing and even CHIPS – but it is loaded with nutritional veggies that I personally feel balance it all out.
It is like comfort food and health food in perfect harmony.
Advertisements
Advertisements
Slice all your veggies.
When it comes to making a good salad, the thiner the pieces the better; the more flavour you get on your fork in one bite the better the salad will taste!
We have all had that hugely chopped salad where one cucumber piece is an entire bite – or you are left to cut all your own veggies up on your plate.
For the salad mix, I prefer romaine lettuce, cherry tomatoes, bell pepper, cucumber, and red onion.
Advertisements
Advertisements
Some optional ingredients that I have used in the past and quite enjoy are corn, black beans or even sliced black olives.
For the dressing, I add 1 part salsa and 1 part sour cream – finishing it off with lemon zest and freshly squeezed lemon.
Combine all ingredients in a mixing bowl, along with shredded cheddar cheese and taco meat.
Advertisements
Advertisements
Advertisements
Advertisements
Drizzle dressing over the salad and mix well.
Plate and top with crushed corn chips of choice.
I have used anything from plain corn chips, to cheese chips, to jalapeño cheese chips.
The choice is up to you!
Next, add a side of avocado and sprinkle with cilantro.
(Cilantro seems to be a “love it or hate it” herb, so if you hate it, just skip this step. I won’t judge!)
Finish off with some freshly ground pepper.
Advertisements
Advertisements
You can treat this as a main course (like I did for lunch) or serve as a starter salad with Chicken Fajitas or Beef Taquitos.
Advertisements
Advertisements
Recipe
Salad Mix
1/2 head of romaine lettuce, shredded
6-8 cherry tomatoes, halved
1/4 bell pepper, chopped
1/2 English cucumber, chopped
Red onion, sliced thinly, to taste
1/4 cup cheddar cheese, shredded
Optional ingredients:corn, black beans, and sliced black olives.
Advertisements
Advertisements
Dressing
1/4 cup salsa
1/4 cup sour cream
1/4 lemon zest
1/4 lemon, juiced
Advertisements
Advertisements
Topping
Corn chips, crushed, to taste
Cilantro (optional) to taste
1/2 avocado, sliced and split between servings
(serves 2 as starter salad)
Advertisements
Advertisements
Directions
Slice vegetables, add to a mixing bowl with shredded cheddar cheese and taco meat.
Drizzle with salad dressing and mix well.
Plate and top with crushed corn chips, garnish with cilantro, and add a side of sliced avocado.
Enjoy!
Advertisements
Processing…
Success! You're on the list.
Whoops! There was an error and we couldn't process your subscription. Please reload the page and try again.
In this day and age of instant gratification, what gardener doesn’t like a quick-growing veggie?!
I know I do!
There is something so satisfying about seeing the very first seed pop through the soil in the spring…
Advertisements
Advertisements
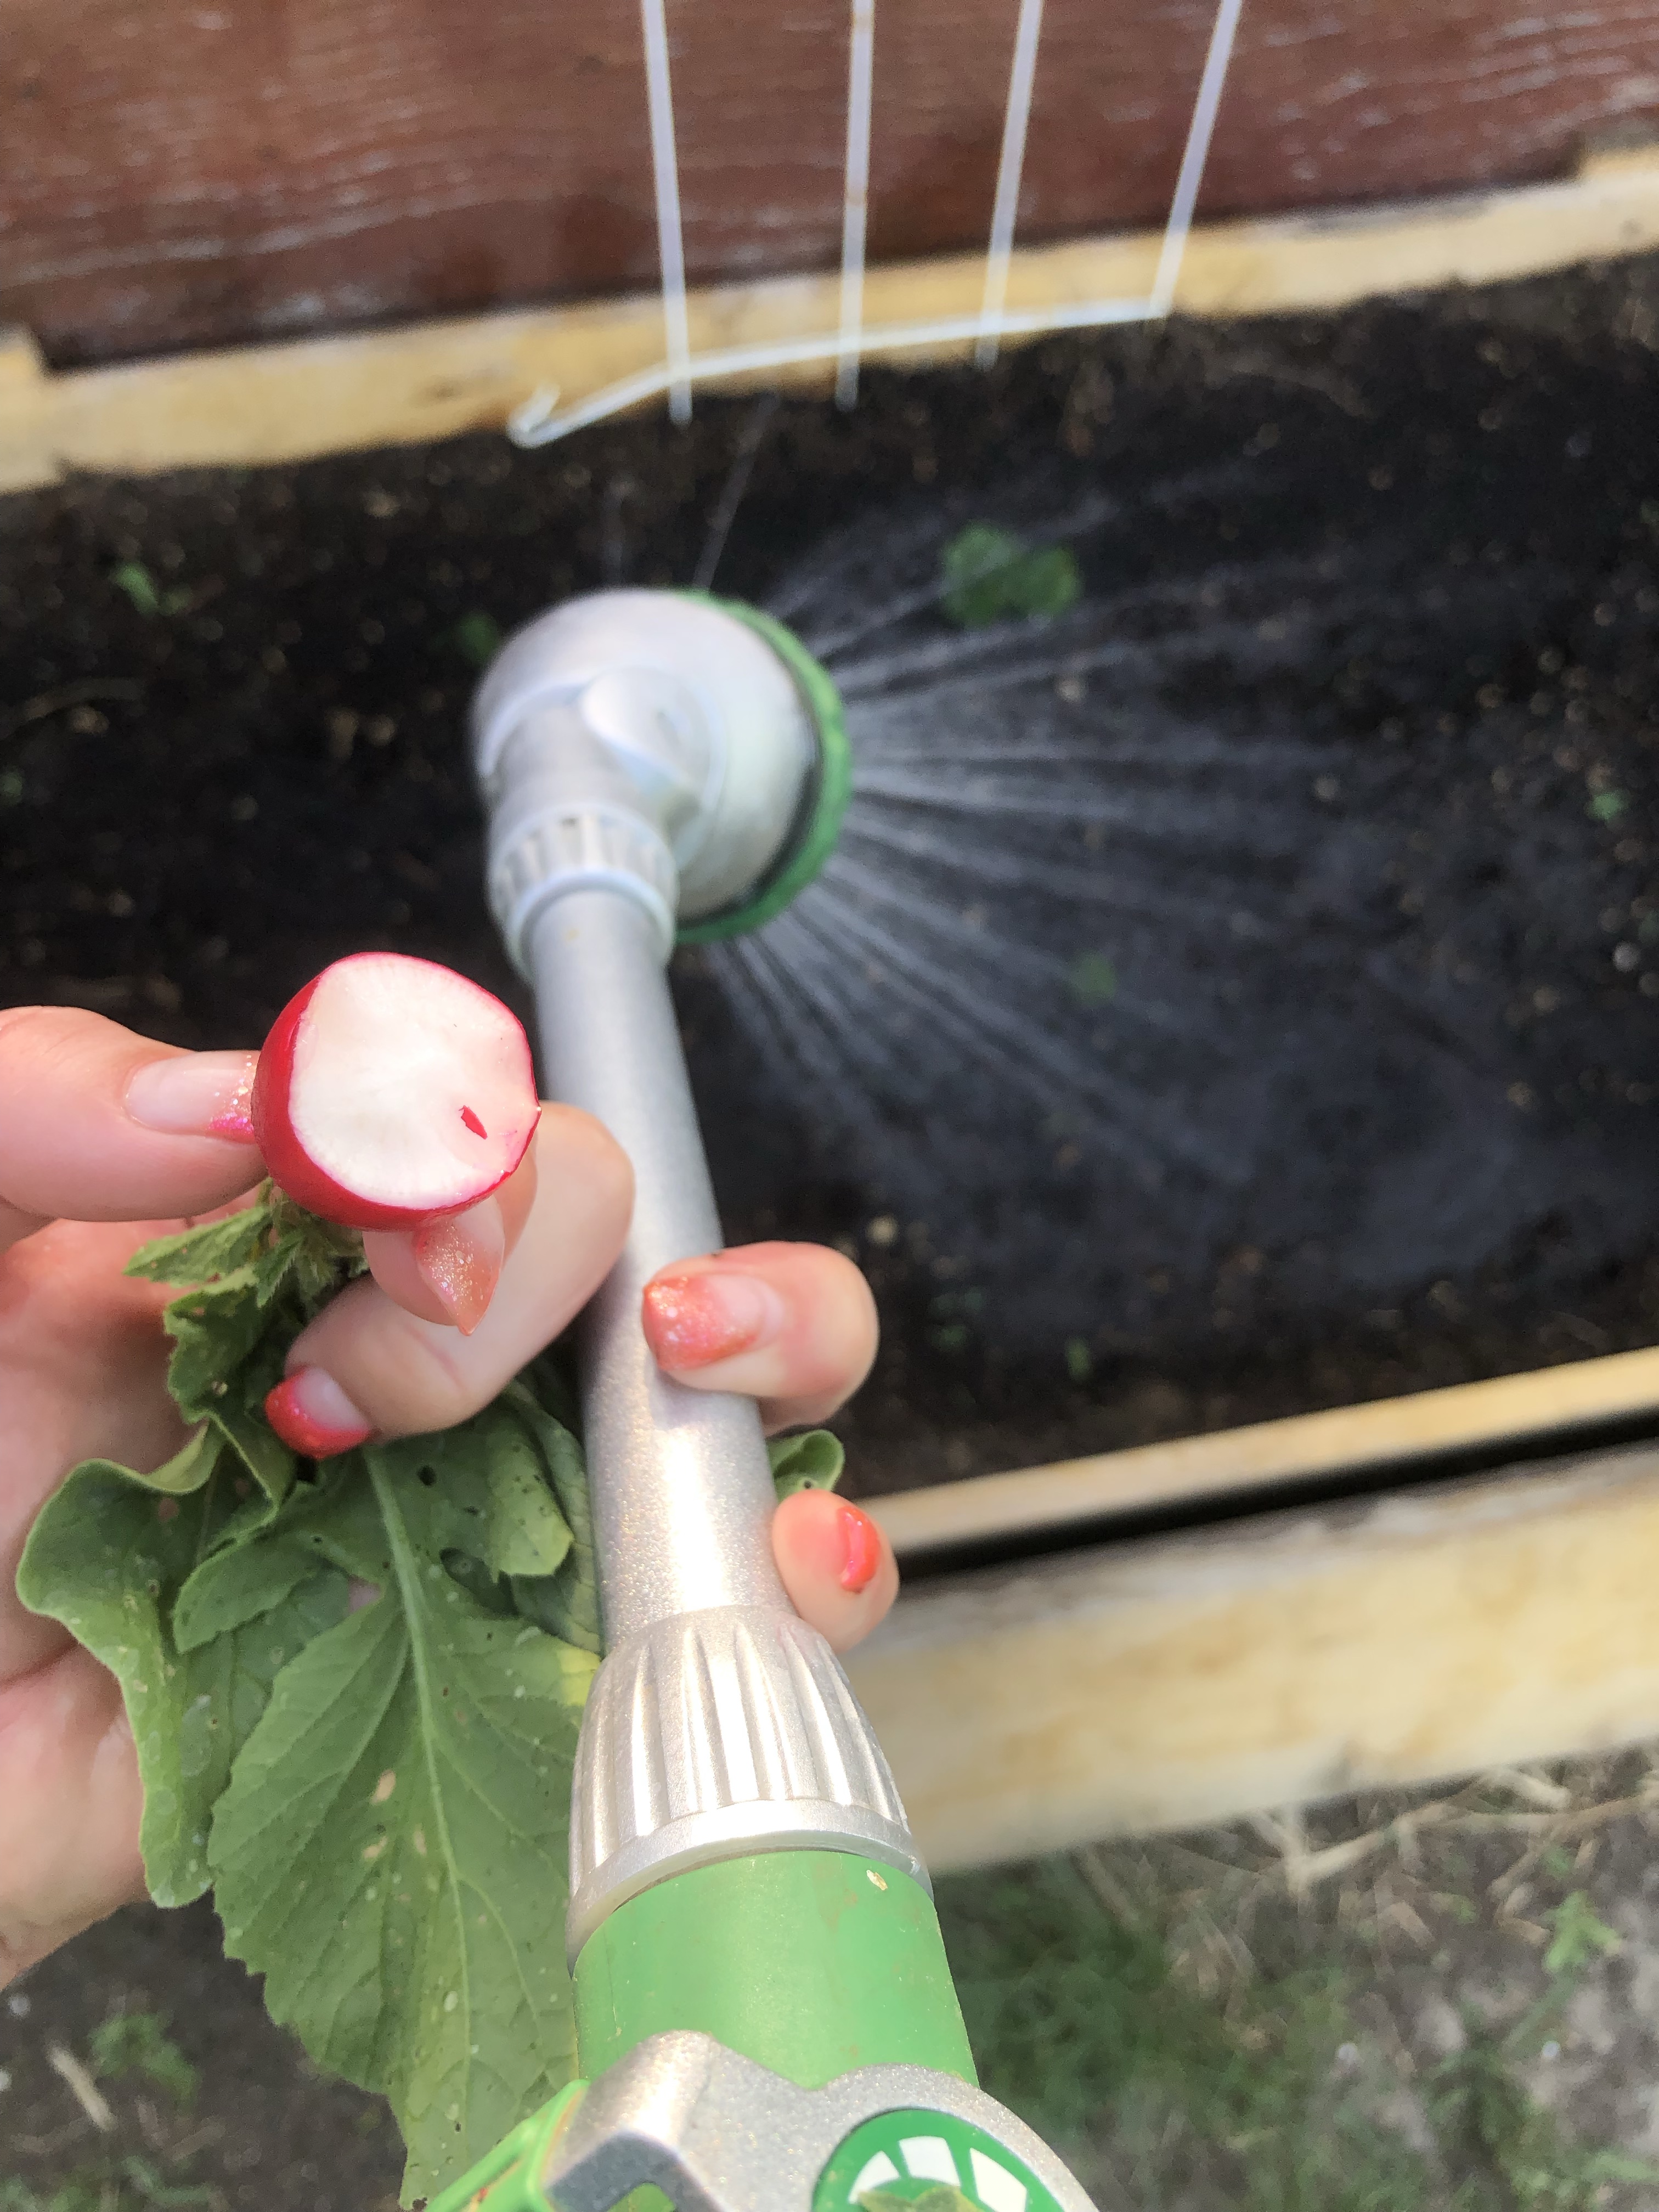
I honestly think I love radishes more for this quality than actually eating them!
Don’t get me wrong – they make a bright, tasty addition to salads and open-faced sandwiches!
BUT that first plant coming up after a long winter is oddly encouraging.
Germination
Radishes can take mere days to germinate and will tolerate cold much better than most other plants.
As a cold-weather crop, they relish the cool spring temperatures!
Advertisements
Advertisements
Seeding
Another thing I love about radishes is the fact that you can plant them directly in the ground outside; I have even just scattered them without covering them with soil and had wonderful results.
There is no hassle with starting them indoors weeks and weeks before hardening them off and planting outdoors.
Easy is a wonderful thing.
Advertisements
Advertisements
That being said, if you wanted to plant them indoors before the snow melts so you can grow and harvest them in your own home, you certainly can!
They tend to be much more drought tolerant than many plants, as well.
Like I said, easy is a wonderful thing.
By planting in intervals, you can have a steady harvest of radishes all spring (and fall).
I typically like to plant every 1-2 weeks during those times of the year.
Advertisements
Advertisements
Harvesting
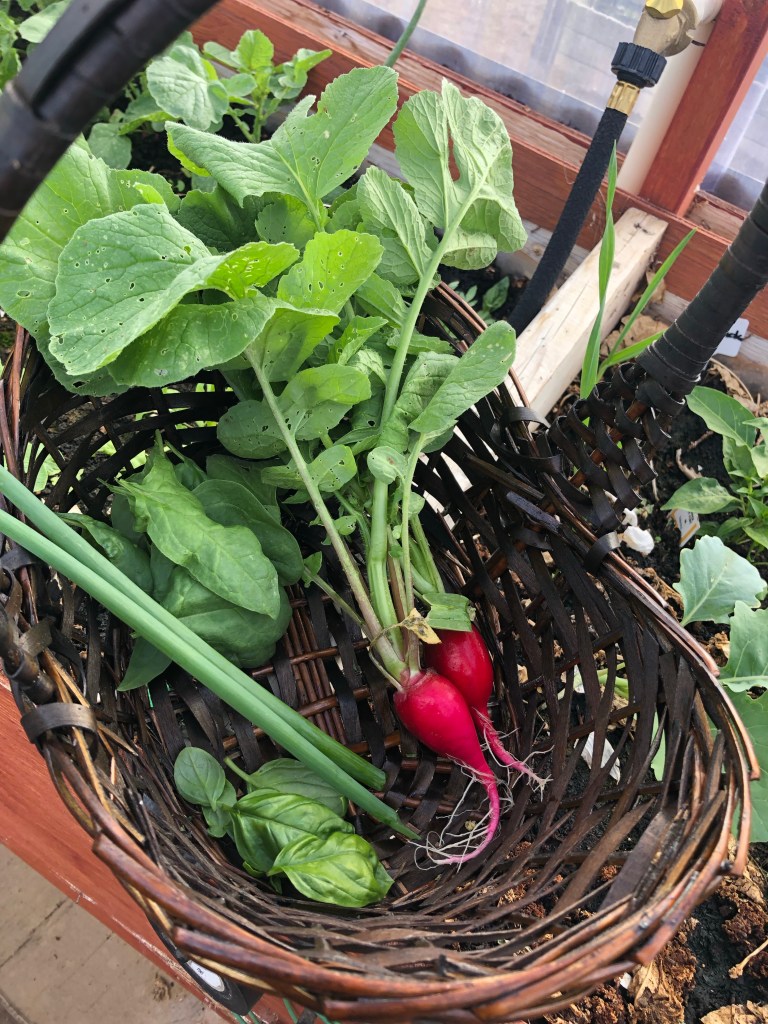
They are such a fast-growing veggie that you will be harvesting within a few weeks.
Last summer, Jake saw me munching on a radish while watering the tiny little seedlings of other plants just starting to come up and couldn’t believe that the radish was from my own garden!
Advertisements
Advertisements
They do not do well in the summer heat, so take advantage of spring and fall temps.
When harvesting, you are best to use them the same day as they are best fresh.
Oh! And you can use the radish tops to make a zesty radish pesto so nothing goes to waste!
Make sure to harvest the radishes before they get hard and woody; they tend to bolt and get tough during hotter weather.
Advertisements
Advertisements
Saving Seeds
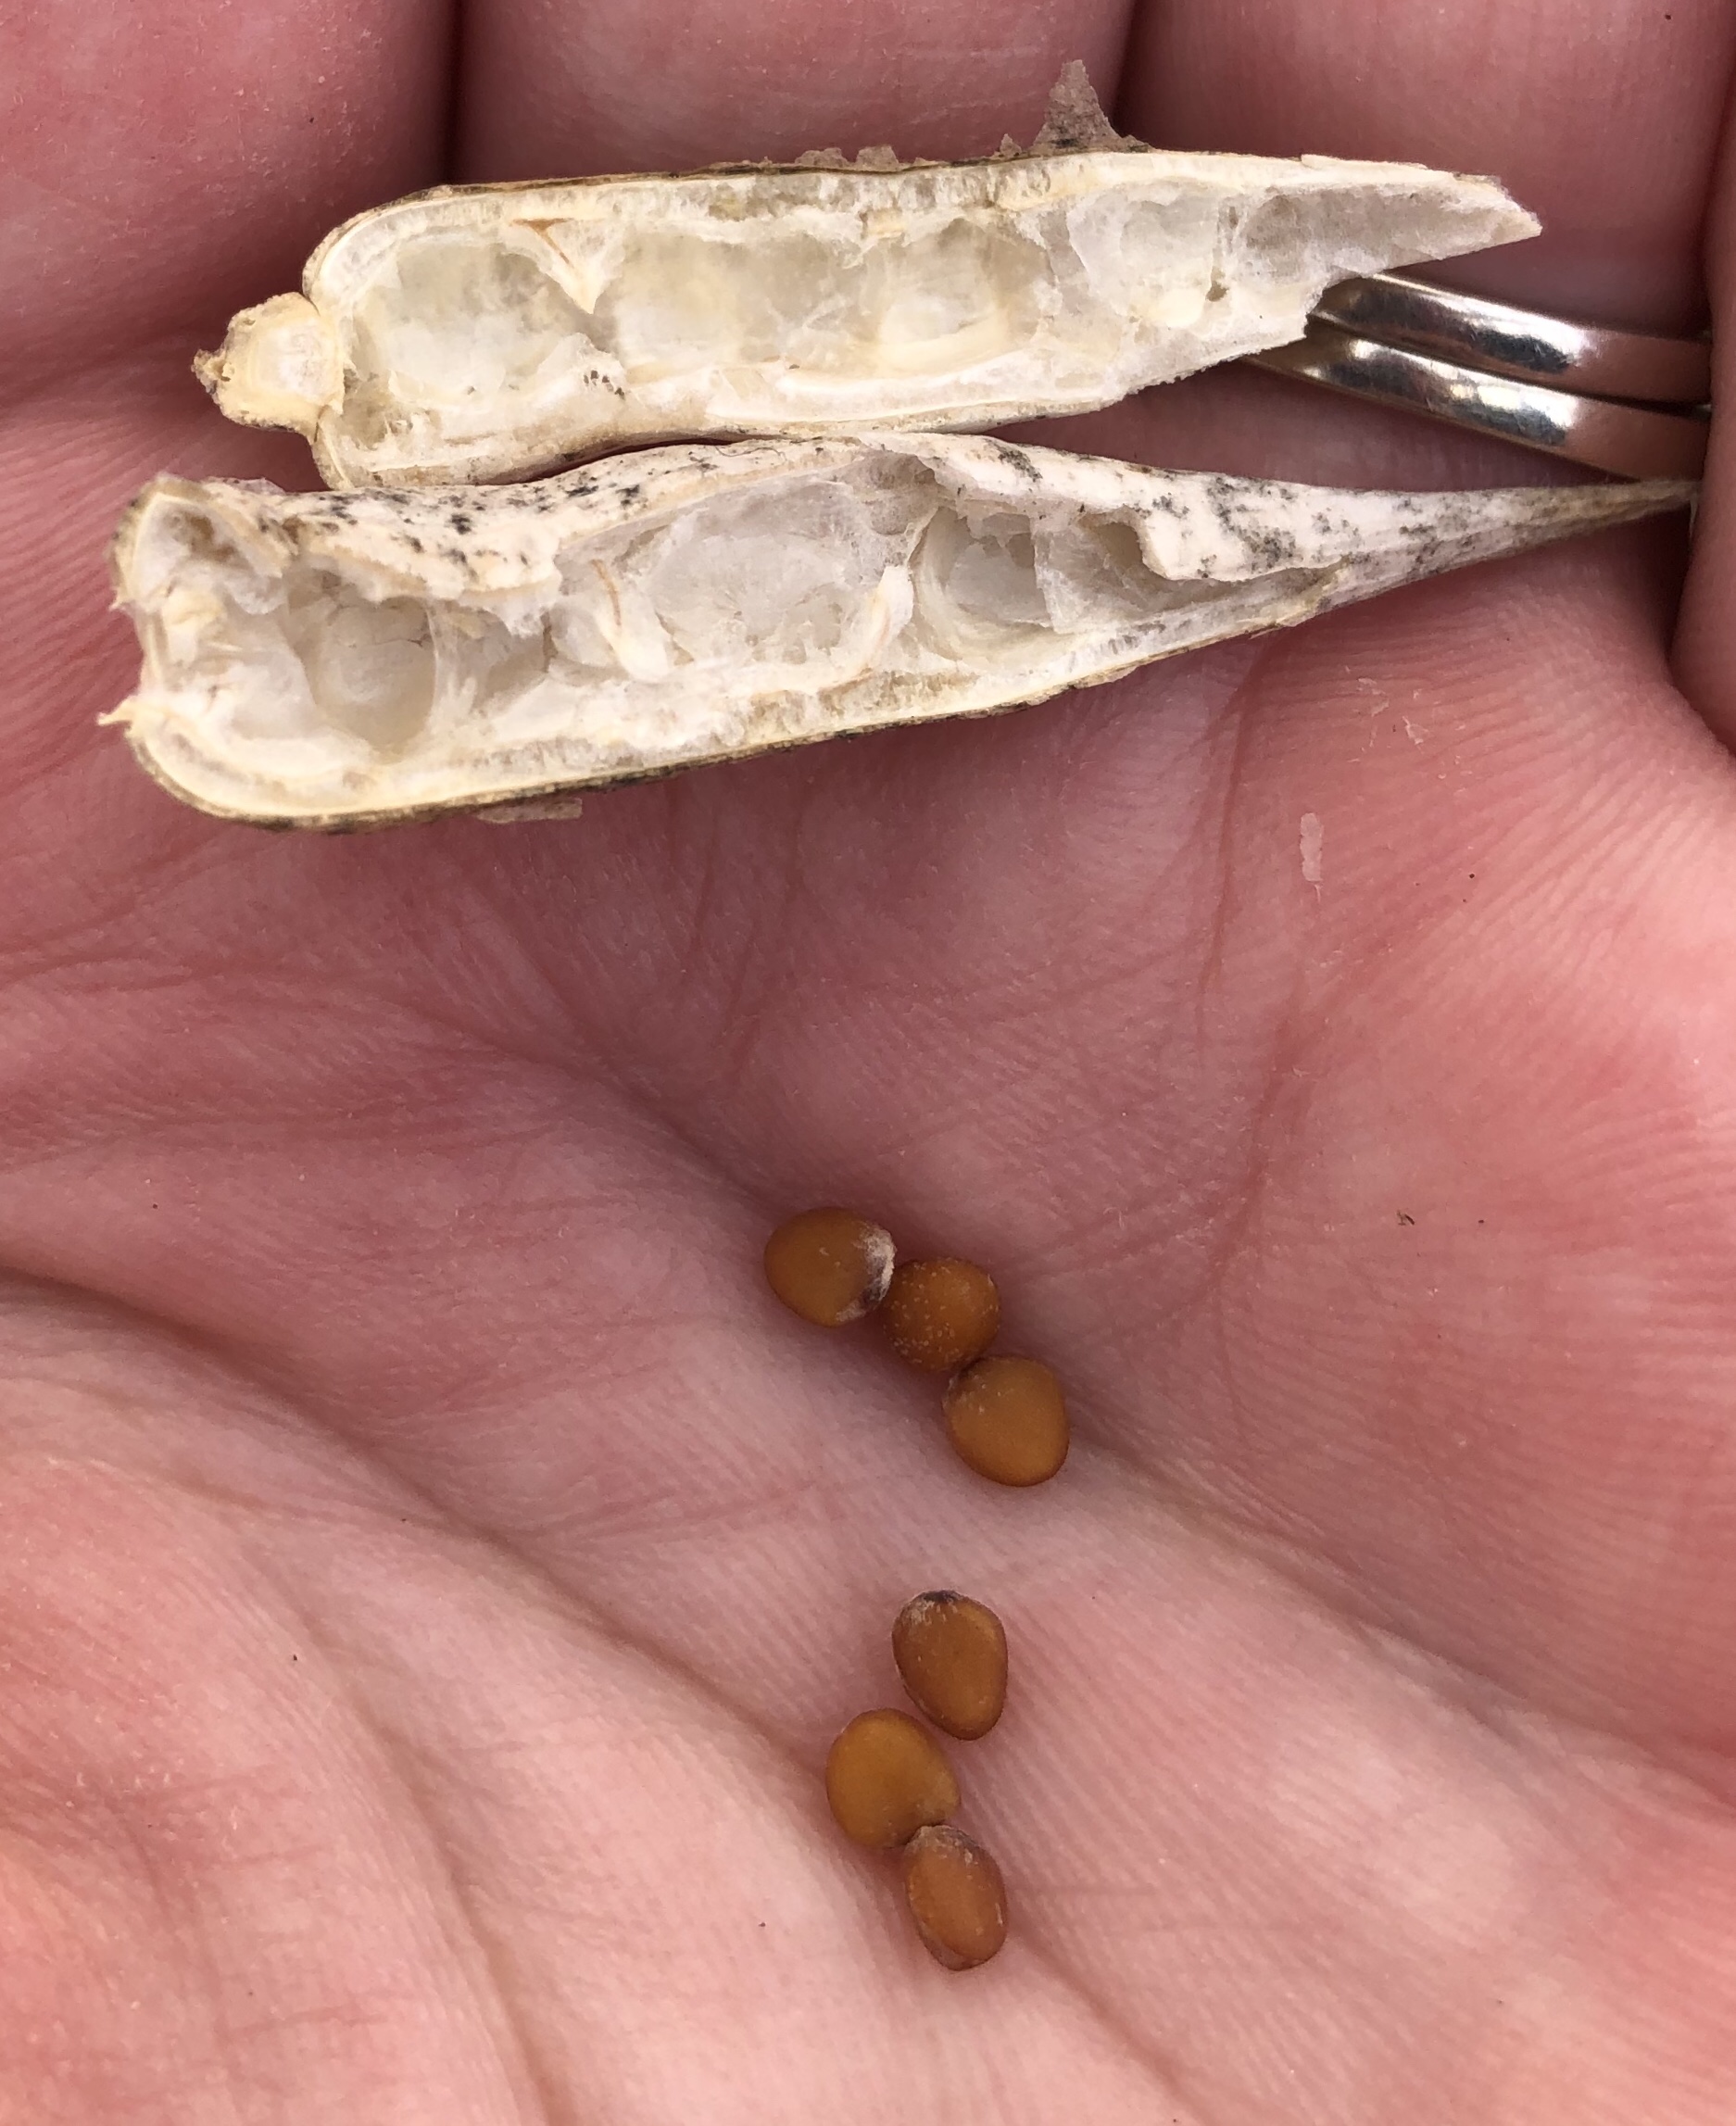
I allow a few plants to bolt and go to seed each year so I don’t have to continue relying on stores for next year’s plants.
Their flowers are absolutely beautiful little blossoms that smell lovely.
Once the pods have been fully formed and the plant starts to die off, the seeds are almost mature.
I allow them to dry completely before shelling.
Advertisements
Advertisements
As with all seeds, make sure they are stored in a cool, dry, dark place to help preserve their quality.
Advertisements
Advertisements
So what do you think? Is this a fun project to try with your kids or are you already an old hand at growing radishes?
Drop a comment below!
Advertisements
Processing…
Success! You're on the list.
Whoops! There was an error and we couldn't process your subscription. Please reload the page and try again.
With all these sourdough recipes floating around the internet these days, have you ever thought about trying your hand at it?
Initially, I found the prospect of making my own sourdough starter both a daunting idea and a very neat homestead-y concept.
Advertisements
Advertisements
Daunting because it sounded like a lot of work to not only start the sourdough starter, but also continue to feed it throughout its entire “life!”
Homestead-y (I may have made that word up…) because what is more “back to basic living” than using nothing more than water and flour to make bread nice and fluffy?
In any case, it seemed like an interesting skill to master – and guess what? I found it was easier than I thought!
Advertisements
Advertisements
I started by adding 1 cup lukewarm water and 1 cup white flour and mixed well.
There were still lumps of flour, but I didn’t worry about it; I have been making yeast bread since I was 10 or so and lumps at this stage always dissipate.
It takes a number of weeks to achieve a “mature” sourdough starter.
Therefore, patience is definitely a virtue in this case!
Advertisements
Advertisements
While developing this mature starter, you need to remove half the mix and feed the starter with more flour and water daily.
Many people say to throw the removed portion away, but I’m not about to waste that tangy flavour!
In the early stages, your starter will not give you the leavening effect you need to make your bread rise.
BUT it can still add flavour to yeast bread recipes! (Or pancakes… or waffles… or pizza dough…)
You simply need to add all the ingredients the sourdough recipe calls for PLUS yeast, so you get a good rise.
Advertisements
Advertisements
Once you have a mature sourdough starter, you really only need to feed it every few days to maintain it.
When you feed your starter, after removing half the batch, add 1/2 cup water and 1/2 cup flour and mix again.
Advertisements
Advertisements
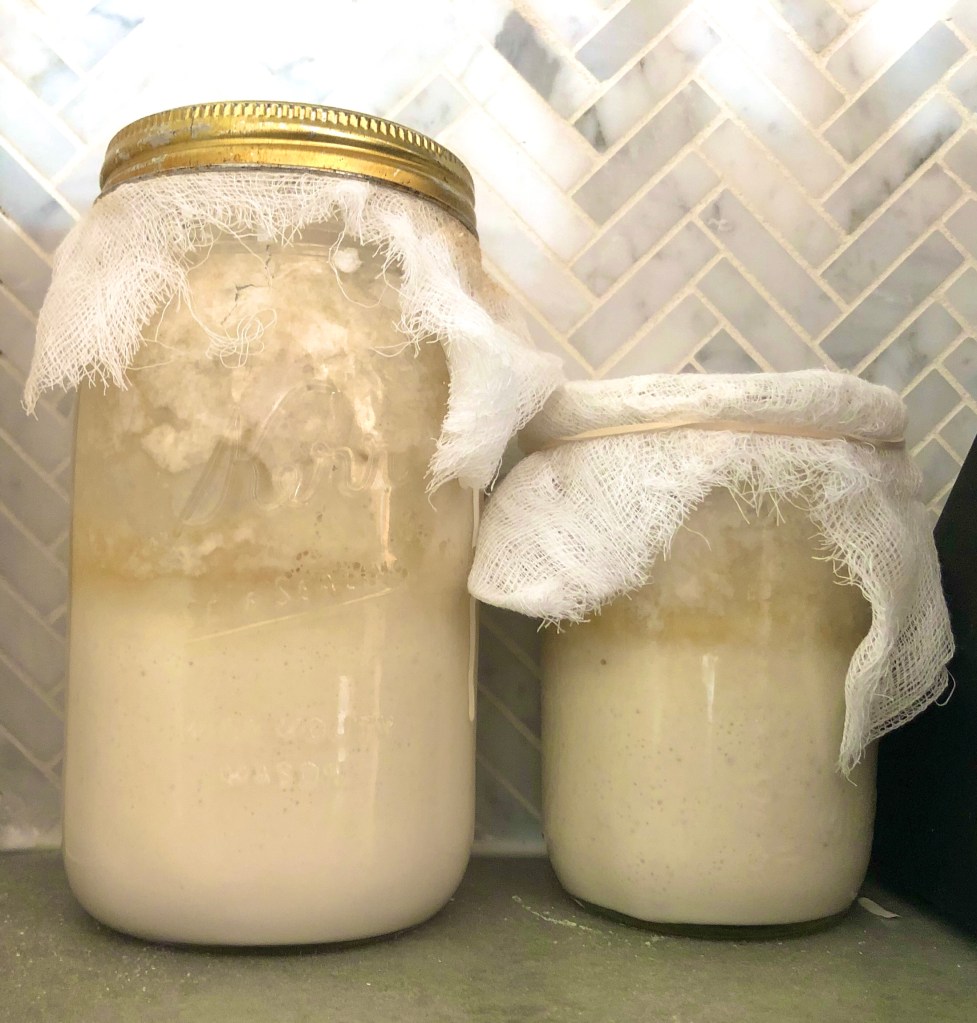
Within a few hours, you should see bubbles starting to form; this means you have a healthy starter!
It should have a nice tangy smell, as well.
Make sure you put it into a container that is at least twice the size of your starter as it will expand when you feed it and don’t want it all over your counter.
I have my starter covered with a couple layers of cheese cloth.
Advertisements
Advertisements
To use the “throw away” portion from my mature starter, I have placed it in a mixing bowl and added 1/2 cup water and 1/2 cup flour – just like feeding the starter I’m keeping!
Then, I cover it and let it sit overnight or even up to 24 hours.
It should bubble nicely by the next morning and can be used for all kinds of recipes!
Roast beef is a classic Sunday dinner, its mouth watering aroma wafting through the house.
I am sure many of you have memories of rushing around the kitchen on Sunday morning, trying to eat breakfast and get the roast into the oven before arriving a tad late for church.
But, coming home to the glorious smell filling the house and food ready to dig into made it all worthwhile!
Advertisements
Advertisements
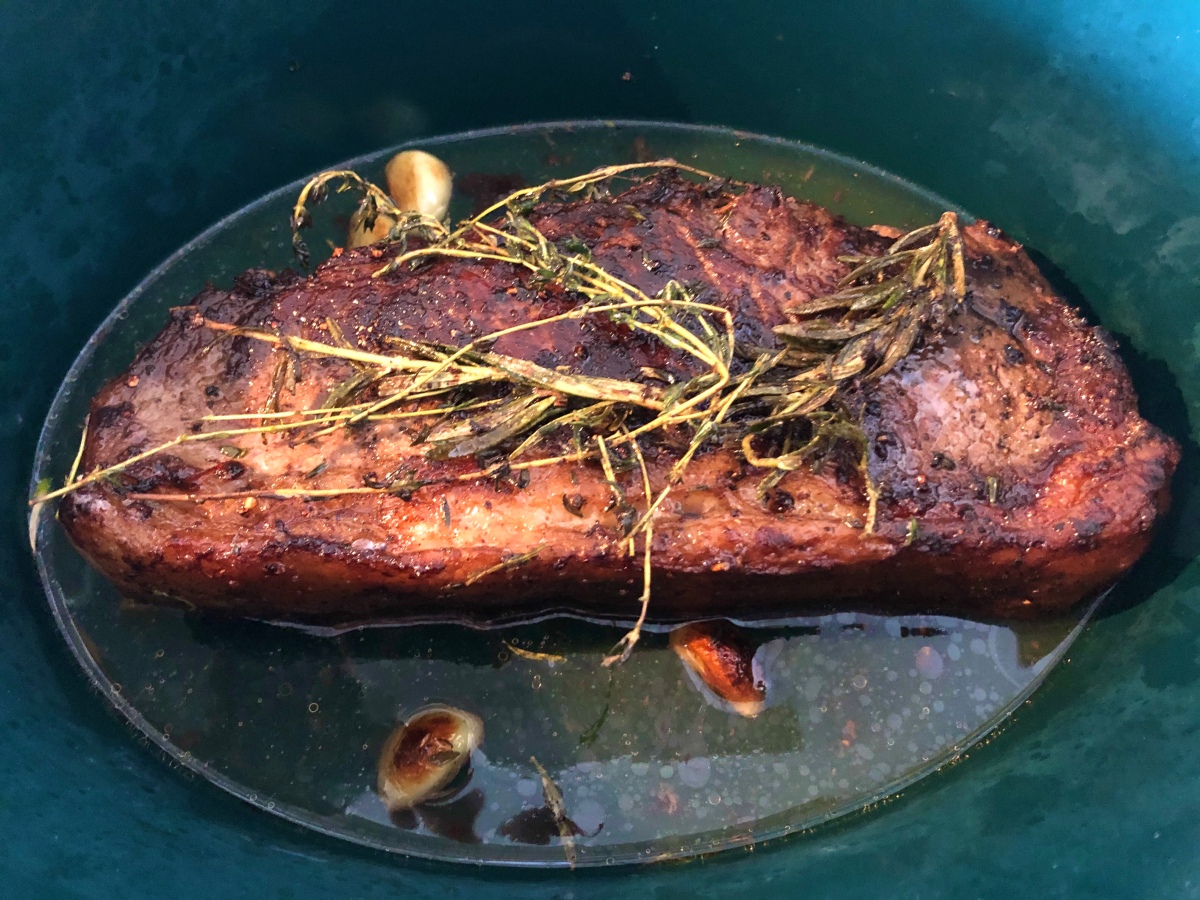
This roast beef recipe is a bit different than I grew up with, but is oh-so-tasty!
The added fragrance of garlic, rosemary, and thyme with the seared roast is wonderful!
Plus, searing the roast in butter adds so much flavour.
It must be my mom’s side coming out in me; butter = flavour!
Advertisements
Advertisements
Strip Loin
Advertisements
Advertisements
Strip Loin is a fabulous cut to use for this recipe.
I buy the huge slabs from Costco and cut them into roasts, freezing 7 or 8 meals worth from one slab.
They kind of end up looking like big steaks and make a meal for 2, at least the size I cut them.
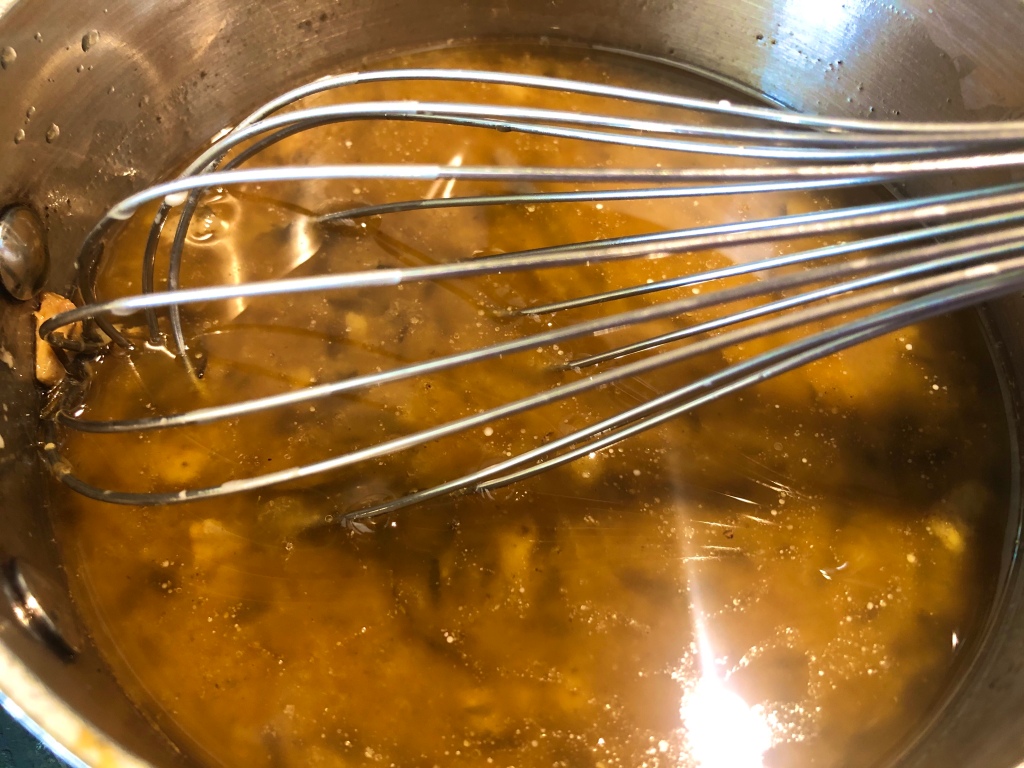
Once thawed, I pre-heat a pan on high heat and add butter, garlic, and rosemary & thyme sprigs.
Next, I sear all sides of the roast until golden brown, spooning the hot garlic butter over the roast.
Oh! And of course salt & pepper are always a must.
Advertisements
Advertisements
Advertisements
Advertisements
Once it is browned on all sides, I place it in the crockpot with white cooking wine and Worcestershire sauce, adding the rosemary and thyme sprigs on top and the garlic on the sides.
Drizzle with butter from the pan.
Now the wait begins… part of the tender, fall-apart-on-your-fork process is a looong, sloooow cook time on low temperatures.
I set the crockpot on low and leave for 4-5 hours.
Advertisements
Advertisements
An hour or so before you plan to serve the roast beef, start on the sides.
Or do you simply eat them to get your dose of greens like you’re supposed to?
I personally love most veggies, but Brussels Sprouts had never been in my top 10 picks.
With grocery stores having shortages and limited supply on a lot of the vegetables I typically would buy, I ended up substituting Brussels Sprouts so we had at least somegreens to go with our meals.
Turns out I like them a lot better when they are home-cooked!
This simple recipe only requires 5 ingredients – including the Brussels Sprouts!
Advertisements
Advertisements
Start by adding butter to a pan on medium heat.
Once it is melted, add the Brussels Sprouts and sauté until they are fork tender.
If they are fresh, this doesn’t take very long; if they are frozen, plan for it to take a few minutes more.
Salt and pepper to taste.
Drizzle with balsamic vinegar, leaving on heat for 1-2 minutes.
You can serve the sprouts whole or cut them in half.
Bring to boil, then reduce heat to a simmer until potatoes are fork-soft.
This will take about 8-10 minutes.
Advertisements
Advertisements
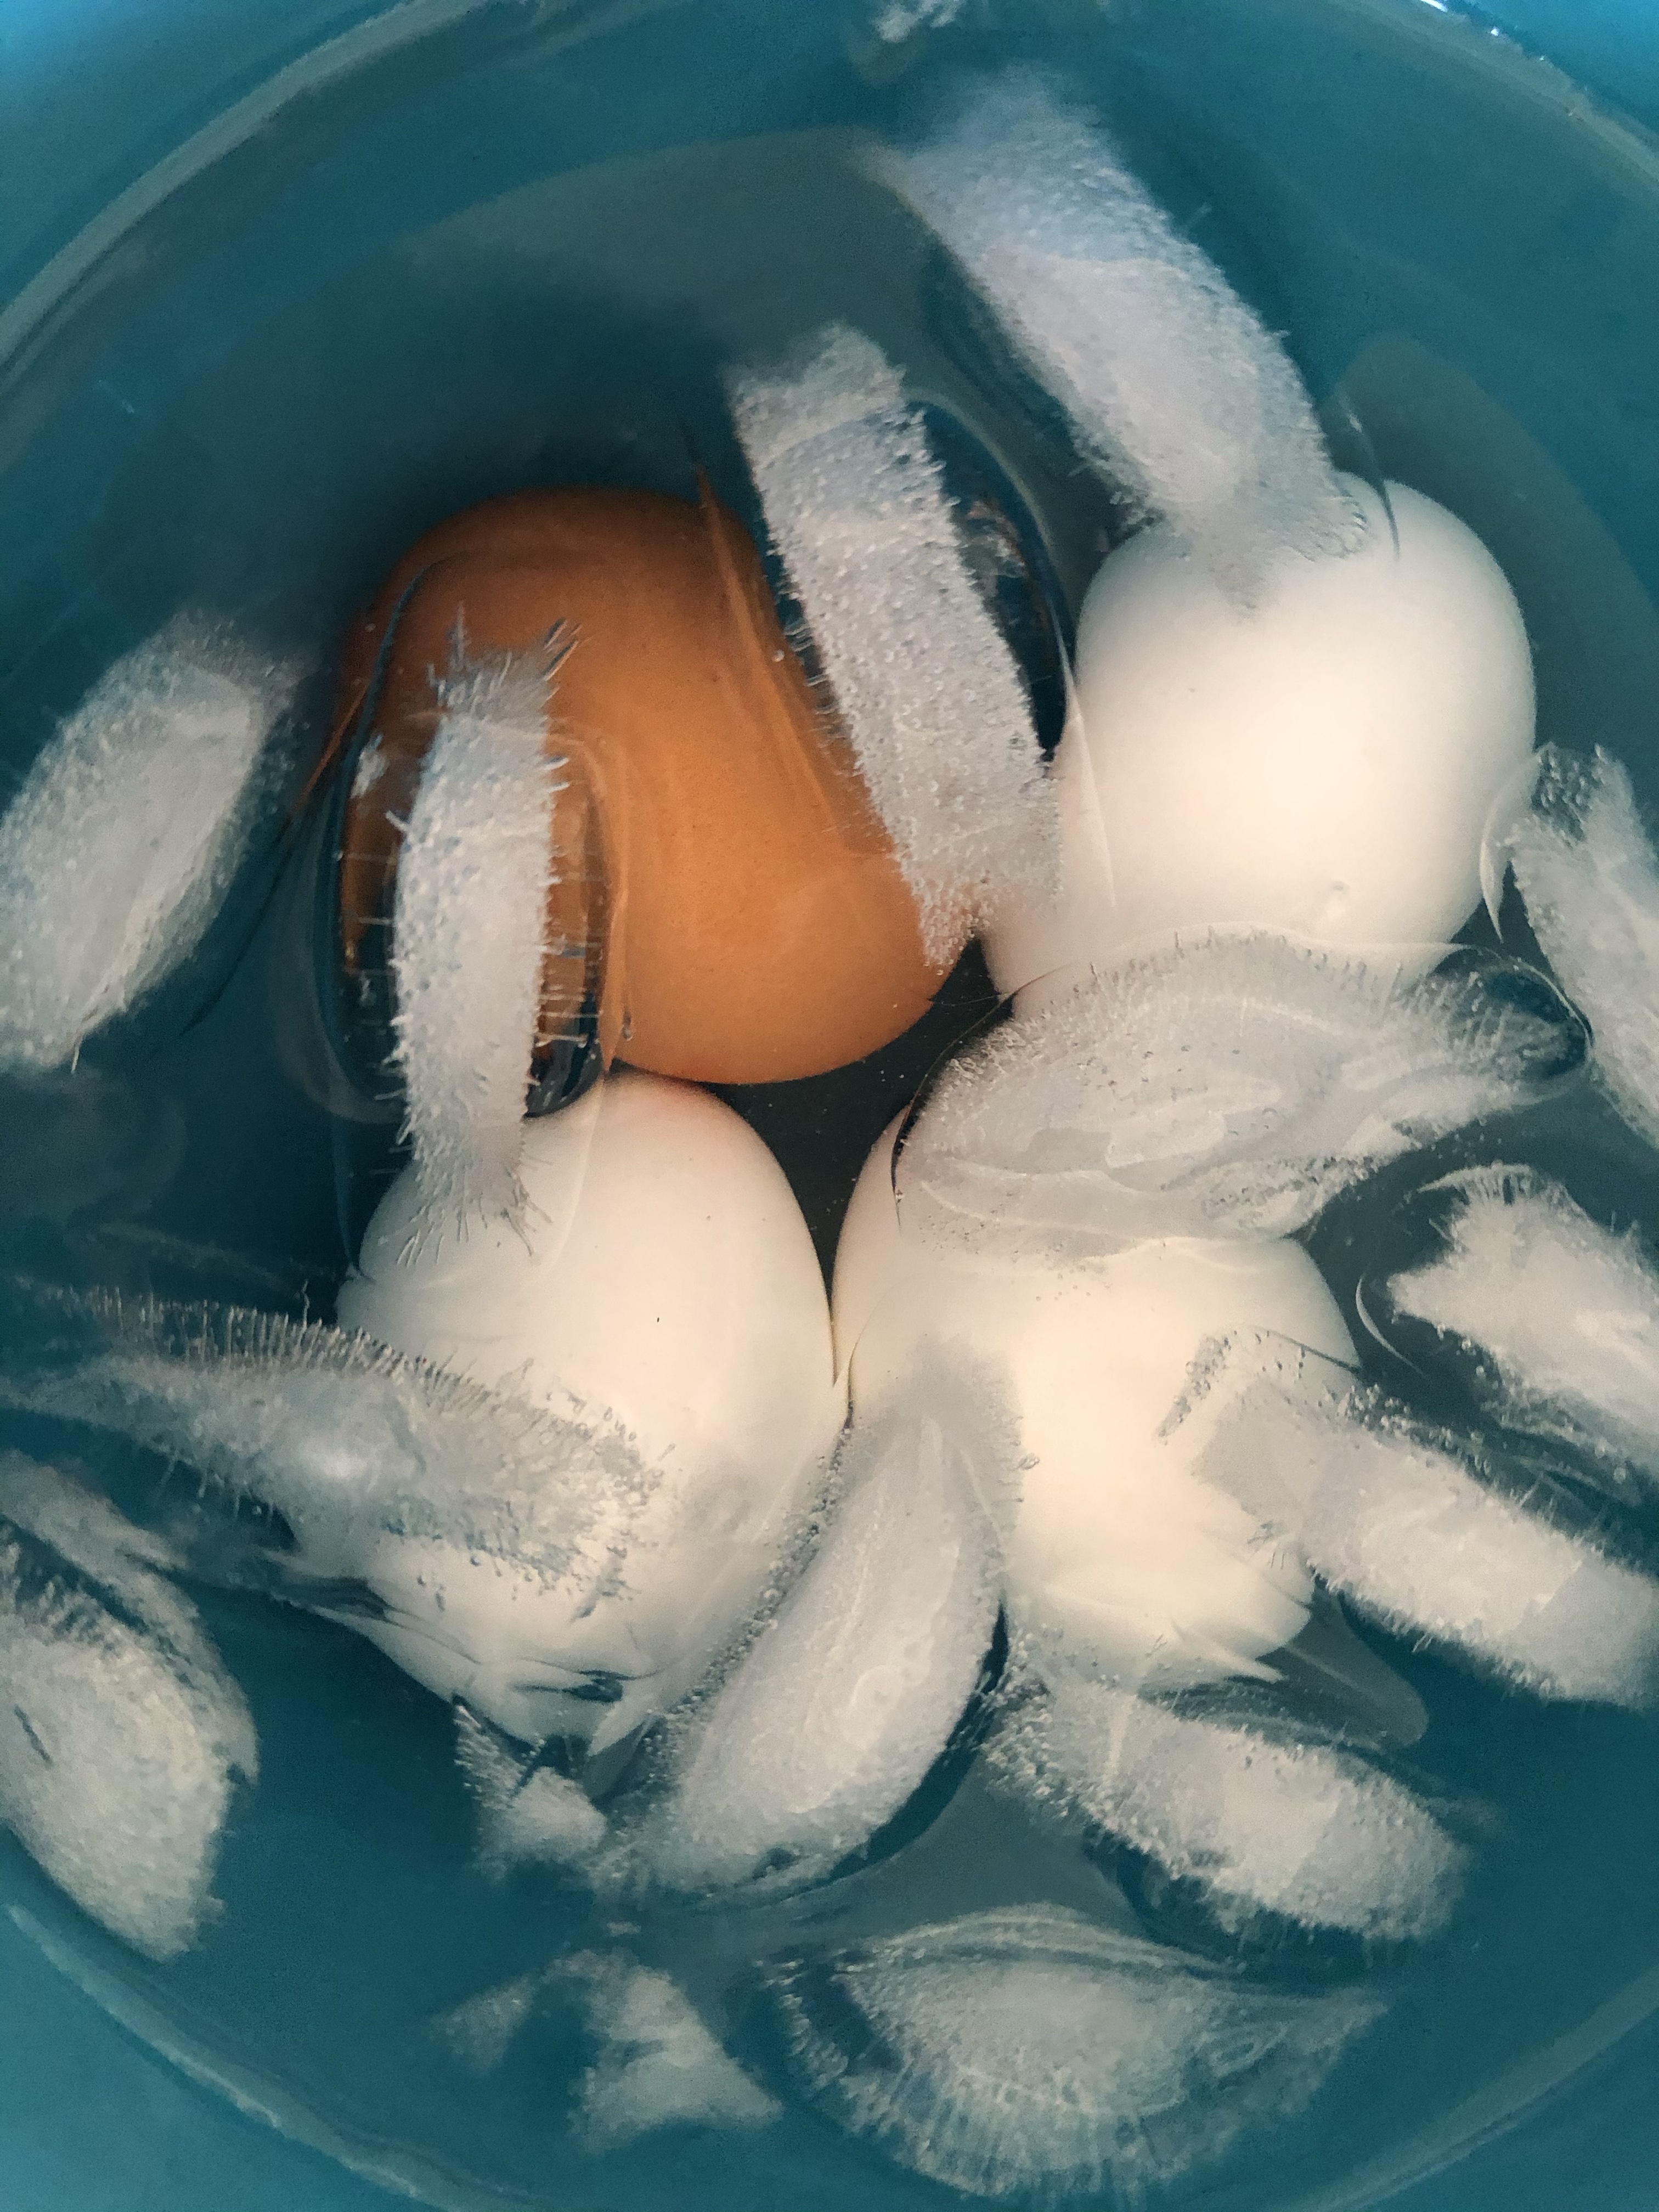
Next, drain the water and place the eggs in a bowl with ice water until they are fully cooked.
While the eggs cool, add Miracle Whip, mustard, dill, and diced pickles.
I usually add a splash of pickle juice for a bit of extra zip.
Advertisements
Advertisements
Peel the egg, add half of them to the bowl with the potatoes and mash slightly.
If you prefer to chop the eggs rather than mash, go for it! I find using a fork just as easy as cutting them and it makes less mess.
Advertisements
Advertisements
Slice the remaining eggs into rounds.
Scoop the potato salad into your serving dish and top with the sliced eggs.
Sprinkle with paprika.
Chill until fully cooled and enjoy!
Potato salad makes a great side to go with hamburgers fresh off the grill, smothered in toppings, and finished off with homemade sourdough hamburger buns!
Advertisements
Advertisements
Recipe
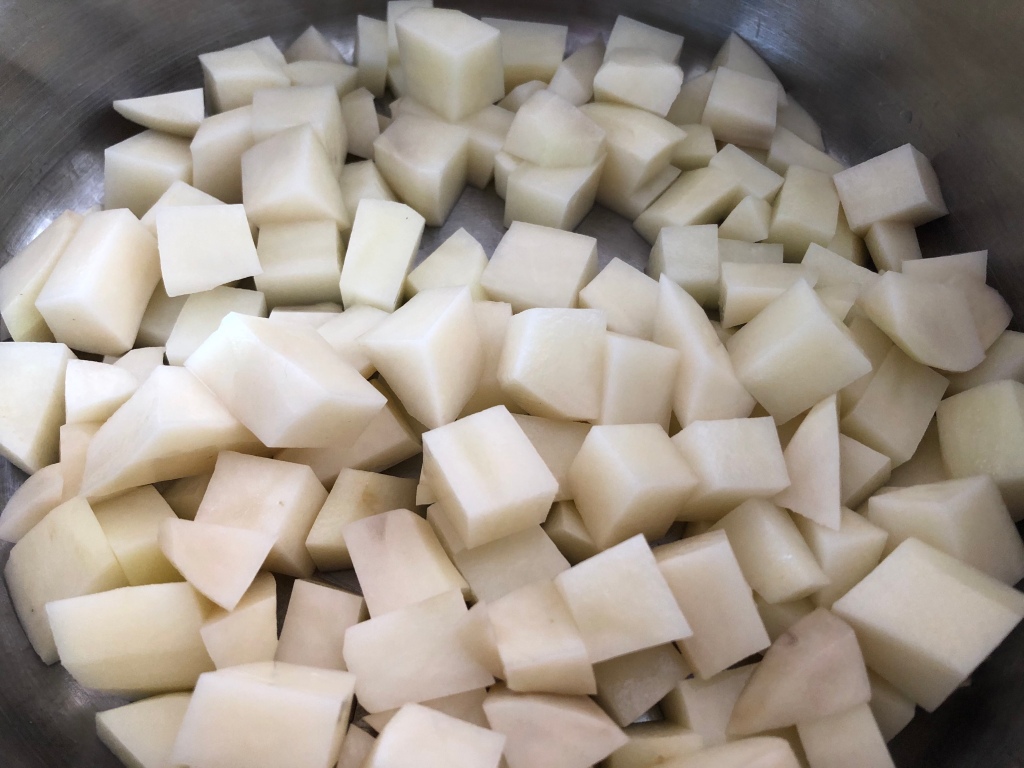
2 medium sized potatoes, peeled and cubed
4 eggs
1/2 cup Miracle Whip
1 tablespoon mustard
2 large pickles, diced
2-3 sprigs dill, chopped
1 teaspoon salt (added to pot while cooking potatoes)
Paprika, sprinkled to taste
Advertisements
Advertisements
Boil the potatoes and eggs together in salted water until potatoes are fork tender, about 8-10 minutes.
Place eggs in ice water until cool and drain potatoes.
Mix potatoes, Miracle Whip, mustard, pickles, and dill.
Add 2 eggs and mash slightly with a fork.
Transfer potato salad to serving dish.
Slice remaining 2 eggs into rounds and place on top of potato salad.
Sprinkle with paprika.
Chill until completely cool.
Enjoy!
(Serves 2)
Advertisements
Processing…
Success! You're on the list.
Whoops! There was an error and we couldn't process your subscription. Please reload the page and try again.
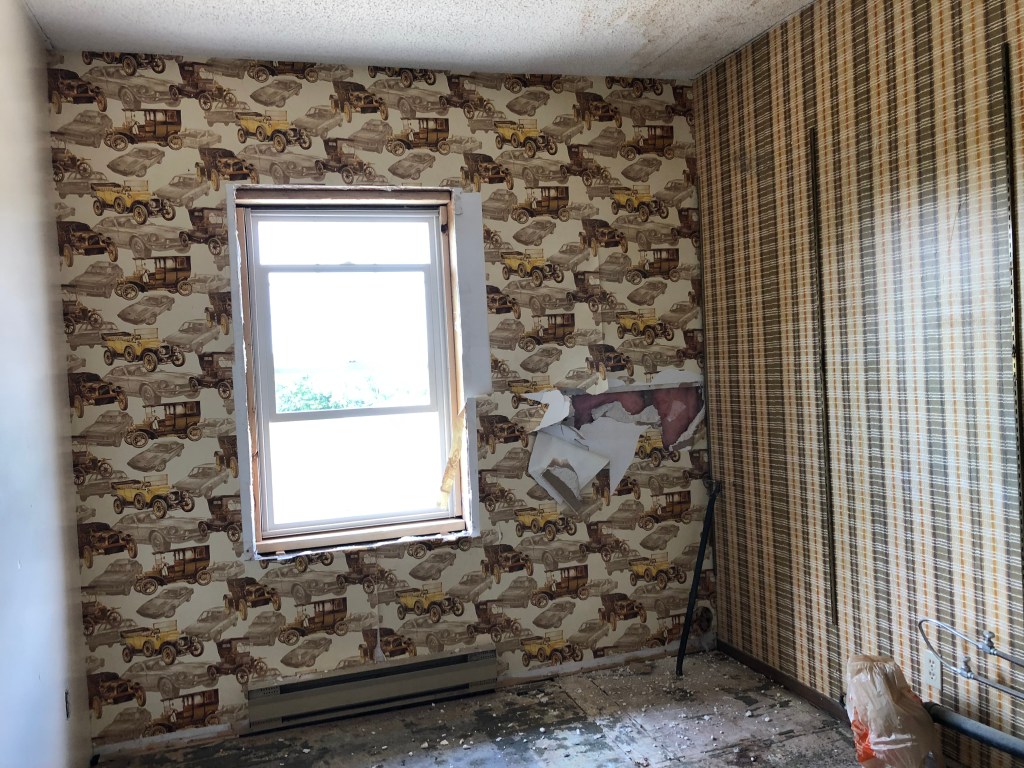
From shabby-to-chic seems to be a good expression for this Pinterest-worthy project.
As you can see in the pictures, the original room had water damage to the ceiling, peeling wall paper, and worn flooring with nail holes in it.
Advertisements
Advertisements
It was nothing less than a disaster when we bought the place and has remained relatively untouched until the summer of 2018, simply due to other projects taking priority.
We took it from a run-down old room to a Pinterest-worthy laundry room in the quickest project time for a full room in our home yet!
Which was under a year… But still… A lot goes into perfection!
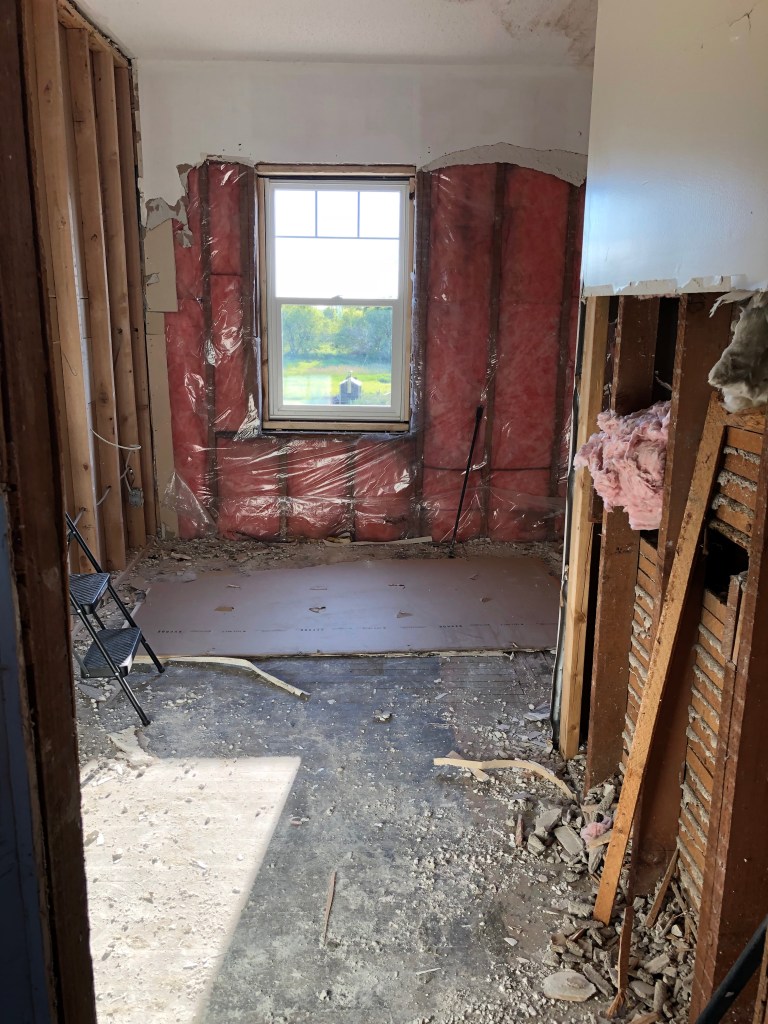
The space after debris had been cleaned out
Advertisements
Advertisements
The old wall paper, featuring vintage cars
Mom and Dad were down from Alaska visiting and the guys were working on installing windows.
Advertisements
Advertisements
Being as how they didn’t need any immediate help, Mom and I started on demolition in the soon-to-be laundry room.
This old house still had original lath-and-plaster construction in the interior walls, which is HORRIBLY dusty, dirty, and prickly with all the tiny nails in the lath.
Demolition is not a fun job, per say, but certainly satisfying.
PRO TIP: If you ever have to remove lath-and-plaster, a crow bar works far better than a sledge hammer. Get a good hole in the wall and simply pull from the inside. It also makes far less mess.
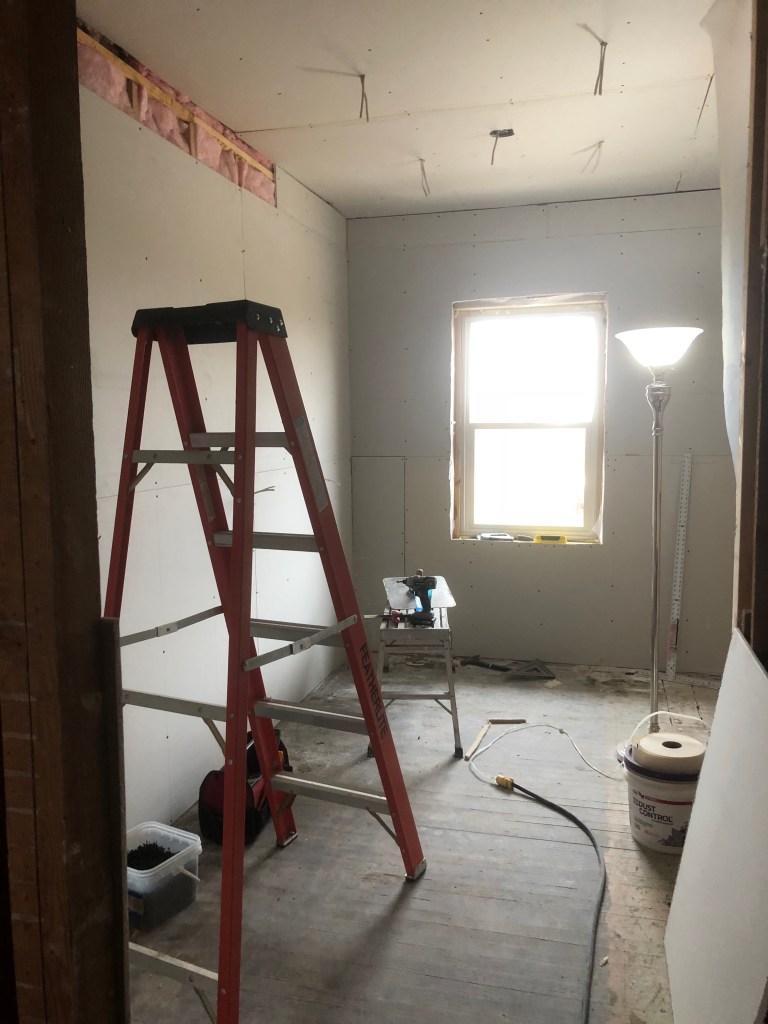
By now we are pretty well versed with hanging drywall, so that part didn’t take us too long – even with all the outlet holes to cut!
Once again, having the right tools makes the job so much easier!
We invested in a drywall lift many years ago and it has paid for itself many times over!
Advertisements
Advertisements
Advertisements
Advertisements
In-floor heat is AMAZING during the winter months when it comes to tile flooring, which we were planning to install.
Instead of pouring concrete, which adds weight to the second story, we made strips of OSB so we could run the heat tubes between them.
Advertisements
Advertisements
We needed a bit more material than we had of the OSB, so we used scrap pieces of the plywood left over from the Wood Range Hood Build (CLICK HERE TO VIEW THE PROJECT).
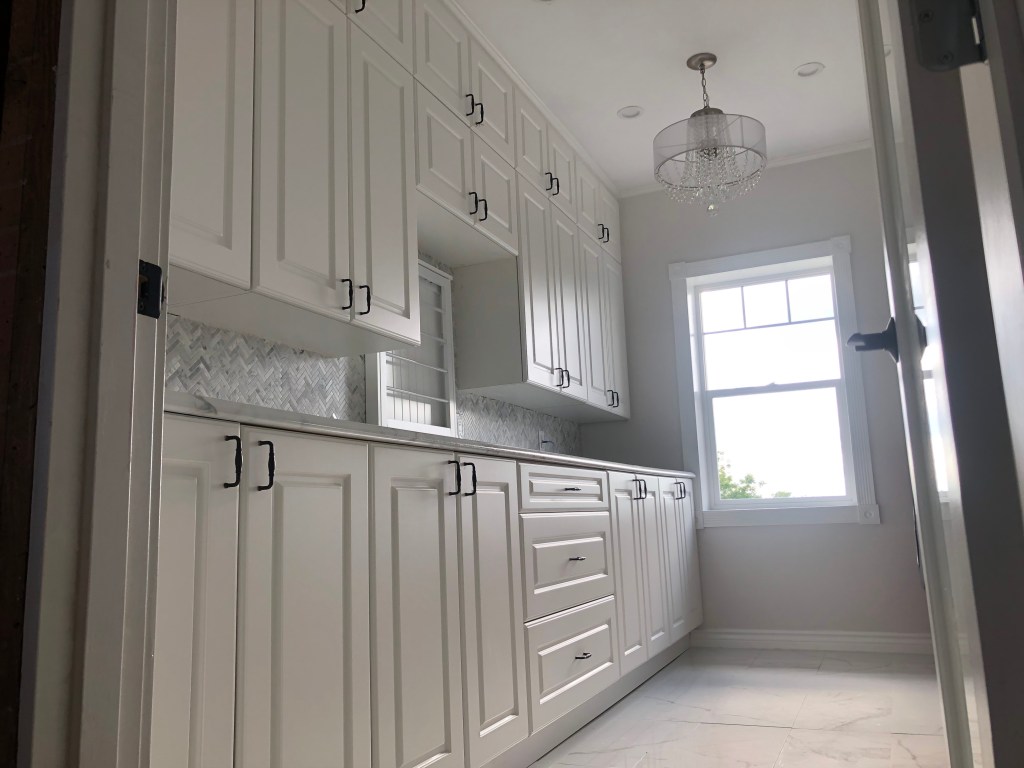
I love good lighting, especially with the long, dark winter months.
I think Jake likely humoured me with my request for so many pot lights in addition to the chandelier… But neither of us have regretted having such a bright laundry room!
Advertisements
Advertisements
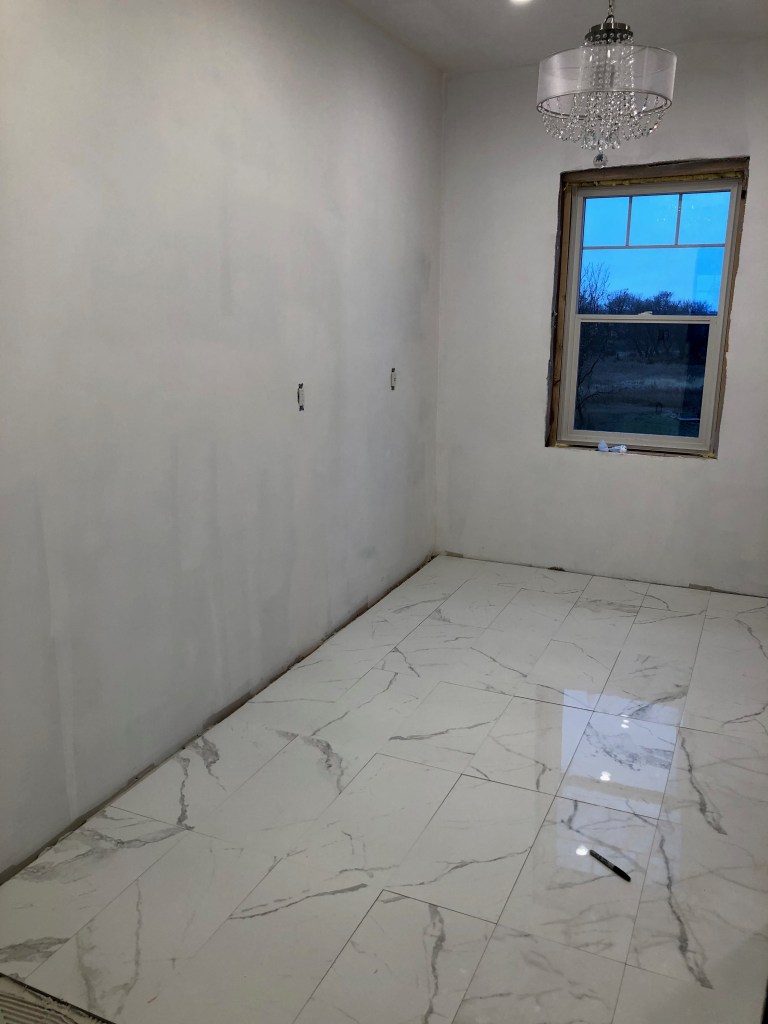
Once everything was mudded, taped, primed, and painted, we installed the floor tiles.
WOW!!! Can you say GLOSSY?! They were so shiny it was like a mirror!
I went with a marble-style tile that was 12″x24″ that barely shows the grout lines now that it has been completed.
Advertisements
Advertisements
My cabinets were one of the few things that we have ordered new, but still chose to install them ourselves to save on labor costs (we have the know-how by now, right?)
Huge shout-out to my peeps at Home Depot in Saskatoon!
It was such a fun process of picking the units I wanted, putting together the layout, and easy to order.
Advertisements
Advertisements
The units I wanted were a bit more than the ones available to pick up in-store immediately, however came pre-assembled (I have spend hours assembling those box kits, so that was worth a lot), had soft-close included in all the units, and came with life-time warranty.
Plus they were made of nicer material. So we went with that!
It took 6 or 8 weeks for them to arrive, delivered to our door… and carried into the house.
I had some of the units carried upstairs that I knew we would be using first, which helped us out and the delivery guys were fantastic about it.
Advertisements
Advertisements
Then we started to see our project all come together!
As we sorted and placed the units, the vision of what our laundry room would look like began to take shape.
I wanted handles to match those in the kitchen, however the place we had bought the kitchen pulls from previously had discontinued carrying that line.
Advertisements
Advertisements
Therefore, I set up a contractor’s account and special ordered them through Richelieu.
Apparently most of these places don’t care what industry you are in as long as you have a business to sign up for a contractor’s account… Good to know…
This project was many a late night and weekend in the making, but so worth it!
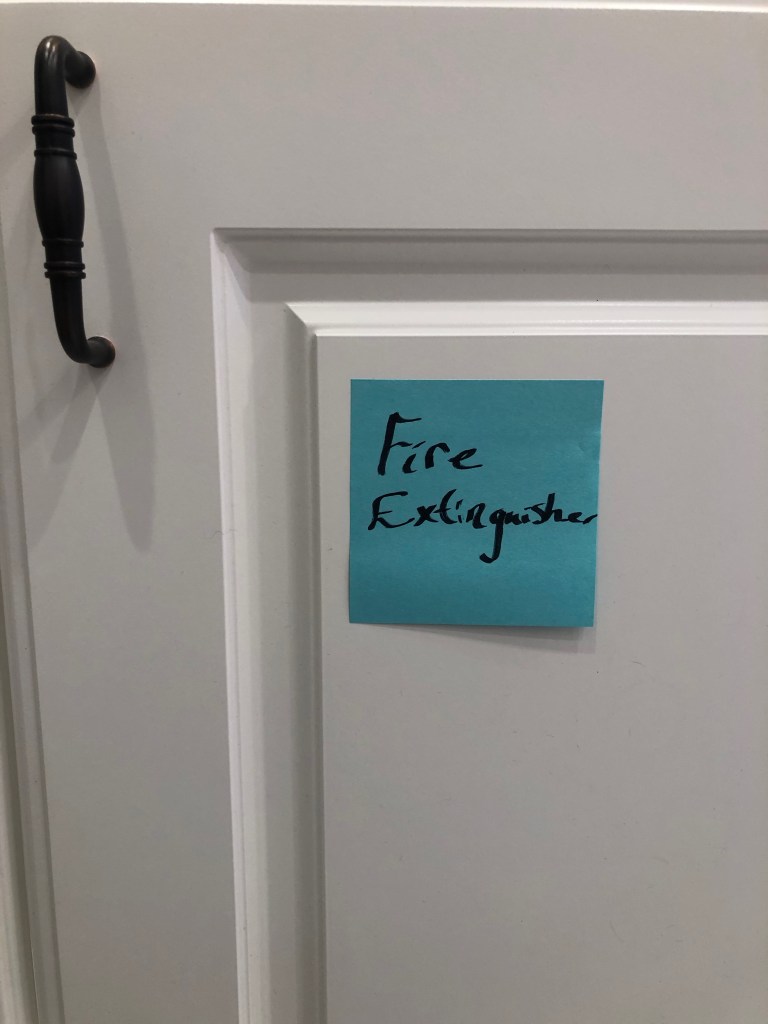
I swore that I would not start filling cabinets until the room was 100% finished!
But that didn’t stop me from planning out where everything should go…
Advertisements
Advertisements
Why do you need a fire extinguisher in a laundry room, you may ask? Well dryer fires, of course!
Better to be prepared and not need something, than need it and not have it! Especially in the case of house fires.
Advertisements
Advertisements
The counters were another item that we ordered – and even had installed!
To have them installed in one day while I was working – and at minimal installation cost was such a treat!
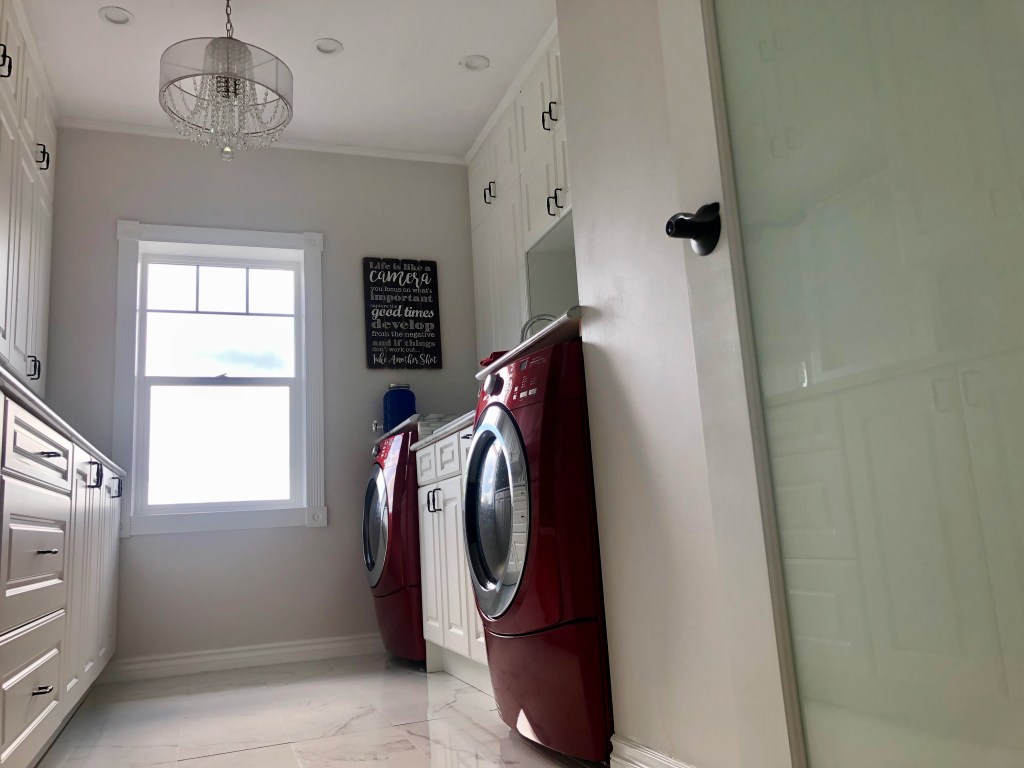
The door. Oh the door!
Advertisements
Advertisements
I was so excited for this part because I had a specific vision in mind of frosted glass with a classy laundry room message scrolled across the top.
It took me ages to find a design I liked for the script, but once I saw this adhesive text, I knew it was the one.
We bought the door through Home Depot, where we buy most supplies.
The only downside to this particular door was the fact that it was not pre-drilled for the handle or inset for the hinges.
Advertisements
Advertisements
Once again, we used our know-how to get it ready and installed.
It was well worth the extra work for the frosted glass and not costing an arm and a leg.
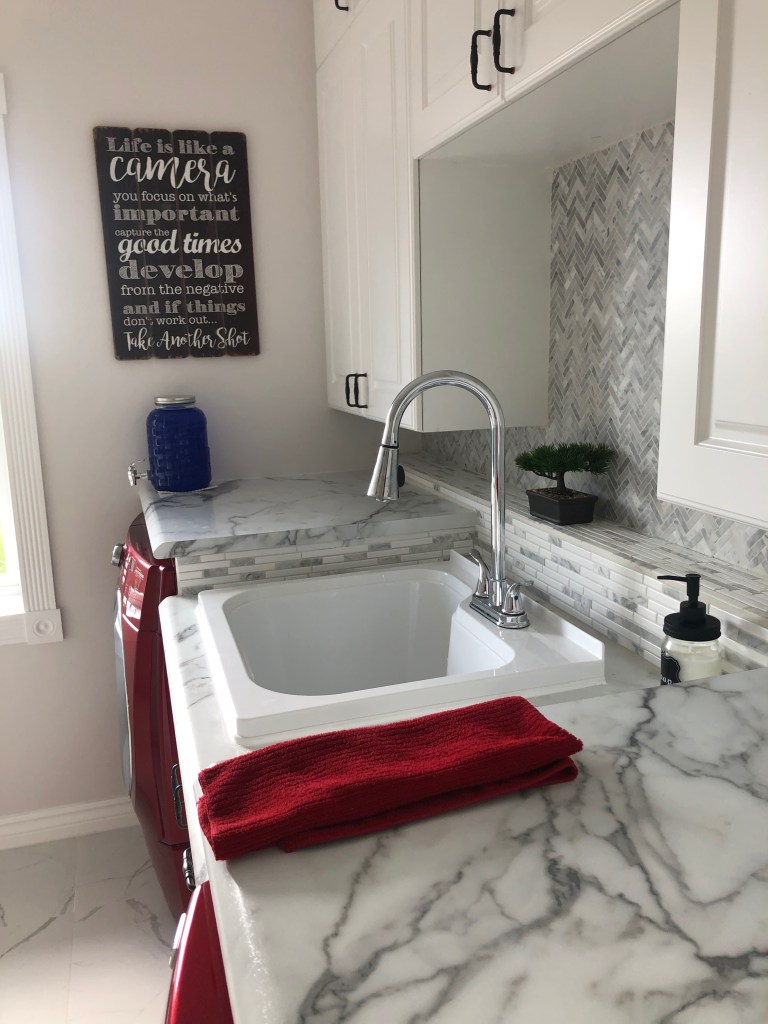
Backsplash is an area that I am particularily picky…
I hate the looks of many choices available, so when I settled on a herringbone pattern, I was so pleased to see that it meshed well with the look I was going for in the laundry room.
Advertisements
Advertisements
Bright and clean with a few choice accents. Exactly what I was hoping for.
Adding the trim cleaned up and completed the look.
Advertisements
Advertisements
The sink between the washer and dryer is incredibly handy.
Need to soak some delicates? No problem!
Need to wash your hands after you got soap on them? Also no problem!
A sink is a must-have for a full laundry room setup, in my opinion. If you can make it happen, do it!
Advertisements
Advertisements
We also put a sliding trash can unit to the right of the sink (directly left of the dryer), which is such a handy and tidy way to get rid of lint.
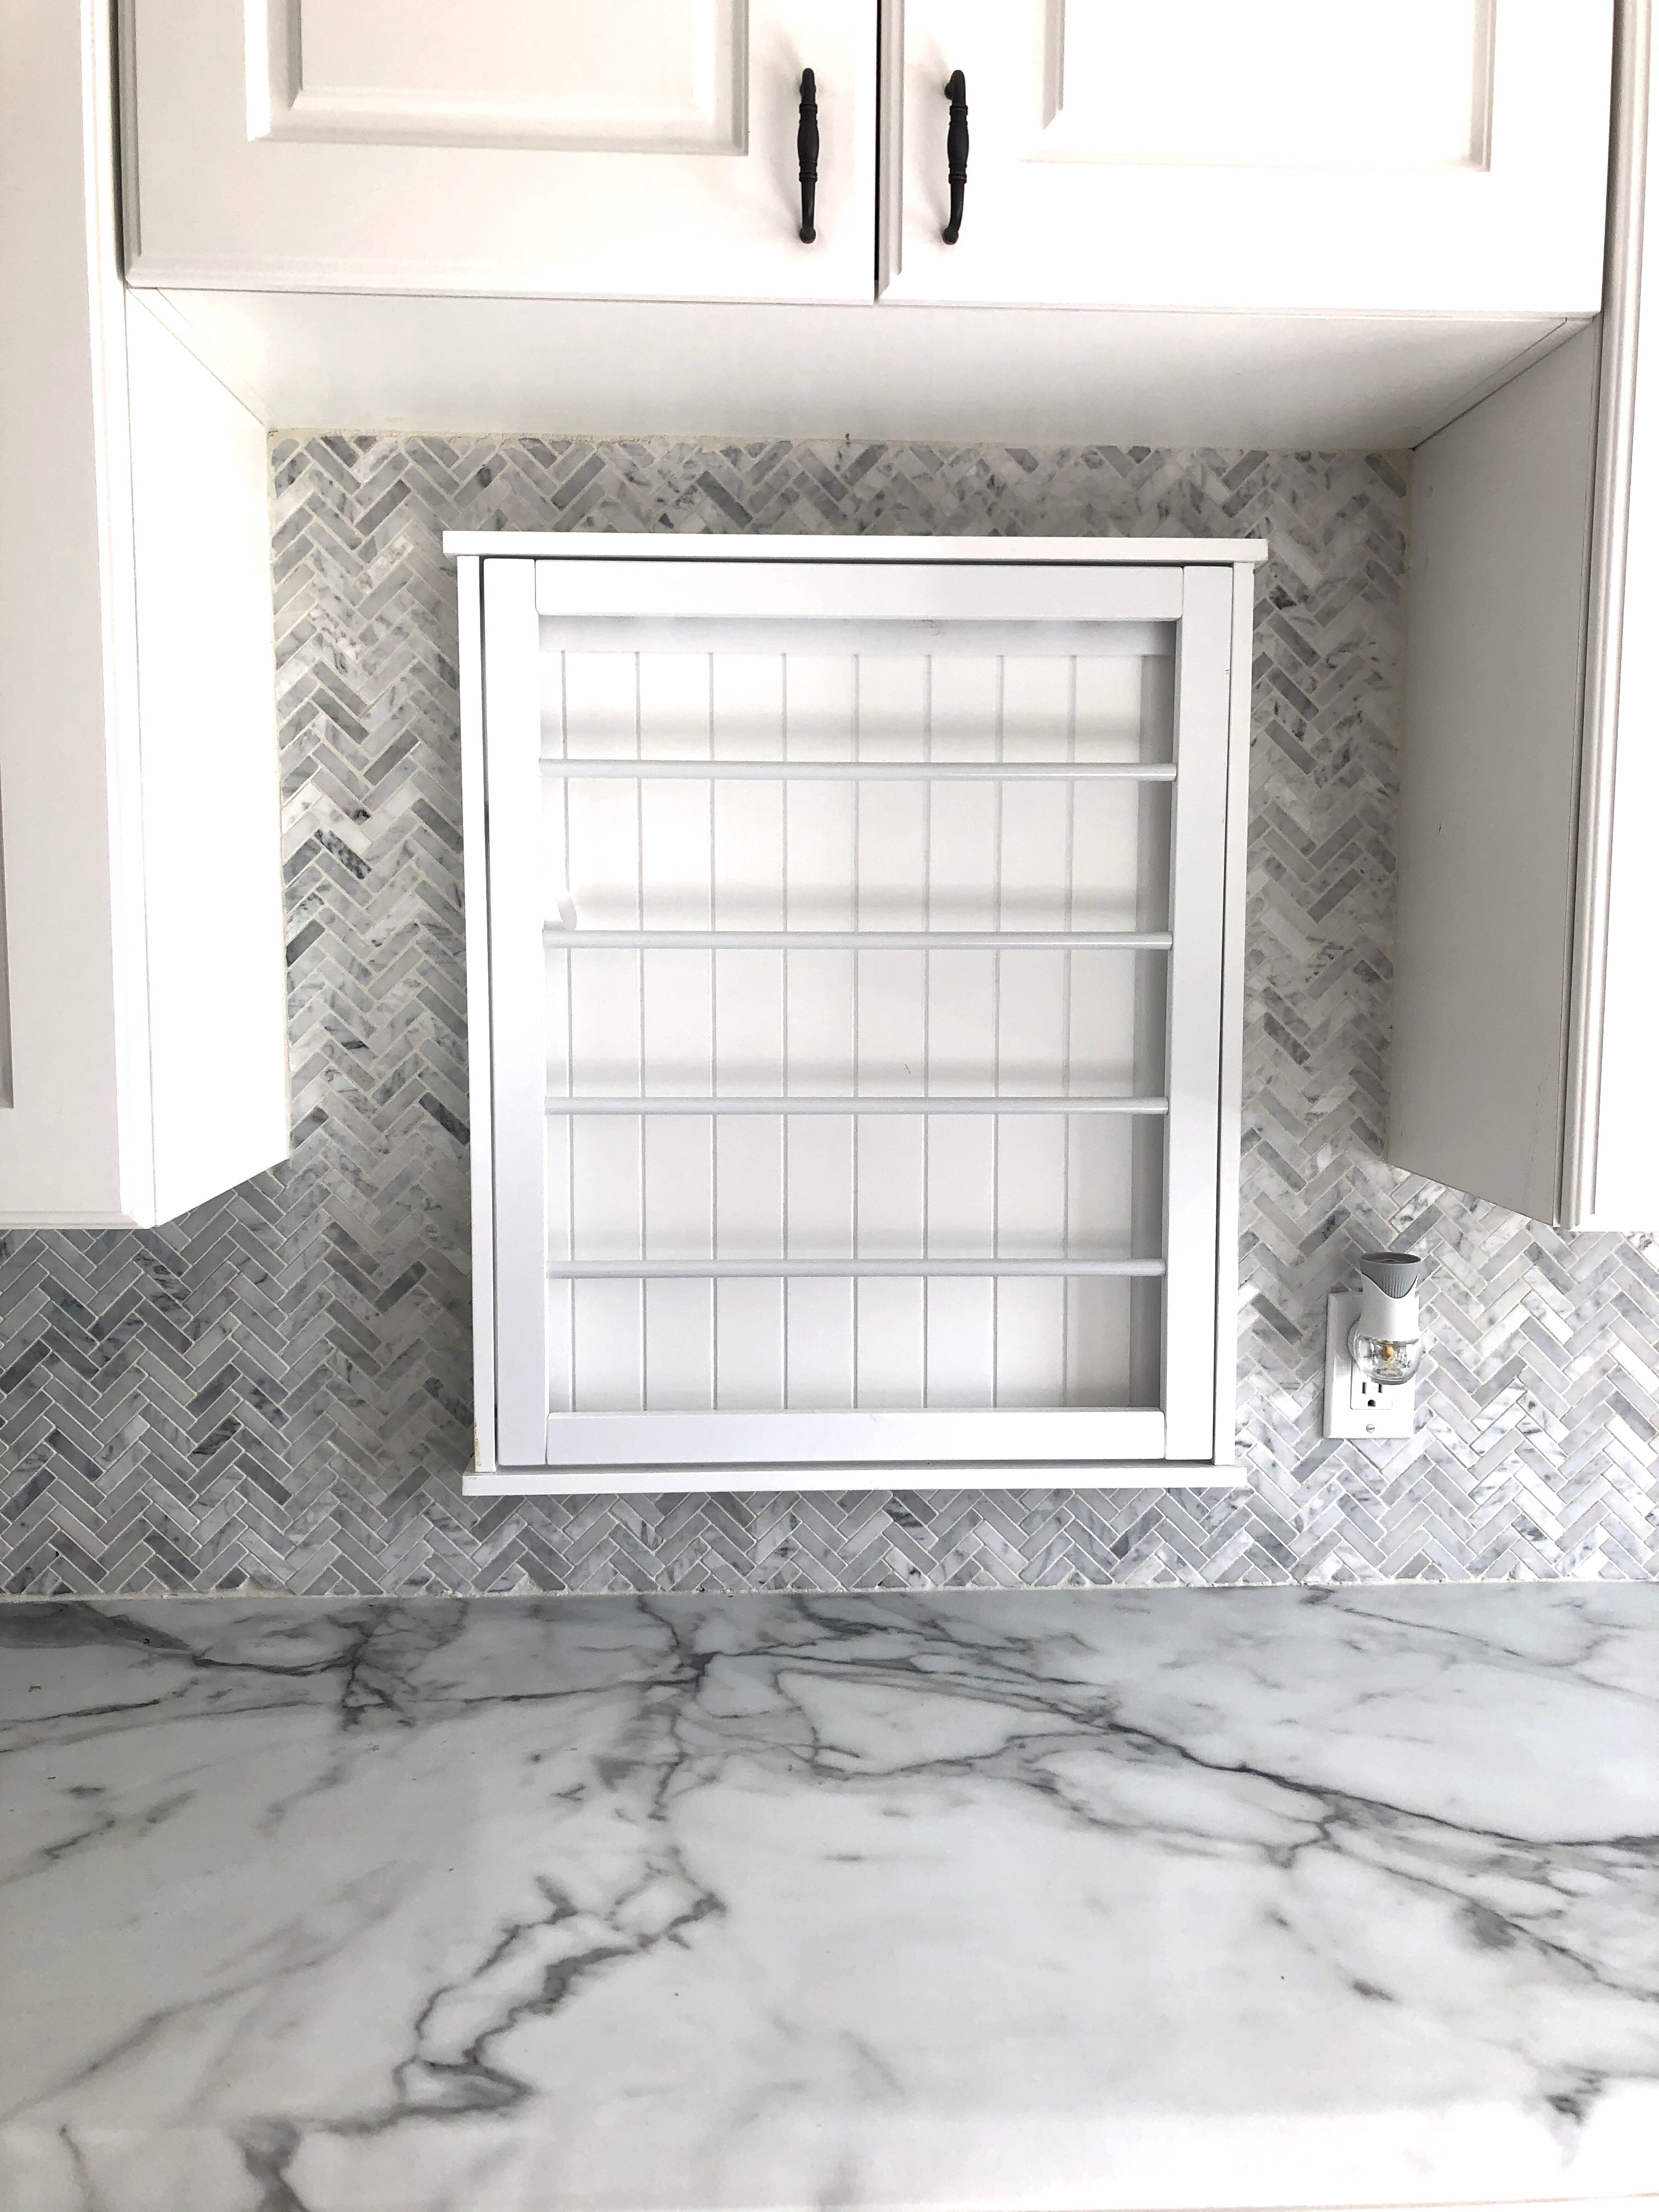
If you are going all out with a room dedicated to laundry, why not splurge and add a drying rack that doubles as classy decor?
Advertisements
Advertisements
A bit of fun decor
In all the years we have been working on renovations, this is the first time that I have felt truly organized.
Advertisements
Advertisements
Up until now, nothing had a permanent “home” where it belonged and I ended up having to move things around from one place to the next as we worked on projects throughout the house.
Now, with all this storage space, I can organize my cleaning chemicals & detergent one one shelf and my batteries & light bulbs in another, while blankets and bed linens have their own unit!
Oh! And of course you can’t forget a cute coin collector for all the change claimed from pockets, right?
What do you think? Has this sparked the renovation inspiration for you? Drop a comment below with your next project!
Advertisements
Processing…
Success! You're on the list.
Whoops! There was an error and we couldn't process your subscription. Please reload the page and try again.
I have always enjoyed the look of an arbor with flowering vines framing the structure, so why not use that concept in the garden as both an architectural accent and a functional growing space?
My garden path was begging for a beautiful entrance and a garden arbor sounded like just the thing!
After a trip to Home Depot for building materials, we started our project by building the raised beds that would go on either side of the archway.
4’x4′ boxes may have been a bit of overkill, however I planned to use most of the space for my kitchen garden filled with fresh herbs, so the space came in handy.
Advertisements
Advertisements
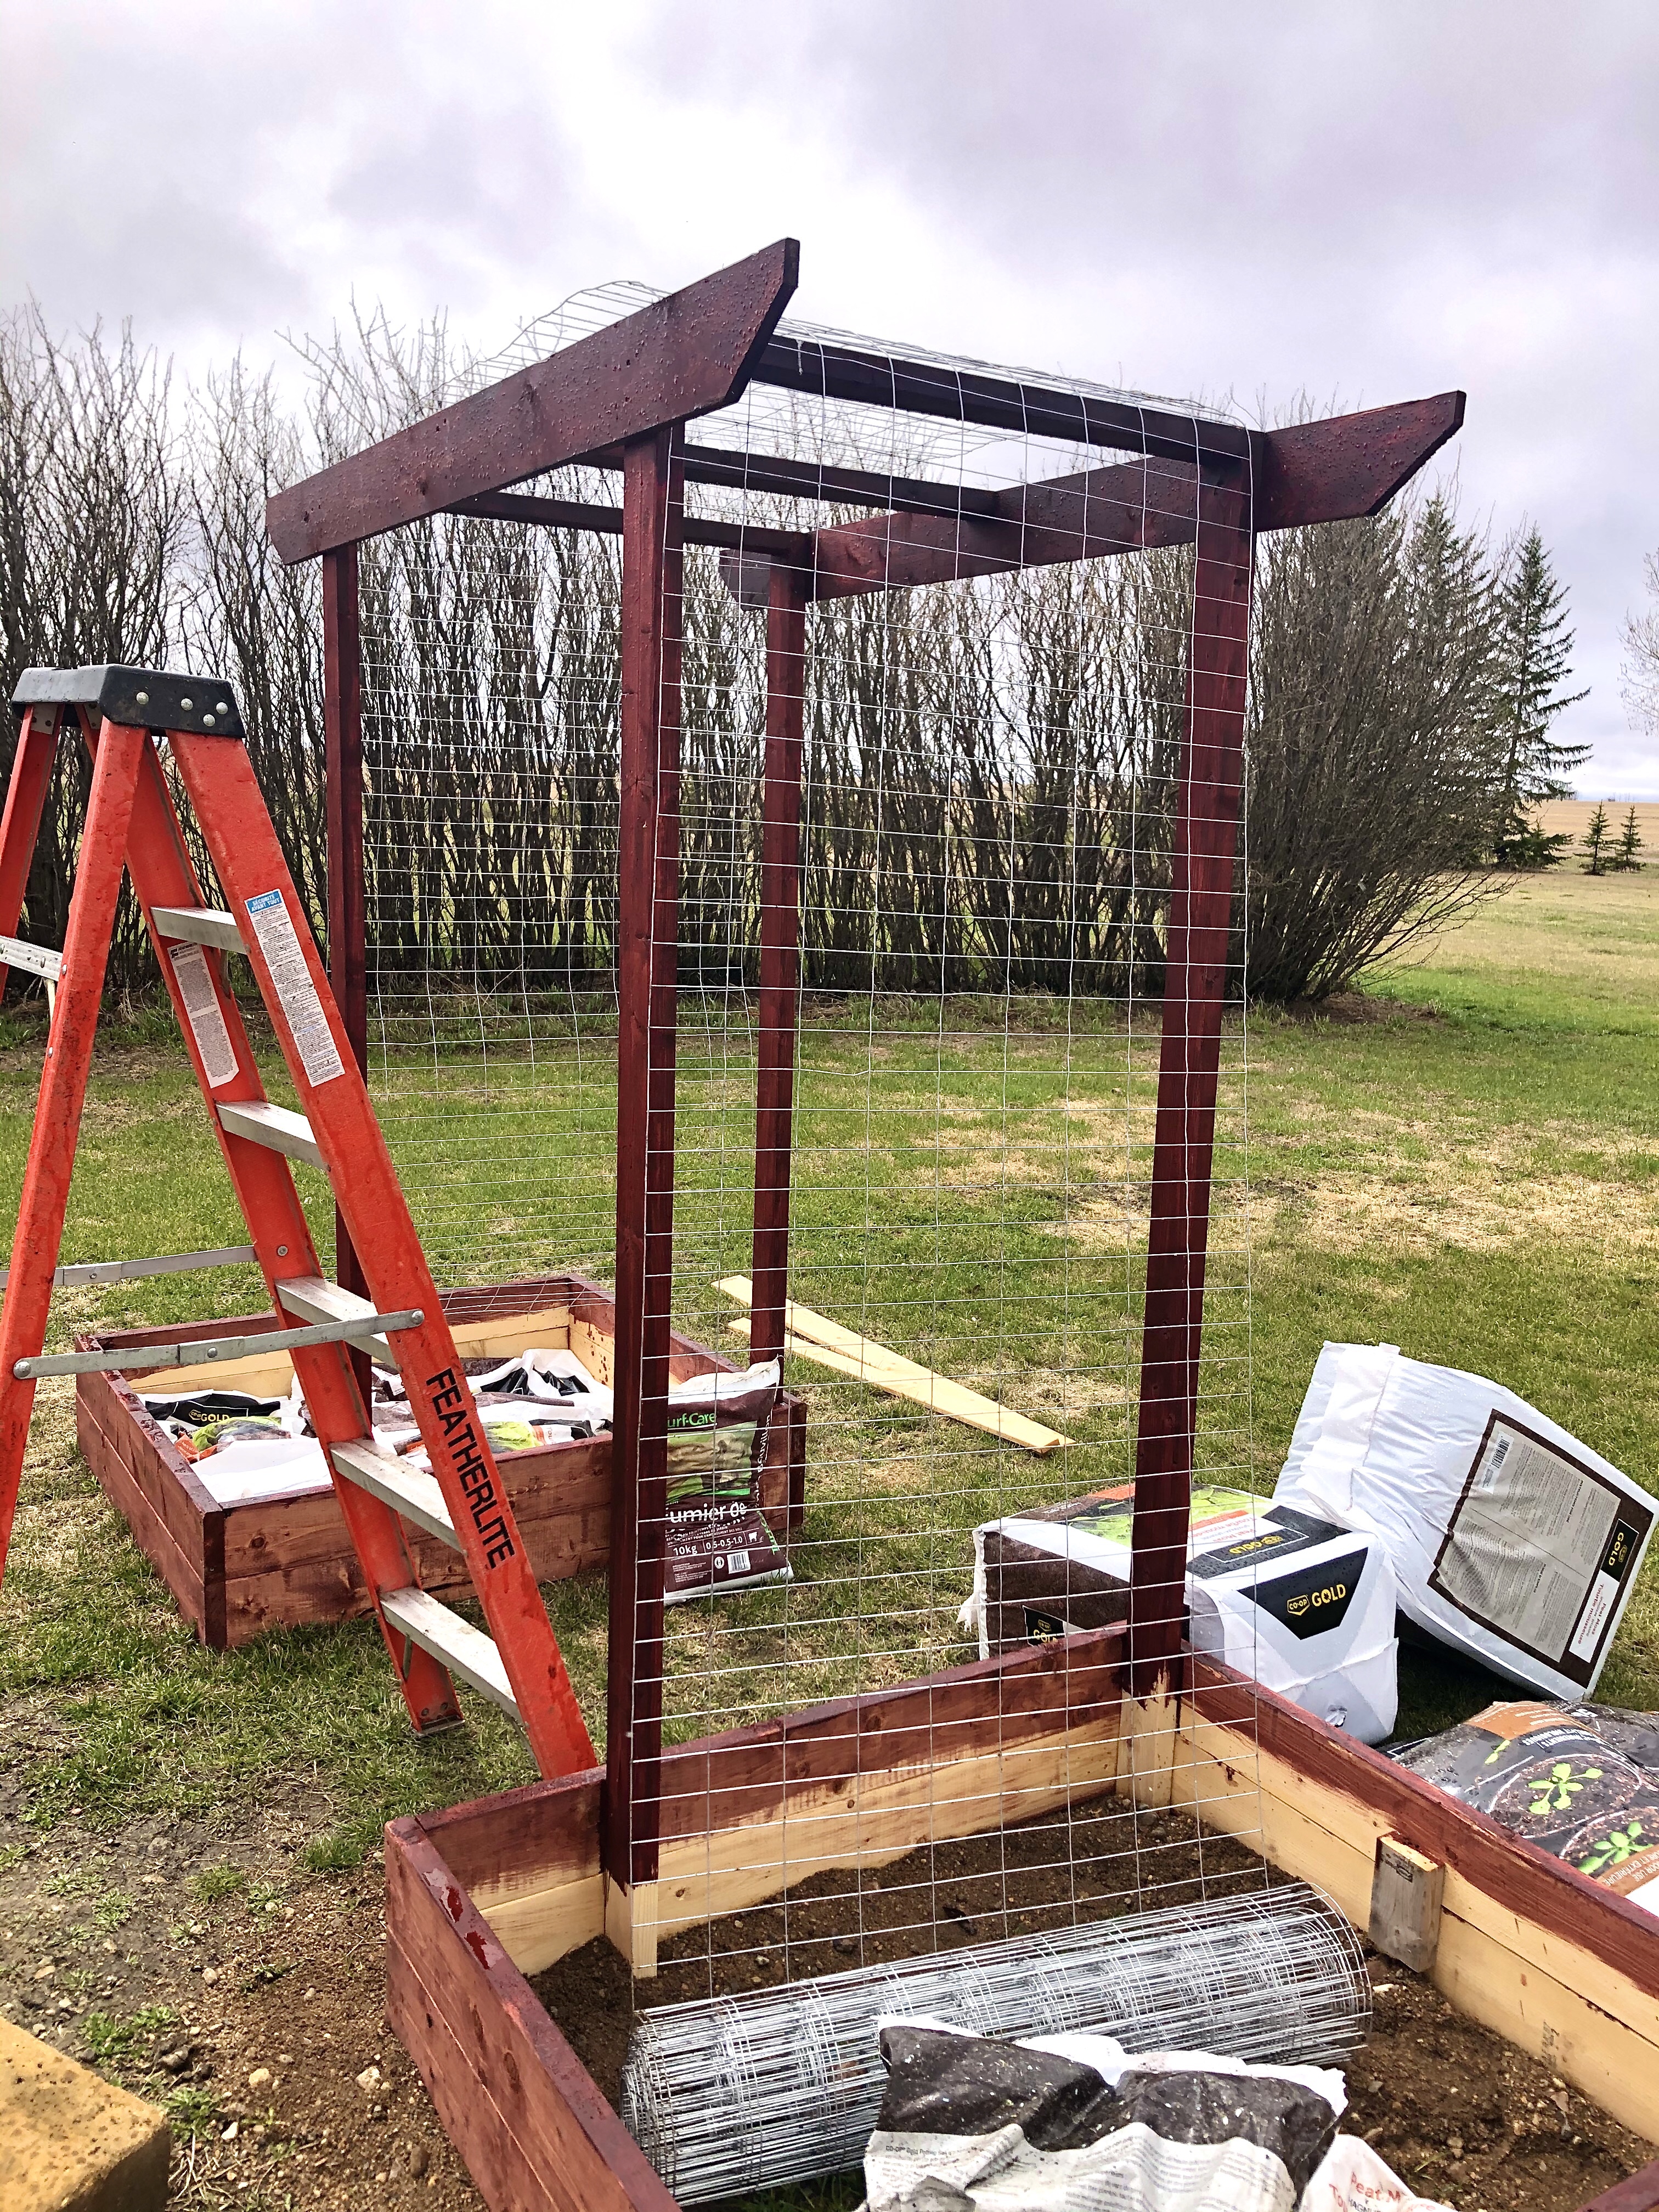
Once both boxes were built and stained, we put them in place and started on the archway.
We checked out many different design ideas on Pinterest and decided that a pergola-style arbor was the look for us!
Advertisements
Advertisements
Advertisements
Advertisements
Next, we squared and levelled everything .
The full supply list was very simple for this build:
10 – 8 foot 2×6’s
7 – 8 foot 2×4’s
1 pail of stain
20 feet of wire
And a handful of screws…
I love projects that come together in such a short amount of time with supplies that are easy to find!
Advertisements
Advertisements
Tommy photobombing my progress photo.
Advertisements
Advertisements
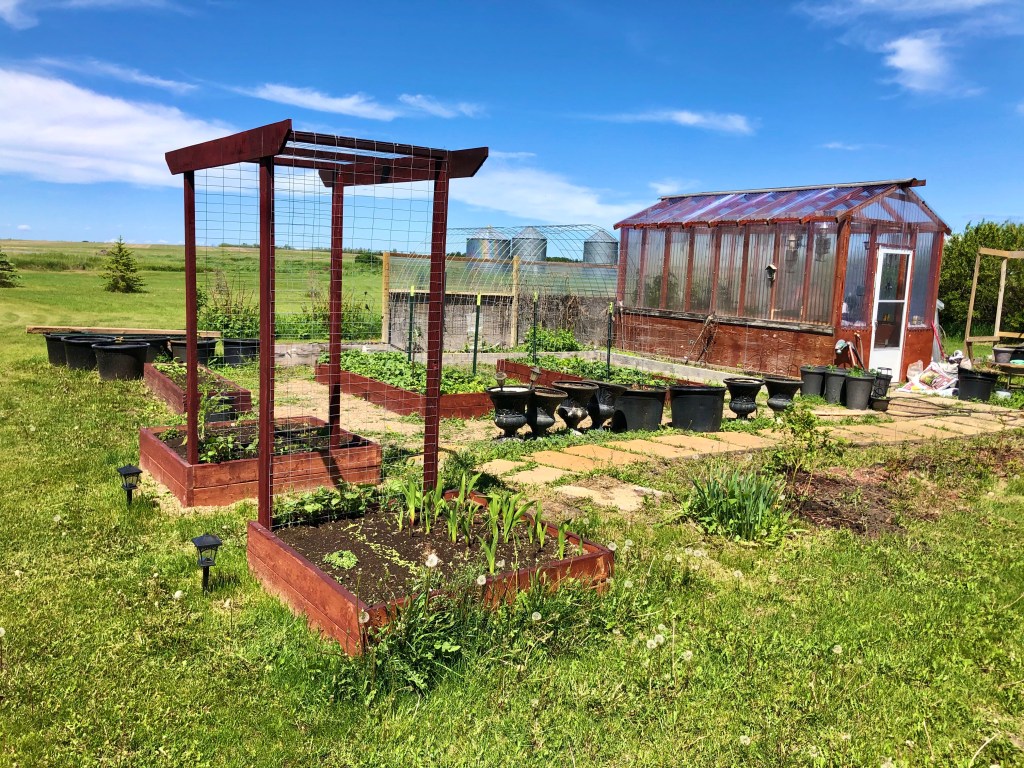
After we finished staining everything (except the insides of the boxes) we ran the wire and secured it in place.
Advertisements
Advertisements
The next step was to fill the boxes with soil, plant them, and then wait…
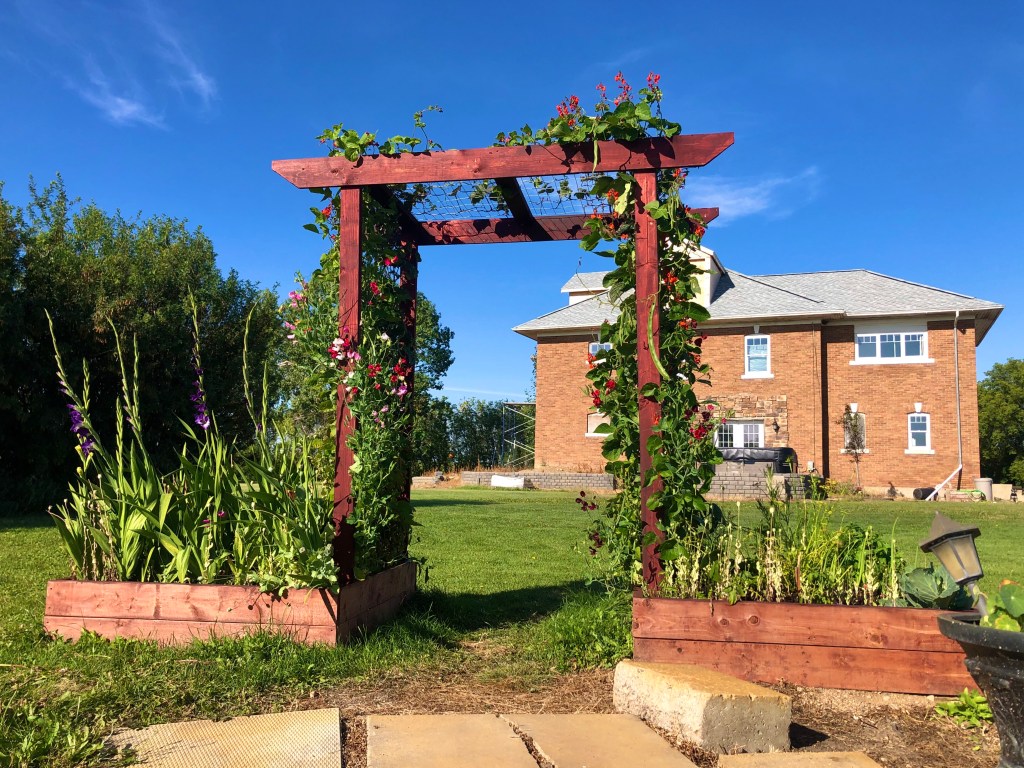
I am a fairly patient person, however I was anxious to see how our new garden arbor would look once the vines had grown up and over the trellis…
There is no rushing plants, so I was forced to wait!
Advertisements
Advertisements
I planted scarlet runner beans, purple runner beans, and sweet peas as the vines to climb the trellis and filled the rest of the boxes with flowers and herbs like basil, oregano, thyme, mint, and chives.
Never having grown scarlet runner beans before, I was impressed with how prolific and bright their red blossoms are (not to mention beans that grew up to 12 inches long)!
The beans had to be trained to wind around the wire every couple days as they grew, however the sweet peas did well attaching themselves on their own.
Want to make a fancy meal that isn’t expensive and is even pretty easy to make?
This recipe is bound to impress!
Not only does it taste amazing and look like a gourmet chef created it, but it is also easy to make – and won’t break the bank!
I am a big fan of foods with a bit of heat, so I took the concept of Cordon Bleu and spiced it up a bit. (It has Jalapeños, so yep! It had a bit of kick!)
Advertisements
Advertisements
First, thaw 2 large chicken breasts. If you want to go with fresh cuts, go for it! Frozen tends to be less expensive and lasts longer.
Prep your ingredients: shred your cheese, dice the jalapeños, mince the garlic, and soften the cream cheese.
Combine these ingredients, along with the salt, pepper, and cayenne powder and mix well.
Advertisements
Advertisements
Advertisements
Advertisements
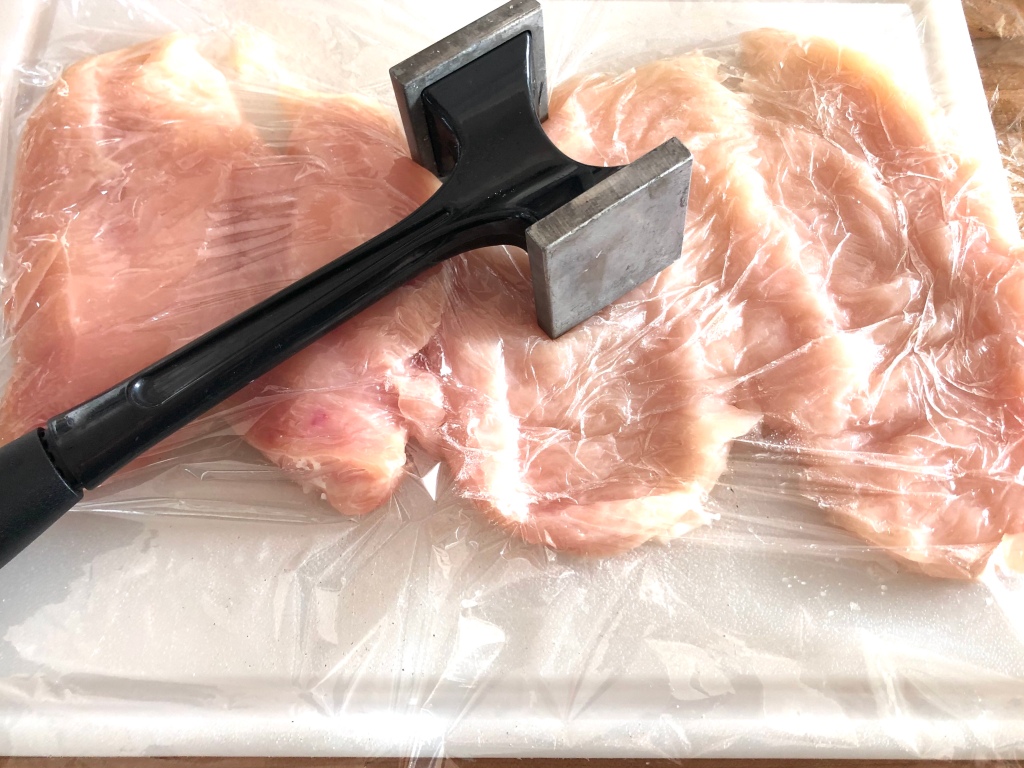
Next, butterfly cut your breasts. This simply means cutting it almost in half between the top and bottom of the breast, but leaving it attached at one side.
Cover with plastic wrap and flatten with a meat tenderizer. Don’t hammer it too thin, though!
Pat the chicken dry with paper towel.
Advertisements
Advertisements
Add the cheese mix and spread evenly on the chicken.
Advertisements
Advertisements
Next, roll it up!
Wrap in plastic…
Advertisements
Advertisements
… and roll it tightly so it looks like the photo above.
Refrigerate for 30 minutes. This will help the roll to hold shape during the cooking process.
If you are in a hurry, you can pop them in the freezer for about 10 minutes, instead.
To coat it and give it a nice crunchy finish with a golden color, dredge in flour. I used to skip this step and go straight to the beaten eggs, however flour helps the egg adhere to the chicken.
Once floured, cover well in egg, then dredge in the Panko crumbs.
Advertisements
Advertisements
Advertisements
Advertisements
Add to a pre-heated pan with canola oil on high heat.
Rotate the rolls so they brown evenly on all sides.
You are not trying to cook them thoroughly at this point, so don’t worry about that. You are simply getting that golden finish.
Advertisements
Advertisements
Place on a baking sheet and put in the oven for 20 minutes at 350º or until the internal temperature reaches 165º